The Fresh Loaf

A Community of Amateur Bakers and Artisan Bread Enthusiasts.

Blogs

justkeepswimming's picture
justkeepswimming

I needed something to spruce up our leftover lentil stew that was planned for dinner. This is such a quick and easy recipe and has never failed me. I usually make 1/2 of the total recipe and cook it in an 8x8 (well greased AND lined) pan. There are multiple recipes available on the web, and most of them use identical formulas overall. I have always followed the KA recipe and use rye flour as they suggest, but others say you can use barley flour. I opted to try that for a change, and substituted fresh milled barley instead of the same amount of rye. I didn't add any inclusions this time, but have done so in the past. In the past I have added various things, like a little caraway, or some pine nuts, or hulled hemp seeds. All were really tasty!

Usually this comes out approximately 50-70% thicker than this. The rye (predictably) does a better job at capturing gases and rising. The crumb is very soft and tender, almost cake-like. Quite yummy fresh out of the oven with some butter on top! 


ReneR's picture
ReneR

I have finally managed a 100% wholemeal rye loaf using Mini's Favorite 100% Rye Ratio that I am not too unhappy about.

Two previous attempts were not bad taste-wise and both rose well in the proving, but one ended up having the dreaded flying top crust and being quite gummy and the other also gummy, even if slightly less than the first one.

The one pictured was made as follows:

Used Mini's ratio (1 SD starter, 3.5 water , 4.15 flour), but also added about 1tbs of carob flour that is like cocoa powder and 1tbs honey as well as the rye spices suggested by Mini. It probably messes with Mini's ratios, but used my 100% hydration SD starter. Only just realised that Mini uses a stiff SD starter. 

Trying to avoid the gumminess of the first 2 attempts, I added 1% salt right at the beginning of the mixing of the SD starter with the water and flour and manipulated the resulting dough as little as possible, just mixing it up initially and then doing a few folds with the wet dough scraper after a few hours of BF and before placing the dough in the baking tin.

The proving in the 500g tin was along the duration suggested by Mini, maybe an hour or so longer and the dough rose well and made the nice marbling cracks on the surface of the loaf on the dry flour sprinkled on top that can be seen in the photo. In retrospect, maybe the pinholes on the surface were a little too large by the time I was ready to bake, so maybe a slightly earlier baking would have given a slightly more open crumb.

I put the tin in a DO preheated to 200C, covered for about 30min and then, with the lid off gradually dropped the temperature by about 20C every 10min, for a total bake of 1h and left the loaf outside the tin in the oven till the oven had almost completely cooled. Again, I only now understood that Mini actually bakes her loaf starting with a cold oven, so this may also affect the bake.

This time there was almost no gumminess and the longer baking and temperature reductions seem to have helped with that. Maybe it could have been a little less in the oven as the crust was a little dry this time, but better like that than gummy in my opinion.

If I could get a little more open crumb, eliminate any gumminess completely, and get the baking right so it is cooked but not dry on the outside, I would be happy.

Any advice, comments, or suggestions very welcome from those with more 100% whole rye flour experience. While I regularly use up to 30% whole rye flour in my wheat SD loaves,  this is the start of my 100% rye voyage and I can see it is a completely different beast compared to other flours. 

Yippee's picture
Yippee

Hi friends!

 I want to share how I bake decent loaves in this mighty toaster oven. Here’s what I do: 
  1. Place the TRAY (not the rack) in the lowest slot.
  2. Put the graniteware roaster (15" oval end-to-end) directly on the TRAY.
  3. Line the roaster with a layer of aluminum foil.
  4. Put the lid on the roaster.
  5. Seal the oven glass from the inside with a large piece of heavy-duty aluminum foil.
 Here are my baking settings: 
  1. Cold oven, no preheat
  2. Toast
  3. 450°F x 15 minutes, check
  4. 450°F x 15 minutes, check
  5. 450°F x 15 minutes, check
 The loaf shown is a Berliner Landbrot baked with these settings. (65% whole rye, 35% AP, 80% hydration, 800g dough, any bigger will hinder browning around the edges as they are too close to the roaster)  
  Check more frequently or lower the temperature if you’re not baking lean bread. If the loaf is turning too dark when you check, cover the top of the loaf or the bottom of the roaster with more foil. Don’t worry about opening the oven door - the oven heats up quickly and retains heat well. After baking, blast a super fan/air mover at the oven and turn on the range hood. This cools down the oven and its surrounding area within minutes!

That's it!

 A big thank you to Precaud for recommending this oven! It makes breadmaking less annoying and more bearable!                                                                                                                                                                                                                                                   
justkeepswimming's picture
justkeepswimming

First, a heart felt thanks to Abe, Caroline, Clazar123, as well as multiple previous TFL members for sharing your methods! Especially the reminder about using the microwave with the light on. I did a test run (empty) and left a thermometer in there with the door slightly open and the light on. After 3 hours, the temp was holding at 76F, so that should work. 

I decided to go ahead and make 2. I can decide later which one works best. The one on the left is half of an organic granny smith apple diced into roughly 1/2 in pieces. The jar on the right has the other half of the apple, with probably a little less than 1/4 cup of organic raisins. Half of them were chopped in half and smooshed a little bit before going in the jar. And since I was cutting into an orange for an afternoon snack, I squeezed a little juice into the one with raisins as Dabrowman suggested in an old post of his. Both jars got a gentle shake and after taking the picture below, the rings were removed. The lids are just resting on top of the jars, so things can vent as needed. 

We'll see which one is ready first, and which one lasts best in the fridge later. I'll update as things progress. 

Mary 


Benito's picture
Benito

This past winter I figured out my miscalculation on the salt content of my miso when I realized that I based the salt on the dry weight of the beans when in fact I needed to account on the hydrated weight.  This loaf achieves a nice mild yet distinct flavour of my homemade 1 year fermented red miso.  To balance the flavour I have added a small amount of my friend’s wild flower honey from their beehives.  Other than the addition of the honey, this is otherwise a lean bread since no fats were added.  The bread is lovely and soft with a fairly open crumb for this type of bread.  I did attempt to score it, but it was very very soft.  The resulting bloom actually almost appears to have occurred naturally.  I think the next time I will try this again and add some toasted sesame seed oil and see how that comes out.

Overall hydration about 82% when including the 18% water in honey


For 1 loaf in a 9x4x4” Pullman pan.


Build stiff levain, ferment at 74°F for 10 hours overnight.

Starter 6 g, water 23 g bread flour 39 g


Bread flour 262 g, Whole Wheat Flour 129 g, Water 304 g, all levain, hold back water 13 g, honey 26 g and Red Miso 54 g


In the morning, add miso and honey to the water and dissolve.  Then add the levain and break down the levain as well as you can.  Add both the flours and mix well until no dry bits are left. After 10 mins of rest start gluten development with slap and folds then gradually add the hold back water in several aliquots using Rubaud to fully incorporate the water well.  Alternatively you can use your standmixer to develop the dough and do the bassinage.  Bench letterfold, remove aliquot, then at 30 mins intervals do coil folds until good structure is achieved.


Once the dough has risen 40% then shape the dough into a batard and place in prepared pan.


Final proof the dough until it has reached 1 cm of the rim of the pan.  pre-heat oven at 425°F and prepare for steam bake.


Once oven reaches 425ºF score top of dough and then brush with water.  Transfer to oven and bake with steam for 25 mins.  Vent the oven (remove steaming gear) rotate the pan and drop temperature to 350ºF.  Bake for another 25-30 mins rotating as needed until browned.  Remove from the pan and place directly on the rack baking for another 5-10 mins to firm up the crust.

My index of bakes.

hellen's picture
hellen

Sharing this recipe for no yeast crumpets I developed and am quite proud of.

I don’t know why this doesn’t exist already (or maybe it does but is just obscure). The no-yeast crumpet recipes I have found previously don’t really have holes on top and looked more like pancakes than crumpets imo. All the recipes for holey crumpets I found on the internet were either made from sourdough discard or some combination of yeast and baking powder/baking soda.

I’ve tried a sourdough discard + baking soda crumpet recipe (the KA one I believe) and also two different crumpet recipes which use instant yeast and baking powder. None worked for me, they all turned out cakey, mushy, and/or gross.  I decided to develop my own crumpet recipe. My first attempt using sourdough to leaven the batter was not ideal.

After several failures, I went and bought crumpets from the supermarket out of sheer frustration and noticed that there was no yeast listed in the ingredients. I consider this brand of crumpets (Oakrun bakery) to have the ideal texture as it has a very defined honeycomb with a bouncy texture when toasted. (Aside from no yeast, they also had more sugar than the crumpet recipes I found online.) So I decided to use this as a guideline to develop my no-yeast crumpet recipe. I don’t have access to some of the leaveners they use, so I only use baking soda. After some tinkering with hydration, I think I’ve hit a pretty good ratio. 

Recipe is here. Hope you give this recipe a try and get consistent holey crumpets as well. 

The most important thing about cooking crumpets is having a flat and heavy griddle or pan that retains heat well.  Also, you should modify the vinegar amount if your white vinegar is not 5% acetic acid.

Process video here: (not sure why video embed not working?) 

https://www.instagram.com/p/C9U7379yGd1/

or watch on my instagram or tiktok.


I am fairly certain that the addition of potassium bicarbonate will give a better honeycomb texture. Although I have not tried this yet, you can get “lye water” at Chinese grocery stores which is essentially a solution of sodium bicarbonate and potassium carbonate. I think this will work fairly well to give crumpets a good honeycomb texture. Chinese lye water is traditionally used in bai tang gao/bok tong go, a honeycomb textured rice cake that is fermented with yeast (leading to sourness) which then reacts with this sodium bicarbonate and potassium carbonate mixture when steamed to give high, defined honeycombs. Personally, I think the texture of a good bok tong go is very similar to that of a good crumpet.

Would be curious to know if anyone has experience baking with potassium bicarbonate or this potassium carbonate and sodium bicarbonate solution.

Sugarowl's picture
Sugarowl

I'm still baking somewhat, still struggling with energy levels, and more blood work is due (I hate needles).  As a mom of two active boys, I find myself alternating between cooking mac and cheese, homeschooling, and lots of "stop bugging your brother" moments. Thank goodness for coffee!

I had neglected my starter for a month or two (maybe 3?). I pulled it out the other day and it was NOT moldy! :) I took a small part of it that hadn't gone grey and now I  have about 150g in the fridge waiting anticipating a small loaf bake soon.

In other news, I did recently discover that Publix does carry Einkorn flour. I found some at the Port Canaveral location for $10/ 1lb. They also have the Arrowhead Mills rye flour. I'm undecided whether to try the Einkorn flour.

My goal for this week is to make a loaf of bread and a batch of biscotti. My boys have been asking for me to make more "dipping cookies." If I have time, I plan to make more tamago boro (little egg biscuits). I want to try making them in the oven this time and with different flavors.

Currently we are preparing for a road trip. We are going to Chincoteague, Virginia for a family vacation.For the trip, I plan on making mini muffins, biscotti, and probably some basic sugar cookies. The ones for my relatives will be frozen for the 3-day trip up there. I know it doesn't take 3 days to drive to Virginia, but we are taking our time since our boys have never seen mountains (Florida is very flat).

Isand66's picture
Isand66


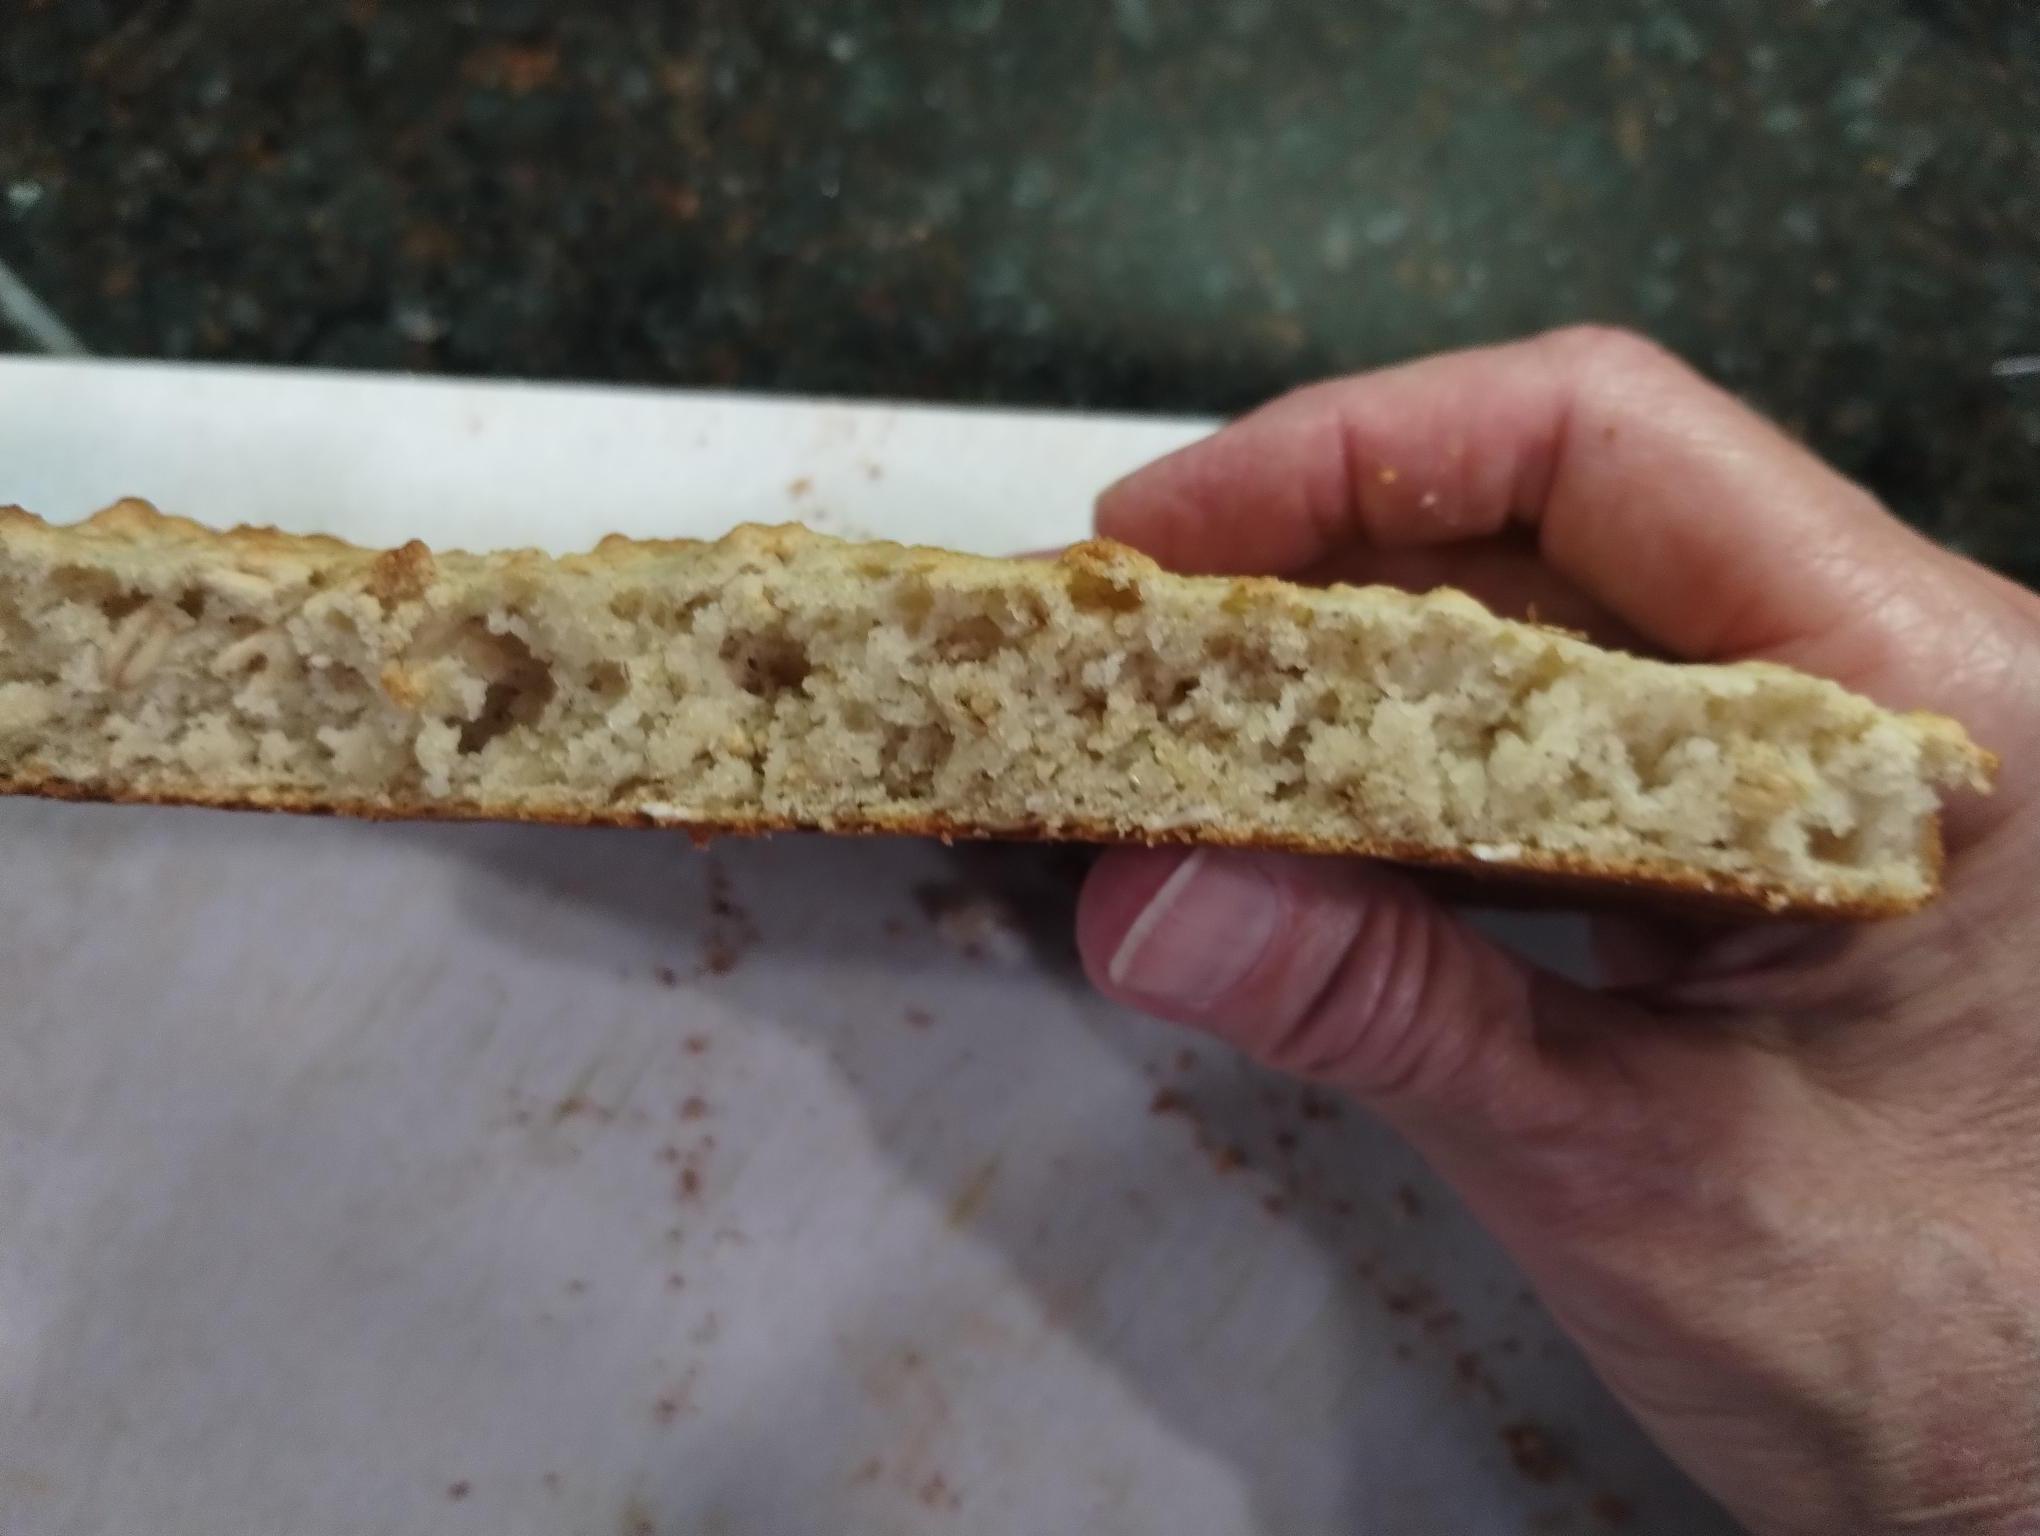
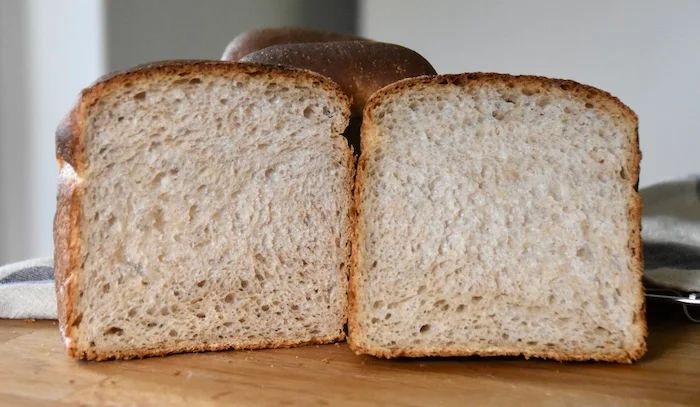
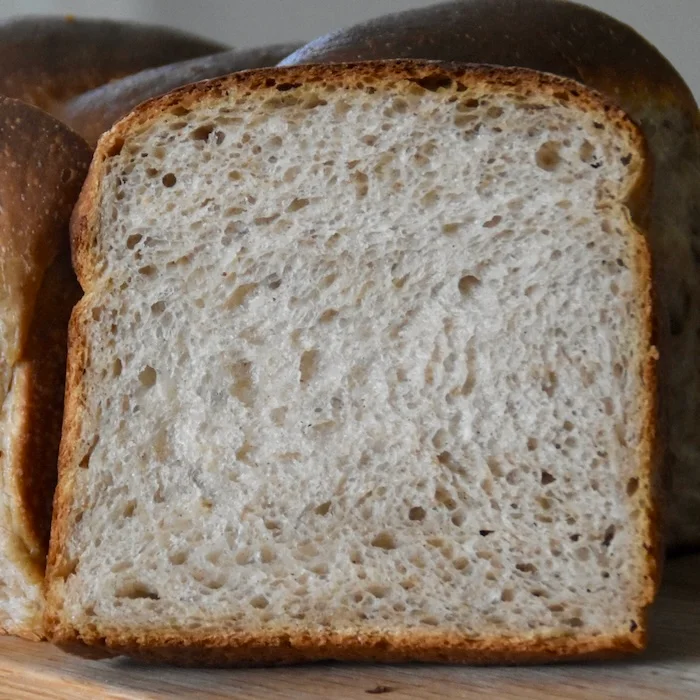
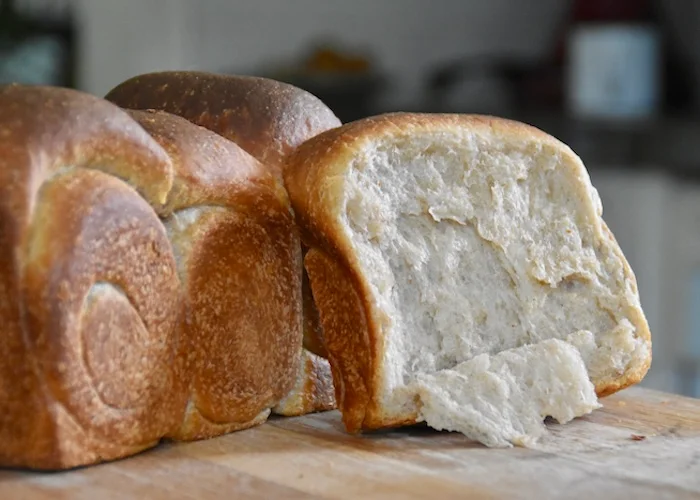
These were made with freshly ground soft white wheat Purple Straw grain berries which is a heritage grain. This is another unique and hard to find wheat berry from Barton Springs Mill. It is not really meant to be used in bread, but rather biscuits, pancakes, pizza etc. but I wanted to try some in rolls. From the site:

This Colonial Era wheat hasn’t been tasted in over 50 years and we’ve worked hard to revive it for you! This Colonial Era honeyed wheat is most applicable in delicate situations where you want a soft and fluffy texture and don’t need too much structure. Expect subtle notes of honey!

I also added some leftover mashed potatoes and copious amounts of softened butter and a little honey. The potatoes are about 80% water so the hydration listed on the formula is not a true reflection.

Similar to my last bake, since I’ve been trying to get more consistent results with the fresh milled grains I use for 50-100% in my bakes. Getting the fermentation down correctly so it doesn’t go over or in some cases under is tricky. So far this method based on experiments detailed at https://thesourdoughjourney.com/ have worked out pretty well. His timing charts are based on using all white flour so it’s not a perfect match when using freshly ground flour. I’m still experimenting but so far so good. Unlike my past bakes with rolls/buns I shaped them after bulk and placed them on baking sheets, and refrigerated them overnight. I baked them directly from the refrigerator after around 12 hours, but they could have stayed longer if necessary.

These turned out great and were nice and soft and perfect for burgers and sandwiches.

Formula

Levain Directions 

Mix all the levain ingredients together for about 1 minute and cover with plastic wrap.

Let it sit at room temperature for around 6-7 hours or until the starter has almost doubled. I used my proofer set at 76 degrees so it took around 5 hours for me. Either use in the main dough immediately or refrigerate for up to 1 day before using.

 Main Dough Procedure

Note: I use an Ankarsrum Mixer so my order of mixing is slightly different than if using a Kitchenaid or other mixer. Add all your liquid to your mixing bowl except 50-80 grams. Add the levain in pieces and mix for a few seconds to break it up. Next, add all your flour to the bowl and mix on low for a minute until it forms a shaggy mass. Cover the mixing bowl and let it rest for 20 – 30 minutes.   Next add the salt, honey, and softened butter as well as the remaining water as needed and mix on medium low (about speed 3) for 12- 24 minutes. You should be able to achieve a nice windowpane.

Remove the dough from your bowl and place it in a lightly oiled bowl and do several stretch and folds.  Making sure the dough is as flat as possible in your bowl/container measure the dough in millimeters and take the temperature of the dough as sell. Based on the chart here, determine what % rise you need and make note. If you have a proofer decide what temperature you want to set it at and what rise you are aiming for. If the dough is fully developed you don’t need to do any stretch and folds, but if it’s not, do several sets 15-20 minutes apart.

Once the dough reaches the desired bulk rise, shape them into rolls around 135-150 grams and place them on your baking sheet. When finished shaping, cover the dough with a moistened tea towel or plastic wrap sprayed with cooking spray and place them in your refrigerator. Since there is such a high percentage of whole grains in the dough I didn’t want to leave it in the refrigerator for more than 12 hours. Depending on how cold your refrigerator is you could leave it longer and have to experiment to make sure it doesn’t over ferment.

When you are ready to bake, an hour beforehand pre-heat your oven to 450 F and prepare for steam. I have a heavy-duty baking pan on the bottom rack of my oven with 1 baking stone on above the pan and one on the top shelf.  I pour 1 cup of boiling water in the pan right after I place the dough in the oven.  Remove your rolls from the refrigerator when the oven is fully heated and brush them with an egg wash. Add seeds, toasted onions, etc. as desired and place in the oven along with the cup of boiling water.

Bake for around 25 – 30 minutes until the buns/rolls are nice and brown and have an internal temperature around 200-210 F. 

Take the rolls out of the oven when done and let them cool on a bakers rack for as long as you can resist. 

hellen's picture
hellen

My best attempt yet in my quest to make the fluffiest, shreddiest healthy-ish whole grain imbued shokupan: this 20% Rye Shokupan.

Recipe is adapted from Benito's Mochi SD Hokkaido Milk Bread recipe, a great recipe - all props to benito.

Because I am lazy I cut some steps to simplify the process a bit - namely, I poured boiling water directly from my kettle instead of heating up milk (I know - it changes the composition somewhat) and I baked the bread all in one step instead of taking it out of the tin for further baking. I also had more sourdough starter to use up so I modified the stiff sweet starter amounts.

Aside from that, the main difference is the use of whole grain rye flour for the tangzhong/yudane. This bread I am quite pleased with but later attempts to raise the rye flour content were unsuccessful - gah! I really hope to develop a high-percentage super shreddy rye bread...one day...

The hardest part of making this bread is getting the proofing right. Almost all of my shokupan failures come from overproofing. I find shokupan dough to be much less forgiving than other lean doughs, which I can chuck in the fridge if I need to go out. Further thoughts and written recipe/recipe card here on my blog, or you can follow benito's recipe above and just change the mochiko to rye.

Pages

Subscribe to RSS - blogs