The Fresh Loaf

A Community of Amateur Bakers and Artisan Bread Enthusiasts.

davidg618's blog

davidg618's picture
davidg618

I've noticed in the forum posts there are, currently, quite a number of  TFL members concerned about the maintenance and vigor of their sourdough seed starters. Being one that doesn't like debates I generally stay away from commenting on those posts. However, in this moment, having been there myself I've chosen not to comment about anyone's concern; instead the following is a description of the simple way I maintain my sourdough seed starter.

A bit of backstory: In the summer of 2011 I was forced to admit to myself that the sourdough seed starter I was using was failing. It had turned extraordinarily liquid, and not at all sticky, despite being kept at 100% hydration. I tried to save it but failed. Thinking I'd been doing all the right things, i.e. discarding approximately half my stash and replacing it with an appropriate amount of flour and water each week  I was at a loss to know what to do next. 

I sought help, specifically from TFL's resident microbiologist, Debra Wink. She responded almost instantly, nonetheless my seed starter had bit the dust, mostly because of my ignorance and uncertainty of what to do.

However, with Debra's nearly daily guidance I nursed a replacement starter to early maturity. 

Subsequently, I had enough intelligence to ask her about maintaining my new colony of yeast and bacteria. She asked me to describe how I'd maintained my defunct starter. I described as above: throw some away, add some flour and water, stir it up and put it back into the refrigerator.

Debra didn't criticize, she simply asked "How often do you bake sourdough loaves, and do you make extra starter"? The answers were "weekly" and "yes", explaining the extra starter was insurance I'd made enough for the bake because I couldn't scrape all the starter out of the bowl. Her reply, "So you've got this perfectly good leftover fresh leaven. why don't you save it for next week's bake? "You only need to save about 20 grams to make enough for your next bake."

WOW! Why didn't I think of that!?

Over the next few months the following discipline emerged. For each weekly bake I make enough leaven to satisfy the loaves to be baked, and 60g extra. I only need 40g, but I still haven't learned how to scrape everything out of the bowl.

I take 40g of the leftover leaven and mix it with 40g of Bread Flour, and 40g of water. I cover it and let it rest for 45 mins to insure its homogeneously hydrated before chilling. "Why so much"? you might ask.

See, I'm a belt-and-suspender kind of guy. As such, I put half of the fed leftover leaven, split evenly into two half-pint Mason jars. 

I so much avoid errors that I won't dispose of jar #2's backup seed starter until I know I mixed its replacement properly.  The approximately 60g in each 1/2 pint jar is then returned to my refrigerator to rest safely for another week.

I don't wash the half-pint jars: never.  I scrape as much of the remaining previous week's leftover seed starter I can from the jars, half fill them with hot tap water, and shake them vigorously to remove the stuff I can't scrape out. When they are clean to the eye (including their plastic lids) I fill the jar nearly full and place both the open jar and its lid in the microwave. I put a chop stick from a nearby Chinese restaurant in the jar, and nuke the set for 1 and 1/2 minutes (long enough to cause the jar's water to boil for 25 to 30 seconds). The lids also are charged with hot water. their screw-on ridges provide the same safety as the chopstick does. 

Most of you reading this know the danger of super-heated water, i.e. water heated in a smooth glass jar in a microwave won't always boil when it reaches 212°F. It will continue, however to collect energy from the microwave until the superheated water is pushed into an unbalanced state. At that point the water will "explode" (instantly vaporize) and cause damage to the microwave and possibly its operator. The chop stick and the lids' ridges provide nucleation centers that trigger boiling at the proper temperature thus prevent violence.

I cool the semi-sanitized lidded jars in the refrigerator before filling them. But I'm not done with them yet.

The yeast and bacteria, although sluggish, are not dormant at normal refrigerator temperature. Over the next three days I monitor their expansion, peaking, and falling. So far it's the same every week, and another indication that all is well with my sourdough seed starter.

I've been practicing this discipline for eight years. My sourdough seed starter residents are offspring of the yeast and bacteria present eight years ago. The derived sourdough leaven I use to bake almost weekly performs exactly as it did the many weeks before. 

I have no doubt that this will continue so long as I stick to this discipline.

I also have a discipline I practice developing sourdough leaven. In simple terms I build the necessary quantity for each week's bake in three progressive builds,  each separated from the earlier feeding by eight hours. I believe this is a fail safe approach using seed starters that spend most of their time in a refrigerator.

Happy baking to all,

David G


davidg618's picture
davidg618

Olive Oil bread--with a sourdough twist. Inspired by "Bourke Street Bakery: the ultimate baking companion" published by "Murdoch Books; year unknown, but very recently.

It's been two years + since I last posted on TFL. I had reached my goals: improve my baking skills, include sourdoughs among them and develop a modest list of breads appropriate for any and all occasions in our lifestyle. That list now includes a variety of commercial yeast doughs, sourdougs, and baking powder doughs. Along the way a host of new cookie, cake, and pie recipes crept in. And we now seldom buy pizza elsewhere.

Ultimately, I, and I'm certain most of the TFL regulars got tired of my posting the "same old s***. I quit posting. But I continued to bake: almost every week. It's now been more than twenty years since we've bought a loaf of any commercially baked bread. and I remain grateful to The Fresh Loaf, and its many passionate, and gifted bakers for easing my struggles.

This week three lines of "unfinished business" converged.

1. A few years ago, I'd been seduced by the aforementioned book. Its photographs are dramatic, Its prose well written, and a scan of its breads and other recipes seemed interesting and appealing.

Nonetheless, until the last two days I've never tried a single one of its recipes.(I have looked at the pictures often ).

So I scanned again: Olive Oil Breads caught my attention.

Scanning the base recipe I found it contained all the usual ingredients of Foccacia and a wee bit more: 20ml of milk.

I bake Foccacia frequently. We use it as a base for pizza-like toppings, panini sandwiches, soup, croutons and simply toasted and buttered for breakfast. We also often use Foccacia in place of conventional buns.

2. I've never found a home-baked hamburger or hotdog bun recipe I like well enough to bake a second time. I've tried quite a few.

3. Bourke Street's Bakery claims the milk ingredient "makes the interior crumb consistent." (p161)

My 72% hydrated foccacia formula--no milk--yields a very open crumb. However, I attribute the crumb's extraordinary open crumb to a fifteen-hour fermentation at 54°F.
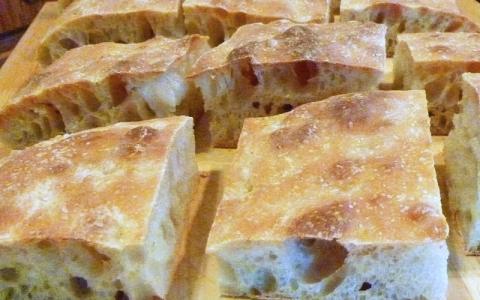
http://www.thefreshloaf.com/files/styles/default/adaptive-image/public/14703/SDFocaccia6%3A13a.jpg?itok=kRvniyXi

See "http://www.thefreshloaf.com/node/33820/sourdough-focaccia" for details

Most often we welcome this open crumb, but there are times we would prefer it a bit tighter--hamburgers especially.

Potentially offering an alternative to conventional Foccacia I decided Ito adapt Bourke Street Bakery's Olive Oil bread substituting my sourdough starter for their "Olive Oil bread Ferment", a roughly 70% hydrated mixture containing all the ingredients of the Olive Bread dough recipe: flour, salt, EVOO, milk, water and yeast.

My sourdough starter is conventional: flour, water and a natural colony of compatible yeast and lacto-bacteria. I maintain it at 100% hydration and store it in the refrigerator. I replace it each weak with surplus ripe levain made using a three-build, 24-hour process for that week's bake. I developed the three-build process when I first committed to baking sourdoughs, and, while I've simplified the process, I've never abandoned it. I've been using this method since 2011 when I had to replace my contaminated first colony. My current starter is the replacement.

I estimated the target hydration of the BSB's Olive Oil bread recipe at 65%. This initial close look at the recipe revealed a mix of weight and volume units I found annoying. I generally don't worry about tsp. measures vs. single digit grams, but 20 ml of milk is not 20 g. nor is 70 ml of water 70g of water, except at some Celsius temperature I can never remember.

Replacing the "Ferment" I adjusted the amount of sourdough starter to replace the 70 ml. of water prescribed, and borrowed flour from the dough recipe to match the estimated 70% of the hydration of the prescribed "ferment". Furthermore, I added the prescribed salt (2.5g) to the dough's recipe, excluding it from the ferment, and omitted entirely the prescribed 2g of fresh yeast. The remaining ingredient, 1/2 tsp of milk was added to the mix.

Preparing the Olive Oil dough I replaced the "Ferment" with the equal weight of my modified sourdough starter described above. The prescribed yeast ingredient was omitted entirely. Other than the flour employed to balance the "Ferment's) hydration (30g)  all the remaining ingredients: water, EVOO, mik and salt were added as prescribed.

However, I subsequently prepared the dough somewhat differently than directed. Initially, and by hand, I I mixed only the flour, milk and water allowing the mix to hydrate for one-hour in the refrigerator. Following, I combined the "Ferment", EVOO and salt, again by hand. After a second 1 hour rest I conducted three Stretch-and-Folds, interspersed with 1-hour, chilled rests. The dough then rested in the a wine cooler at 54°F over-night (9 hrs.)

The following morning I warmed the dough at 82°F in a proof-box for one hour. Subsequently, using the prescribed dimensions directed, I reluctantly cut fifteen rounds, 1-1/2 in. diameter, with a biscuit-cutter from a 3/4" thick dough sheet.

I say reluctantly because I felt certain this dimension would be too small to fulfill my wanting a hamburger bun result.

I was further irritated by the book's direction to "Preheat the oven to its highest temperature." My oven can produce a consistent 550°F. I chose 450°F. the temperature I routinely bake sourdoughs.

Results:

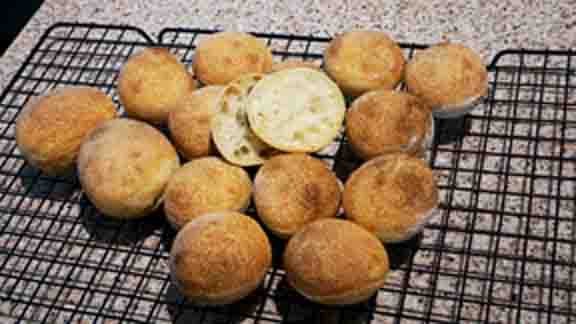
Cons: As expected, despite the expected expansion proofing, and equally satisfactory oven-spring, the buns are hen's egg size.

The hoped for "consistent interior crumb" didn't manifest. The crumb is irregular, and quite open. That said, I hasten to add this may be due to the slow, chilled dough ferment. I see the same crumb structure (and often greater random) in all sourdoughs, and some commercial yeast doughs chilled and fermented long hours.
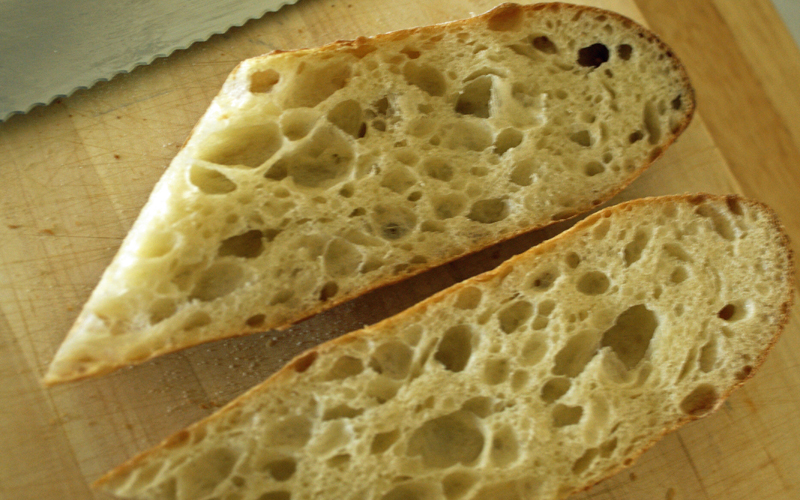
These baguettes made to 65% hydration were chilled, and bulk-fermented @ 54°F for 15 hours.

See "http://www.thefreshloaf.com/comment/258972#comment-258972" for details

Pros.

The lead-in photo shows the crumb open, irregular and mature (noted by the crumbs iridescence). Despite it's not being "consistent interior crumb" I love it. I'm going to make this dough another time--probably a few more times. The crumb, while open, doesn't approach our Foccacia. It's flavor is excellent (likely due to good ingredients, but the long ferment also contributes. The crust, not yet mentioned, is thin and softens within a few hours after being stored in plastic. Given I can retain the crumb, the thin crust with hamburger bun radii this might be the elusive sought-after bun.

The book.

Despite my disappointment and irritation with its recipe format, I"m a bit more critical re perceived laziness concerning testing recipes at home-appliance achievable temperatures. None the less I'm glad I bought the book. I bought it to experience, at least a wee bit, Australian baking culture. More personally important, It's home to such foodie recipes as "chicken pies with eggplant and mushroom", and "pork, apple and braised cabbage pie". What's not to like?

I'm hoping the second edition will omit the volume measurements bigger than a tablespoon.

David G

davidg618's picture
davidg618

Baker/author Ken Forkish, in Flour Water Salt Yeast: The Fundamentals of Artisan Bread and Pizza, makes an impassioned and compelling argument for home- baking in Dutch ovens.

He writes of his struggle to achieve the same “texture, crust, color and oven spring…” in his home oven compared to: “[what]… we get in the bakery using the 15,000-pound Italian deck oven, with steam at the push of a button.” Shortly following he expresses his gratitude to authors Jim Lahey (My Bread) and Chad Robertson (Tartine Bread) for introducing him to using Dutch ovens for home bread-baking, their books recognizing “…previous techniques for home baked hearth bread, most often baked on a pizza stone with myriad methods for producing steam, were insufficient for recreating the oven steam we enjoy as professionals bakers”

I don’t bake bread at home in Dutch ovens. I made this choice five years ago. I’m and old man. I suffer from arthritic degradation in my spine. If I overdo it I hurt. I’m also a klutz. Throughout my lifetime I’ve frequently tripped over matchsticks. My choice was made for personal safety. I don’t feel comfortable wrestling a pre-heated Dutch oven bent over an open, heated home oven. There are also secondary reasons. One looms large in my reasoning: my favorite loaf shape is the batard. It appears Dutch ovens, with few exceptions, dictate “Only Boules”.

I own six Dutch ovens: three of them are made from raw cast iron (two of them have three short legs for campfire cooking/baking), three of them are enameled cast iron. The oldest two were purchased, by me, in the 1950’s; the youngest three years ago: an enameled Lodge—made in China. It’s my least favorite (its interior stains). Two (Le Creueset)  have some-kind-of-plastic handles that would be harmed at bread-baking temperatures. I could remove them, but that would make wrestling covers more difficult. I’d probably drop one on my toes. The two with legs don’t sit well in ovens. Also, only my oval Le Creuset would allow baking my favorite bread shape. Forget baguettes.

I love Dutch ovens.

But I won’t bake in them for the reasons stated above.

When I read author Forkish’s declaration my first thought was, “What am I missing out on?” I scanned through the rest of his book, and my copy of Tartine Bread, but found nothing quantifying the shortages in texture,  crust, color and oven spring my naked-in-the-oven-with-insufficient-steam breads achieve.

I didn’t doubt there are differences. I simply wanted to know, “What are the differences? How “big’” are they?”

I decided I’d do an experiment. I would simulate a Dutch oven by placing a six-inch deep, fourteen-inch diameter stainless-steel bowl over a 500 gram boule-shaped loaf resting on my preheated baking stone. I would insure the bowl was placed such that its entire rim rested on the seventeen inch wide inch baking stone: an easy challenge.

I would then compare it to an “identical” boule baked in my usual manner.

In this picture and the two following the bowl-covered loaf is on the left.

These loaves, each 500g, were from the same dough (70% hydration, natural levain only) but proofed seperately and baked serially. I was concerned that if the differences were slight how the exterior "wet" oven air might muddy the outcome. I need not have worried.

My visual assessment was the covered loaf had expanded more then the conventionally baked loaf, but after seeing the difference in shape, and loft I wasn't entirely convinced.

I placed each loaf in a thin plastic bag and extracted the trapped air from each bag. the plastic became a thin skin clinging to the loaves crust. I carefully immersed each loaf in a bowl filled to its rim with water. I collected and measured the overflow in milliliters. The cover-baked loaf displaced 10% more water than the conventional loaf, indicating its volume was the greater. Additionally, I weighed the two baked loaves. The differed in weight by only 2 grams (less than 0.4%)--the cover-baked loaf was the heavier..

The crust on the cover-baked loaf is noticeably thinner than the conventional loaf, but I made no effort to measure the difference. Interestingly, I perceive, in this picture the crumb of the conventional loaf exhibits less random bubble size, but overall appears to be slightly more open than the cover-baked loaf. However, the variance seems small, and slices elsewhere in the loaves compared randomly.

The volume difference vs. weight difference would suggest the cover-baked loaf's crumb is slightly more open.

Both my wife and I ate multiple samples of both loaves. Neither of us perceived any difference in flavor or chewiness of the crumb. The cover-baked loaf's crust is, not surprisingly, less chewy. My wife prefers it. I couldn't perceive any difference in crust flavor; my wife didn't have an opinion.

The 10% volume difference in oven spring caught my attention.

I've not been disappointed with the oven spring I've been routinely achieving. (I think the photographs justify my satisfaction.) But, if I can get more, without having to wrestle with eight pounds of piping-hot DO, I'll take it. But first, I wanted to be certain my one trial was typical.

I did it again: with a couple refinements, a week later.

1. I baked  the loaves simultaneously: one covered, one conventionally

2. I increased the dough weight per loaf by 100g. I reasoned this should make any volume difference more observable.

3. I shaped the loaves into batards.

My usual steam source is two small vessels containing a rolled up towel fragment, and filled with boiling water. I don't load loaves until I can see boiling restored.

The volume difference was immediately noticeable.

I didn't repeat my immersion measurement. These loaves' volumes clearly differ by at least 10%.

However, the conventional loaf agian exhibited greater loft.

The other observables: dissimilar crust color and surface texture, thinner crust are essentially the same. The crumbs' structure remains, to me, inconclusive as well as flavors.

Let me hasten to add these results may not be representative of results in true Dutch ovens.

I'm going to buy a second stainless steel bowl.

Happy baking,

David G

davidg618's picture
davidg618

...after two months test-baking rye breads, some of whose recipe addled my brain, to just bake my familiar weekly sourdough.

This is essentially Vermont sourdough from Hamelman's Bread with 11 percent less levain, and 15 hours retard at 55°F.

David G

davidg618's picture
davidg618

Scalded Rye Bread

It's been a worthwhile experience. I feel I've learned a lot of the basics for handling rye flours. Four of eighteen I'll add to my modest repertoire: Rye Sticks, Milwaukee Rye, Zeltan (Tyrolean Fruit Bread) and Rye Squares; I'll likely tweak them all to better match the flavors I want.

I'm still searching for a high percentage rye bread, dense, flavorful and sour. There are a few candidates among the ones we (Gang B) baked but I'm far from chosing yet.

Of the last two (shown above) Ginger-Prune Bread, and Scalded Rye Bread, one is is in the running, the other--for reasons other than flavor--isn't. Both have distinct, excellent flavors.

David G

davidg618's picture
davidg618

I'm a believer biscotti lends itself as well to savory versions as it does sweet versions. Unfortunately, there are few savory recipes to be found.  I've been making a romano and black-pepper biscotti for a couple of years.  It's my adaptation of a parmigiano and black-pepper recipe I found online. I've been thinking of other savory combinations since, but haven't acted on them: until today.

This is a bacon-chedder combination baked today. The recipe is mine.

Bacon-Chedder Biscotti

250g AP flour, unsifted

2 tsp Baking powder

1 tsp salt

1/2 tsp fresh ground black-pepper

115g (one stick) Unsalted butter, cut into segments

60g bacon, friend crisp and crumbled and cooled

60g shredded or grated sharp chedder cheese

6 Tbls Buttermilk

1. Combine flour, baking powder, salt, black-pepper and butter segments in a large bowl. Using a pastry cutter, two table knives or your fingers work the butter into the dry ingredients until the mixture looks like course corn meal--a few pea-sized pieces of butter is fine.

2. Add the cheese and bacon crumble and toss with your fingers insuring the cheese and bacon are well distributed.

3. Make a crater in the center of the mixture and pour in the buttermilk. Gently combine the wet and dry until a ball begins to form. Pat the mix into a smooth ball, and refrigerate for at least 45 minutes.

4.The dough will be tacky. Divide the dough into two masses and, on a lightly floured surface, form two logs approximately 2 inches wide and 12 to 13 inches long. Transfer the logs to a silicon-paper (or non-stick fiberglass pad) lined half-sheet pan. Gently flatten the logs to approximately 1 inch thick.

5. Pre-heat the oven to 350°F. Bake the logs for approximately 18 minutes. Test that the loaves are firm, but not crisp. (Light browning around the edges is a good indicator the loaves are ready for slicing) Remove the pan from the oven and reduce the oven temperature to 300°F.  Allow the loaves to cool in the pan for 10 mins.

6. Transfer a cooled loaf to a cutting board. With a sharp serrated blade, cutting on a diagonal, cut the loaf into approximately 15, 1/2 to 3/4 wide wafers. Arrange the cut wafers cut side down on the paper-lined pan. Do the same with the second loaf.

7. Bake the wafers 20 minutes @ 300°F. Test for firmness. The wafers should be firm, but needn't be crisp at this point. Being careful not to burn your fingers on the edge of the pan turn each wafer over exposing the previously down side. Return the pan to the oven and bake for another 18 minutes. Test. The wafers should be crisp to the touch without any spring. Remove the pan and transfer the wafer to a cooling rack. Cool until they are at least not a threat to burn your tongue.

Enjoy

David G 

davidg618's picture
davidg618

Zelten di Natale, or just Zelten; a popular fruit bread in South Tyrol, an alpine region in northern Italy. 

That's not surface topping, the loaves are loaded with fruit and spices fore and aft, and top to bottom. Yes, there's a little bit of rye dough too.

I'm saving these to serve at our annual holiday dinner, but I've nibbled a little. These are definitely not the dreaded annual Fruit Cake from aunt Jane!

David G


davidg618's picture
davidg618

Easy dough to work with, very good flavor, tender crumb and crust. I'm going to try Reuben sandwiches with it.

David G

davidg618's picture
davidg618

Never having baked, tasted or even seen these skinny loaves before now their shape is my best guess based on Stan's instructions.

I may not have got the shape right, but I'm sure I got the recipe right. They are loaded with flavors! We're planning a small get together with friends to eat these; each guest will bring a dip or spread they think appropriate for rye. I'm making a roasted beet, yogurt, bleu cheese and bacon dip.

Crumb.

David G

Pages

Subscribe to RSS - davidg618's blog