The Fresh Loaf

A Community of Amateur Bakers and Artisan Bread Enthusiasts.

Most bookmarked

txfarmer's picture
txfarmer

Horst Bandel Pumpernickel From the Hamelman Bread Book

Hi all, I've been making high percentage rye breads recently, finally got to the horst bandel pumpernickel this past weekend. Having read some of the warnings here, I was very stingy with the soaking water for old bread (I used some 100% rye) and rye berries. I didn't add any extra water at first after mixing everything together, it was actually pretty dry, with lots of dry flour at the bottom, so I added water one TBSP at a time, until the "dough" is a paste that felt like the 100% rye I made successfully a few times. Shaped and put it in the pullman pan (even double checked to make sure it's the right size), after 50 minutes it rose some, the top domed probably 3/4inch below the pan edge, not as high as I had expected, but I didn't want to over proof, so it went into a 370F oven for an hour, then 275F for 3 hours, then the oven is off. Everything went smoothly, imagin my disappointment when I open the lid this morning and found that the bread didn't rise at all in the oven, still the same dome shape. What could be the problem? The sourdough start I used has been reliably effective for months, and the starter dough rose and matured properly in the 14 hours. The instant yeast I used is from the same batch used for another bread, which rose successfully, what what can it be? Did I leave the dough too dry? Should I have baked it longer/at a higher temperature? I am eager to try again and get it right, but need to figure out what went wrong first! Oh, the high gluten flour I used is Sir Lancelot from KA, about 14% protein. Thanks!

wally's picture
wally

A sieve or a proofing basket? More adventures in jury rigging

This weekend I decided to try Hamelman's Country Bread in the shape of a boule.  However, I lack proofing baskets, and as I proceeded through the recipe, a nagging thought kept injecting itself: So, how do plan on keeping your boule from turning into a pancake?

I baked only one loaf, so I scaled down his recipe thus:

Overall formula:

Flour (sir galahad)    454g    100%

Water                         309g     68%

Salt                                4g      1.8%

Yeast    1/4tsp instant dry       .6%

The pre-ferment is a stiff pâte fermentée:

Flour                        227g

Water                       136g

Salt                              2g

Yeast  1/16 tsp instant dry

Final dough:                DDT = 75° F

Flour                       227g

Water                     173g

Salt                             2g

Yeast  1/4 tsp instant dry

Pre-ferment            365g

Mixing:

The pâte fermentée is made up 12 - 16 hours prior to the final dough.  Final mixing involves incorporating all ingredients except the pâte fermentée on speed one, and then cutting in the pre-ferment in chunks as the dough comes together.  Increase to speed two and continue for 2 - 3 minutes (or longer).  Hamelman's description of the final dough is "supple and moderately loose, with moderate gluten development."  My own experience was that while the dough had developed some strength, it was still relatively slack.

Bulk fermentation:

2 1/2 hours, with two folds at 50 minute intervals.

Shaping and Baking:

Pre-shape, cover with plastic and bench rest for about 20 minutes.  Final shaping into boules is followed by placing the loaf into a floured banneton or a couche.  Final fermentation is approximately 1 1/4 to 1 1/2 hour.  Bake is at 450° in a pre-steamed oven that is steamed again once the loaf is loaded.  Baking time is approximately 35 minutes.

The moment of truth for me came at the shaping stage when I had to decide what to do with this boule I had created.  It was clear to me that with a final fermentation time of an hour or longer, even a tightly shaped boule would begin to imitate ciabatta dough, and I do not have any bannetons.  But as I surveyed my kitchen, it occured to me that I did have a fairly sturdy sieve, into which I could fit a floured tea towel.  That revelation then raised the question, how to suspend the sieve so that it was level/  A 2 qt. calphalon pot volunteered and I glimpsed a true jury rigged solution to my problem.

I heavily floured the tea towel with rice flour, which I've discovered is much less absorbent than AP - I haven't had anything stick to surfaces I've dusted with rice flour and this was no exception.

The result is a boule which, though it spread some in the oven, does not resemble the pancake I had dreaded as I began my project.  The country bread has a pleasing taste - thanks to the pre-ferment - and makes a nice (if not so wide) sandwich bread.

Meanwhile I've made a note to add bannetons to my Christmas list.  But in the meanwhile, I'm happy with my sieve and makeshift proofing method!

Larry


flournwater's picture
flournwater

Experimenting with Kefir

A recent post (http://www.thefreshloaf.com/node/13534/kefir-sourdough-starter) inspired me to experiment with Kefir (a fermented milk product) as an ingredient in formulating bread dough.  I was looking for a well defined sourness in the dough that could be easily controlled.  As a start, I used a portion of my "go to" starter, which is a 100% hydration formula, and reduced the hydration level to 70%.  I left that in the refrigerator for 48 hours, then added 142 grams of bread flour, 80 grams of water and 40 grams of Kefir.  That went back into the refrigerator for another 22 hours and was then combined with 9 grams of active dry yeast proofed in 20 grams of warm water, 10 grams of table salt, 337 grams of bread flour and 210 grams of water.  After making certain that the ingredients were thoroughly mixed and that no raw flour chunks remained, this mixture was allowed to rest at room temperature ro 90 minutes. 

Using a bowl scraper, the dough was then folded over onto itself at 90 degree angles until a complete turn of the bowl was completed; making four folds.  This repeated once after an hour had passed and again after a second hour had passed.  The dough was then set aside to proof.

After it had essentially doubled in mass (about an hour), I placed the dutch oven in the oven of the range and preheated to 500 degrees and waited an additional fifteen minutes.  I removed the dutch oven from the range, poured the dough into it, put the cover in place and returned it to the oven for 10 minutes before removing the lid.  I quickly sprayed the top of the loaf with Canola Oil, closed the oven and waited another 10 - - 15 minutes until the internal temperature reached 205 degrees.

Here's the result:

(click on thumbnail for larger view)

This loaf had a thin but crisp crust, velvety texture (almost cakelike) and nice crumb.  The flavor was very good, something that will go nicely with a bowl of hot soup or as the foundation for a sandwich.  Paninis for lunch tomorrow.

What I would do differently:

Next time I will change the ratio of water/kefir in the preferment.  Instead of 80 grams of water and 40 grams of kefir, I'll use 40 grams of water and 80 grams of kefir.

Thanks, janeburton, for the idea.

Note:  The Kefir I used was Nancy's Organic, lowfat, cultured, plain, unsweetened (comes in 1/2 pint container)

092709  Update:

I tried the adjustment (ratio Kefir to water) described above.  There wasn't enough difference in any aspect of the bread.  Still good but the added Kefir didn't offer anything to the end result worth mentioning.


tssaweber's picture
tssaweber

Zopf or Swiss Sunday Bread


Chouette22 posted a couple of weeks ago pictures of her Zopf (http://www.thefreshloaf.com/node/13045/hello-switzerland-celebration-bread-and-zopf). In a reply to my post she mentioned that eggs in this bread would make it dryer or stale faster. This motivated me to experiment with my recipe, with the goal to have at the end a fully understood, easy to use and "Americanized" recipe.

To have a solid and accepted expert on my side I used Dan DiMuzio's book, "Bread Baking" to support my testing. On page 138 he defines rich dough and the effect of fat, eggs and sugar in dough. This was a good start as Zopf has all this ingredients in it. Sugar seems to be the least influential with just a little bit more than 2%, but butter (11%) eggs (14%) and to some degree milk(fat) certainly do have an impact. I also wanted to see what the difference between AP and Bread flour would be.

Zopf is the favorite bread of my younger son, so he was very supportive of this idea. He promised his friends in school to bring an entire loaf for lunch and that this bread would beat every other dad's bread. I don't know how many other dads of his friends are baking but I like that it is embedded in him that not only moms are baking and cooking.   

Using my usual recipe I had to adjust the hydration significantly using AP flour otherwise the dough would have been too wet to braid. The final result was ok from an appearance perspective but did taste too much like "normal" white bread and with the additional flour was also much dryer.

Not adding the eggs was a little bit trickier. Eggs are contributing to the hydration but also add fat and strength to the dough. I decided to substitute 75 % of the egg weight with ¾ milk and ¼ water. The dough turned out wetter than usual and I had a difficult time to roll the two strands for braiding. The final bread had less oven spring and turned out a little bit less roundish than usual. The crumb was denser and whither in color. The taste of the bread was even more like white bread.

It seems to me that adding eggs makes Zopf heavier and gives it the crumb structure I like. It also allows for more liquid without impacting the final result.

I will stick with my ingredients but have changed the process to make it easier to assemble the dough. First I add butter, salt (to make sure I don't' forget it again) and brown sugar, zero out the scale, add hot water to soften the butter, then the two eggs and with the cold milk I get to the correct total amount of liquid to balance the varying weight of the eggs. After that I add the flour and the yeast and knead 3 to 4 min on speed one and another couple of minutes, depending on how the dough develops, on speed two of my KitchenAid. 3 stretch and folds with 45 min rest, after the 3rd st&f I divide the dough, braid it and proof for 20 min. Bake for 25 min at 375˚F (convection). The bread should reach 200˚F interior temperature.

Thomas

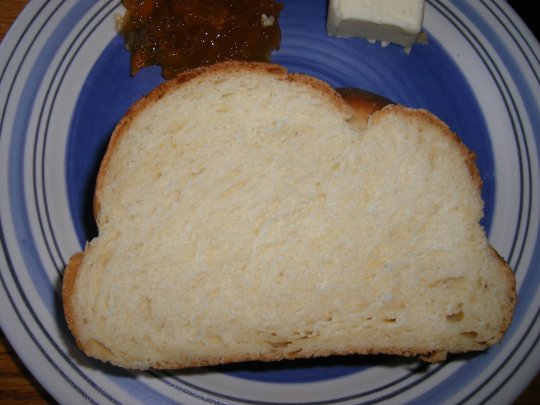
And here the final result:

For those interested in the recipe you can print or download it here:

http://tssaweber.com/WP/thomas-bread-secrets/zopf/

The spreadsheet lets you adjust the final dough weight.

dmsnyder's picture
dmsnyder

Potato-Nut Bread from South Tyrol made with Rye Sour


I made this bread from Salome's formula a couple months ago. At that time, I couldn't get good quality hazelnuts, so I made it with walnuts only. It was very good tasting, had amazing keeping quality and was excellent after having been frozen.

A new crop of very good tasting hazelnuts finally appeared in my local Whole Foods Market, so it was time to make this bread again. Salome has posted this bread on her own TFL blog since I first made it. She made her bread using a rye sour rather than a wheat flour levain. This sounded like a great idea, so I did it.


Ingredients

Amounts (grams)

Baker's percentage

Bread flour

600

100

Roasted potato

400

67

Toasted hazelnuts & walnuts

200 (100 gms each)

33

Water

250

42

Active rye sour

200

33

Salt

10

1.7

Ground coriander

2 tsp


Notes on Ingredients

You may note that I have increased the flour for this bake. Maybe my potatoes had more water content or my flour had less. (Or my water was wetter?) In any case, the dough was even gloppier than previously as I mixed it, so, after giving it a good chance to develop but still having medium-consistency batter in my mixer bowl, I added 100 gms more flour. The ingredient list reflects this.

At this point, I'm not sure what to recommend to others except to not add “too much” flour. This is supposed to be a very slack dough. Alternative methods I would consider would be to hold back some of the water and add water as needed (rather than flour) during mixing. This has the advantage of not throwing off the percentages of other ingredients relative to the flour. Another related solution would be to plan on using the “double hydration” technique often recommended for very slack doughs. This entails initially mixing with only 2/3 to ¾ of the total water until the dough has developed some (gluten) strength, then adding the remainder of the water and mixing until it is incorporated.

Procedures

  1. The night before baking, activate the rye sour by mixing 20 gms starter with 100 gms of water and 80 gms of whole rye flour. Cover and ferment for 8-12 hours.

  2. The next day, roast, steam or boil the potatoes. Peel them.

  3. In a large bowl (or the bowl of your mixer), dissolve the rye sour in the water. Add the flour and potatoes, mashed or put through a ricer and mix to a shaggy mass. Cover and let rest (autolyse) for 30 minutes.

  4. Add the salt and coriander and mix to moderate gluten development. (10-13 minutes at Speed 2 with a KitchenAid)

  5. Transfer the dough to a floured board and, with well-floured hands, stretch it to a 14” square. Distribute the nuts over the dough, roll it up and knead for a few minutes to evenly distribute the nuts throughout the dough.

  6. Form the dough into a ball and place it in a lightly oiled large bowl. Cover the bowl tightly.

  7. Ferment the dough until doubled in volume with stretch and folds at 30, 60 and 90 minutes.

  8. Transfer the dough to a lightly floured board. Divide it in two equal pieces and pre-shape each into a log. Dust with flour and cover. Let the dough rest for 10-20 minutes.

  9. Shape each piece as a bâtard and place them, seam side down, on a linen or parchment paper couche.

  10. Cover the loaves and proof them until they have expanded to 1.5 times their original volume.

  11. 45-60 minutes before baking, pre-heat the oven to 430F with a baking stone and your steaming method of choice in place.

  12. Transfer the loaves to the baking stone and bake with steam for 10 minutes, then another 20 minutes without steam. If the loaves are browning too fast, turn the oven down 10-20 degrees.

  13. Bake until the internal temperature of the loaves is 205F.

  14. When the loaves are done, leave them on the baking stone with the oven off and the door ajar for an additional 5-10 minutes to dry the crust.

  15. Remove the loaves to a cooling rack and cool completely before slicing

I sliced the bread and tasting it after it was completely cooled. The crust had softened somewhat but was still crisp. The crumb is moist but pleasantly chewy. The nuts are soft but provide little pops of nuttiness. This is particularly true of the hazelnuts, which I roasted longer than I usually do. The overall flavor is outstanding. There is more of a sour flavor than my previous bake of this bread, presumably due to the rye sour. There is no discernible rye flavor, but it does add to the overall complexity of the flavor as well as to the sourness.

I do prefer this version with the walnuts and hazelnuts and with the rye sour. 

I'm taking one of the loaves up to San Francisco tomorrow to nourish 3 of my siblings who otherwise would be suffering with only bread from Acme, Boudin, Semifreddi, Arizmendi, Tartine, Noe Valley, etc. to eat. <sniff>


David


Shiao-Ping's picture
Shiao-Ping

Let's have a feast for our eyes


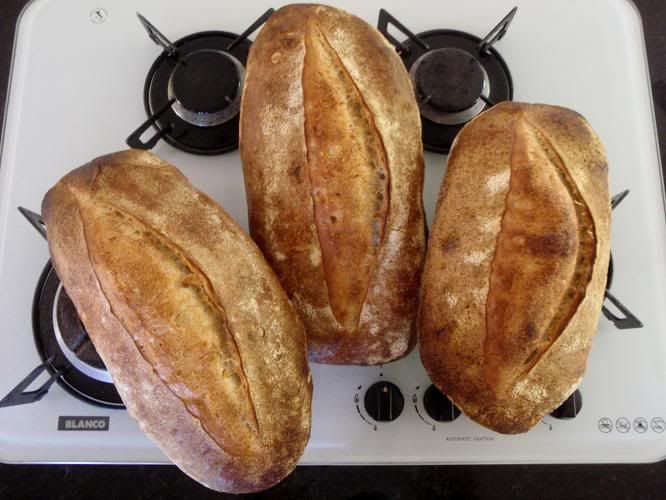
                                                                               SP's Country Sourdough


And let's slice them ...


 Now I found something ... 


And this ...


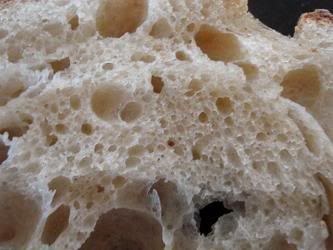
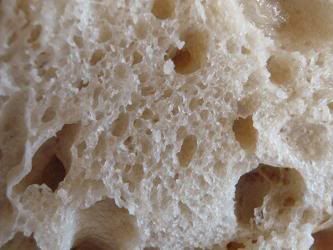
                                   Lovely crumb to me                                        but this is slightly on the dense side and gummy, why?


A wake-up call:

I recall when I was mixing my starter in the water for the final dough, I felt tiny little lumps of dough in my hands but I was unable to break them up because they were too many.  I used a trick that I learned from making custard when there were lumps - by pushing the starter through a sifter, I managed to get rid of most big lumps, but there were still many very tiny ones.  I got tired of trying to get rid of them, so I proceeded as normal.  Those lumps would most likely have been formed during the 2 hour final levain expansion (see my post here for details of Chad Robertson's sourdough timeline) - I did not mix the starter thoroughly with the flour and water.  And these lumps, however small, became the gummy part of the crumb!  (I may be wrong but that's what I think it was.)

A myth: The longer the fermentation, the better it is for the sourdough.  No, it depends on how time is spent, not how much time there has been.

With this sourdough, I learned something new.  What happened was when I was trying to get rid of the lumps, my hands were stirring the starter in the water for quite a long time (15 to 20 minutes at least).  I had never seen so many bubbles appearing in the water as if all of the wild beasties were woken up from their sleep and were doing their morning exercises.  This would not have meant anything to me, had it not been the fact later on that the fermentation seemed to have advanced in quite a fast pace even though the dough temperature was under 20C / 68F.  (I wish Debra of the Frankendough could help me out here.)

Anyway, with the fermentation kicking along, I decided I wanted to do an experiment, and that is, to really work the dough with my stretch & folds in such a way as to really build the dough strength.  I dipped both of my hands in water (to prevent sticking) and, with one hand pressing the centre of the dough, the other hand grapping a corner of the dough and folding onto itself, I stretched & folded the dough quite vigorously for at least 30 to 40 times at each set of S&F's until the dough felt elastic.  I did 3 sets of S&F's within one and a half hours and within that time the dough expanded quite a lot.  In normal circumstances I would have done a 4 hour bulk fermentation as in my post of Chad Robertson's country sourdough; but in this instance, I decided one and a half hours were enough (the dough temperature stayed under 20C).  I divided the dough into three pieces and pre-shaped them twice as they were very soft and even though I pre-shaped them to very tight balls each time they relaxed and spread out completely.  I shaped them to tight batards and only proofed for half an hour, compared to 2 hours previously when I did my Chad Robertson's.  Retardation was only 9 hours.

This morning before I baked them, the doughs were as flat as pancakes, but in the oven, they rose like hills:


What I learned in this bake is that the dough strength (built up from the vigorous stretch & folds) helped in the volume (the oven spring, the open crumb, etc).


Time for some food,


And pack up the rest,


Shiao-Ping 

p.s.  The minor variations I made in the formula here compared to the one in My Imitation of Chad Robertson's Country Sourdough were: (1) 72% hydration; (2) 5% of total flours in rye flour; and (3) total dough weight 3 kg.

Anonymous baker's picture
Anonymous baker (not verified)

hydration ratio content?

Hi

I often see posts/recipes referring to having a 70-75% hydration content.

How does one measure for hydration rate other than weighing the

original amount of flour and water? Sorry if this is a stupid question

but want to learn. Thanks

Mylissa20's picture
Mylissa20

Retsel pros and cons?

I am looking into buying a mill (I dont currently own one) and have been doing some research.  Frankly, I"m torn.  I have read a lot about the Retsel, and am impressed by the durability, manual options, and flexibility of this grinder.  I also like that I won't have to triple check my grains for stones.  The price is considerable but I'm not sure if it really is worth the pros.  My other consideration is the nutrimill.  I'm rather stingy with money so I really want it to be well spent if I'm going to lay down that kind of cash.  What are your opinions?

Mylissa20's picture
Mylissa20

If you had $2,000 for supplies.....

Assume you are a relatively novice but passionate bread baker, you love whole wheat and sourdough, and have been functioning on VERY basic equipment.  No scales, grinders, mixers, breadforms, banneton-to-oven transfer tools, or nice mixing bowls.  Assume also that you have just received $2,000 with which to equip yourself and pursue your passion.  What would you buy, and of which brand? Please let your imaginations run away with you :)

dmsnyder's picture
dmsnyder

Sourdough bread: Two more experiments in one bake


Today's sourdough bread is a continuation of the experiment from last week with my modified steaming method of pouring hot water over pre-heated lava rocks in a cast iron skillet both before and after loading the loaves in the oven.

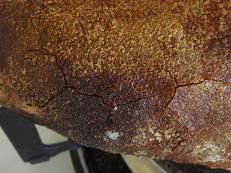
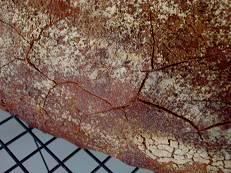
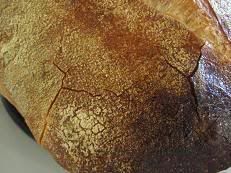
I had two new goals: In addition to trying to replicate last weeks good results, I wanted to increase the sourness of the bread and I wanted to see if I could get a “crackly” crust.

In the interest of increased sourness, I elaborated a firmer levain than what I customarily use. I fed the levain two days before mixing the dough, fermented it overnight and then refrigerated it for 18 hours. I also doubled the percentage of the levain in the formula.

I have read that lower protein flour will produce a more crackly crust, while higher protein flour produces a more crunchy, harder crust. Therefore, I used AP flour (11.7% protein) rather than the high-gluten flour (14.2% protein) I had used last week.

Since I was using a lower protein flour, I reduced the hydration of the dough to 70%. Note that the effective hydration is even a bit lower, since the levain was less hydrated also. I used the same procedures as last week except I baked the loaves slightly longer, since they were slightly larger (because of the additional levain).


Ingredients

Amount

Baker's percentage

Giusto's Baker's Choice flour

450 gms

90

Whole rye flour

50 gms

10

Water

350 gms

70

Salt

10 gms

2

Levain (50% hydration)

200 gms

40

Total

972 gms

212

Procedures

  1. Mix the flours and water to a shaggy mass. Cover and let rest for 20-60 minutes.

  2. Add the salt and levain and mix to moderate gluten development.

  3. Transfer to the bench and do a couple of folds, then transfer the dough to an oiled bowl and cover it. Note the volume the dough will achieve when doubled.

  4. After 45 minutes, do another stretch and fold, then allow the dough to double in volume.

  5. Divide the dough into two equal pieces and pre-shape into rounds. Let the pieces rest, covered, for 10-20 minutes.

  6. Shape each piece into a boule and transfer to well-floured bannetons, seam side up. Place each in a food-grade plastic bag, seal the openings.

  7. Allow to proof for 30-60 minutes (less in a warmer environment), then refrigerate for 8-14 hours.

  8. Remove the loaves from the refrigerator 2-4 hours before baking (depending on how risen they are and how warm the room is). Allow to warm up and expand to 1.5 times the loaves original volume.

  9. 45-60 minutes before baking, pre-heat the oven to 500F with a baking stone on the middle shelf and a cast iron skillet filled with lava rocks on the bottom shelf. (I suggest moving the stone ove to within one inch of the oven wall on your non-dominant side. Place the skillet next to the wall on your dominant side.)

  10. When the loaves are ready to bake, pour 1/3 cup of boiling water over the lava rocks and close the oven door fast. (Strongly suggest holding the kettle wearing an oven mitt!)

  11. Transfer the loaves to a peel or to parchment paper on a peel, and load them onto your baking stone.

  12. Immediately pour ½ cup of boiling water over the lava stones and quickly close the oven door.

  13. Turn the oven temperature down to 460F and set a timer for 12 minutes.

  14. After 12 minutes, remove the skillet. Reset the timer for 20 minutes.

  15. The loaves are done when nicely colored, thumping their bottoms gives a “hollow” sound and their internal temperature is at least 205F.

  16. When the loaves are done, turn off the oven but leave the loaves in the oven with the door ajar for 7-10 minutes to dry the crust.

  17. Cool thoroughly (2 hours) before slicing and serving.

Comments:

I autolysed the flours and water for about 30 minutes. I then added the levain and salt and mixed with the paddle in my KitchenAid for about 2 minutes. As I was switching to the dough hook, I was surprised how much gluten development had already occurred. I mixed with dough with the dough hook at Speed 2 for just a couple minutes more and already had moderate gluten development.

To what could I attribute this? The only possibilities were the increased percentage of levain and the different flour. My hypothesis is it was mostly the flour. We hear that higher-gluten flours require more mixing to develop the gluten. I was using a lower gluten flour than usual for this type of bread.

The dough consistency (Thank you, MC for this useful distinction from the SFBI!) was almost identical to that of last week's dough, so my guesstimated hydration adjustment seemed spot on.

These boules were proofed for a bit over an hour before they were refrigerated. The next morning, they sat at room temperature for about 2 hours before baking. When I transferred them to the peel, they spread some. This could be because of the lower gluten flour effects, slight over-proofing or a combination of factors.

The loaves had reasonable but not great oven spring, and they had less bloom than the previous bake. This suggests they were probably over-proofed a bit. I baked them for 22 minutes at 460F. They then sat in the turned off oven for 7 minutes to dry the crust.

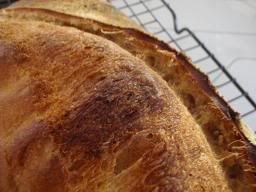
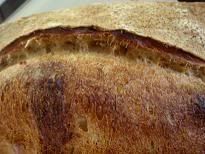
The crust was not as shiny as the last ones, but by no means “dull.” They were singing already when I took them out of the oven. It seemed to me, that the “tune” was higher pitched than the song my boules generally sing. Could this be because of the lower gluten flour? Thinner crust? And … Woohoo! Cracks began to appear in the crust as the bread cooled!

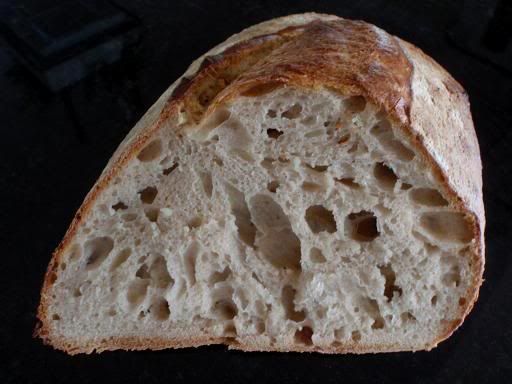
The crust has a crunchy bite. As can be seen from the crumb shot, below, it is relatively thick. I think that, to get a thin  crackly crust like a classic baguette, one must have a shorter bake at a lower temperature.

The crumb appearance was typical for my sourdoughs of this type. However, it was chewier than I expected. Very nice. The flavor was indeed more sour than last week's sourdough, as expected. I would still categorize it as mild to moderate sourness. It is not as sour as the "San Francisco Sourdough" in Reinhart's "Crust and Crumb," which uses an extremely firm levain in even higher proportions.


Conclusions:

  • Increased sour flavor with firmer levain and increased levain percentage: As expected, this loaf was more sour but not dramatically so. To get a super-sour flavor, the techniques used must be pushed further.
  • Crackled crust with lower protein flour: Today's bake seems to support this hypothesis. Is this effect desirable? That's a matter of taste, but, for me, it's at least nice to know how to get the effect when I want it.
  • The benefits of the double steaming technique: Today's results were certainly satisfactory, but they also demonstrate that steaming is just one among several variables that contribute to oven spring and bloom.


David

Submitted to Yeast Spotting


Pages