The Fresh Loaf

A Community of Amateur Bakers and Artisan Bread Enthusiasts.

Most bookmarked

Jw's picture
Jw

The darker the bread, the healthier?

Wrong, says the independent Dutch consumer council "Consumentenbond". They tested multiple grain bread this May from a variety of shops and retail stores. Turns out that the fanciest looking bread (with the best names like Pain de Boulogne) have the smallest amount of fibers from al the tested multiple-grain breads.

Also, you cannot judge a bread by the colour and the number of seeds on the crust. It is what's inside that counts, and the outside of a bread might give you the wrong impression (I feel a metaphor coming up here..). There might be a lot less seeds inside then what is suggested by the outside. Also, the bread is made darker by adding roasted barley.

The 'best' bread to buy (best meaning optimal fibers and lowest salt) is a 1 euro (1,30 USD) bread from a retail store. The list a whole set of ingredients in a standard bread, additives: glucose (for better rise and darker crust), Beanflower, sojaflower, etc.

Of course, you knew this already, that's why you are baking your own bread!

Happy baking (waiting for my second batch to come out of the oven)

Cheers,
Jw.

wally's picture
wally

More fun with fougasse - and a lesson learned

Last week I tried Hamelman's fougasse with olives recipe for the first time and had a very happy outcome.

However, in attempting to move the bread onto parchment after scoring it, I nearly had disasterous results, since the scoring leaves it without any 'backbone.' So I resolved to do a bake today avoiding last week's hassles by allowing the fougasse to rise on parchment paper.

Trouble is, I was too clever by half in my approach (as the results of my niçoise olive fougasse below attest).

Here's what happened, and, in retrospect, how to avoid my mistake.

The fougasse (a bread of Provence) goes through three shapings after its bulk fermentation:

1- it's lightly shaped into a ball and allowed to bench rest for about 20 min.

2- it's rolled into an oval shape with a rolling pin and then allowed a final rise for about 60 minutes, and

3- picking up the dough, you then stretch it out to about 1 1/2 times its orginal length, and then fashion it into a triangle whose base is about 1/2 of its length. After that, it's scored and loaded for the bake.

My misstep occured in step #2. I lightly floured parchment paper, and then rolled the boule into an oval and allowed it to rise for an hour. Unfortunately, after an hour resting on the parchment, it effectively glued itself to the paper, which made step #3 impossible. In attempting to scrape it off onto a floured countertop, I severely degassed the dough. Ergo the very, very overbaked (shall we just say burnt) middle of the loaf.

With my second bake - a roasted garlic and anchovy loaf - I smartened up and in step #2, I rolled out the dough into an oval on a well-floured surface - not parchment paper. After the hour's rise, I was able to lift if off the countertop without degassing it, and then transferred it to the parchment paper, where I did the final shaping (#3).

You can see the quite different result below.

I get raves about the bread - it's a bit like pizza without the sauce. In fact, someone suggested that a marinara dipping sauce would be a good accompaniment.

I'm surely going to continue baking this. Hopefully, the lessons learned in this round will lead to trouble-free shaping next time!

Larry


DakotaRose's picture
DakotaRose

Disapointing Whole Wheat Bread

I don't know what the problem is this year, but every time we make a whole wheat bread with red wheat flour it doesn't rise well and we never get any oven rise at all.  It is so disappointing.  I never had that problem last year, but this year it never fails to disappoint.  I am using the same recipes as last year, but nothing works.  Our sourdough breads aren't bad this year, but I don't use any red whole wheat flour in them because I don't want them to come out as hard lumps of bread.  Any ideas.


Blessings,

Lydia


Here is the recipe

2 t. salt
2 1/4 c. water
1/3 c. honey
1 T. yeast
6 c. flour (equal parts, red whole wheat, white whole wheat and Kamut)

boathook1's picture
boathook1

SOUREST SOURDOUGH BREAD

Once I've made a starter how long should I keep it before trying to bake with it? Does it continue to get more sour with age? MY AIM IS TO BAKE A REALLY SOUR LOAF...

I could not be much newer at this... I'm seeking two things:

1. VERY SOUR tasting results.

2. The simplest recipes.

Could I be asking too much? Is there hope for me?! !... I'm willing to learn... My baking history consists of a cookie mix that came in a cardboard container from the freezer dept. of the local Piggly Wiggly [?]... Oh yeah.. I did a few potatoes once too but if I recall correctly I ended up burying them in my back yard.... {late at night too}... I guess it's also worth mentioning that in the divorce papers I was served, my kitchen antics were a key factor in chasing the little woman from my loving embrace... {Have you ever tried reading fine print when your glasses are all clouded with flour powder?... And you're up to your arm pits in dough that is heavier than you can lift?}... A nasty rumor has found it's way to me as well... According to a recent ruling by the courts I'm not allowed to bake within 500 feet of my former wife......

I remain, your humble and curious student..

Boathook1

Salome's picture
Salome

Parade of favorites (including the third Yoghurt-Whole-Wheat bread)

Gosh, my oven was running hot today. I was basically all day busy baking, which is a real threat. I spent the last two days hiking, walking around 14 hours in total, so I didn't feel like real physical exercise, the dough-kneading was just perfect.

I was like a bee. Once again, I made a new sesame version of the Whole-Grain Oat crackers (250 g ripe sourdough, made out of 120 g oat flour, 120 ml water and 10 g culture, 210 g whole wheat flour, 9 grams salt, 40 grams sesame seeds, 10 g sesame oil and water as required [probably another 100 ml].) It's pretty easy, actually foolproof. I let it ferment as long as it suits me (this time it was about two hours), then I pressed portions of the dough in either sesame seeds or oats and rolled it thinly with a rolling pin, cut it in pieces and baked it at any oven temperature between 180°C and 230°C until the endges were brown. Et Voila, that's it.

I've made these crackers many times now, using whatever had to be used. Great for leftover sourdough, which has to be used - then I simply use the wheat-based sourdough and add oat flour to the dough instead. I simply follow certain rules, when I "construct" the day's crackers recipe. Like, about 30% of the total flour amount is fermented (sourdough), 2% of the flour weight is salt, the hydration is around 60+ percent . . . It has always worked fine.

Secondly, I baked some whole-wheat Pita bread for todays lunch. Again, this is a classic at my home. We stuffed it with vegetarian burgers (Split lentil burgers, another favourite!), lettuce, tomatoes and Tzaziki.

And last but not least, I continued with my venture into the perfect Yoghurt-Whole-Wheat bread. Unfortunately, the loaves overproofed somewhat during their final rise whe I retarded them in the fridge. (I was out, driving with my dad, getting ready for the driver's license exam.) Luckily they still didn't collapse, just the oven spring wasn't as nice as I experienced the last two times.

Yoghurt-Whole-Wheat-Bread #2

Preferment:
175 ml water
250 g whole-wheat flour (I always use home-ground flour)
1/8 tsp yeast

Final dough
550 g whole-wheat flour
30 g vital wheat gluten
17 g salt
1 teaspoon dry yeast
20 g malt
30 g butter
150 g yoghurt (I used 3% fat yoghurt)
300 ml water


I handled the dough pretty much like described in the last Yogurt Whole-Wheat Recipe. I let the preferment proof for about 12 hours at room temperature, let the remaining flour autolyse for about an hour, kneaded the dough well, let it double (2h), punched it down and let it double again (1.5 h), then, instead of shaping sandwich loaves I made two boules and had to retard them in linned bowls in the fridge (where they overproofed . . . So have an eye on your loaves, better don't retard them and don't go driving for more than two hours.). I baked them for about 40 minutes in 230° C with steam for the first 20 minutes, then lowered the temperature to 215° C for the rest of the bake.

Conclusion: The bread is tasty, but it's probably better baked in a tin at lower temperature. Although I did get a crust, it wasn't an extraordinary flavorful one. This dough benefits from the support it gets from a tin, this way it can become very light and fully proofed. As you can see on the pictures, the bread wasn't flat, but somewhat out of shape (shure, it's overproofed). The crumb texture is again light and pleasant, and the flavor is good! For instance with a piece of blue cheese . . .
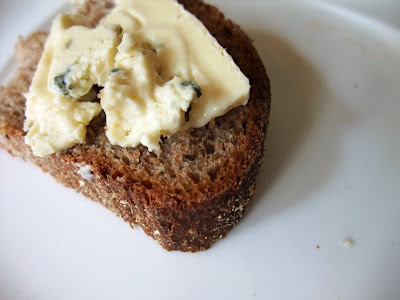
What I'm gonna do: I'll keep this recipe in my recipe folder and take it out later again. Now I'm craving less plain breads again, maybe something with dry fruit, nuts, herbs? If I have a bread to often I get bored of it and don't appreciate it anylonger, that's definitely a sign that I should move on.

Very final conclusion: When I bake this bread the next time, then with exactly this formula, but in a bread pan. And I'll bake it at somewhat lower temperature, maybe something around 210°c? Or lower? This bread reminded me of another delicious tin bread, a recipe from Southern Tyrol. I'll have to get this out soon as well. It's a sourdough bread with rye and wheat.

Salome

bblearner's picture
bblearner

Sourness of Bread

It seems that most sourdough bread bakers are aiming for breads with quite some sourness.  I'm the opposite.  Last Sunday I made two batches of breads following Mr Dimuzio's advice to a blogger here (can't locate the thread now) of a 4-build starter at 1.67 parts flour plus one of 1:1:1 ratio that I want to make pain de mie with.  The results :

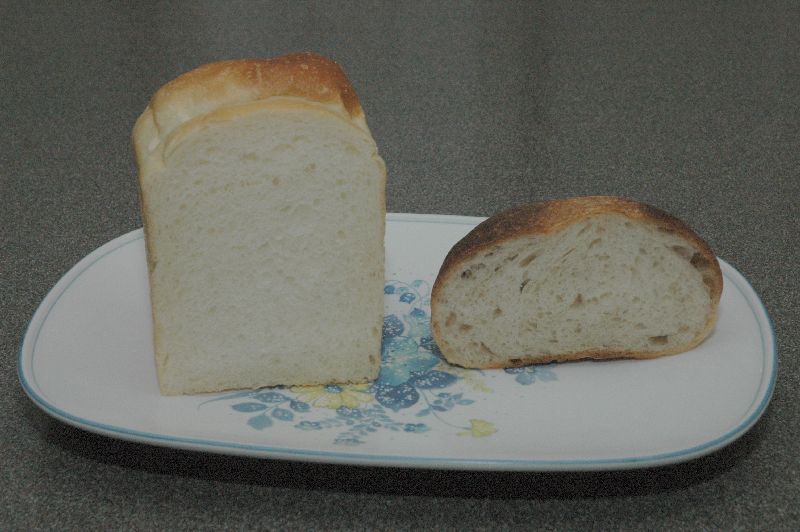
Both breads were very sour, the sourest that I had ever made.  Since I followed the method of feeding the starter 3 times before making bread I was able to finish baking my breads within 6 hours from mixing.  The batard on the right was still within 6 hours but the pain de mie took 8 hours in its final proofing.  Both crumbs are very good, particularly the pain de mie - fluffy yet springy.  What should I do to continue to yield this texture without the super-sourness???

Enid 

Salome's picture
Salome

The experiment continues: Yoghurt Whole-Wheat Bread

I liked the Buttermilk-Whole-Wheat-Bread which I baked just a couple days ago so much that I decided to continue with 100% whole wheat. The Buttermilk-Whole-Wheat-Bread was very soft and light, I have never seen a whole-wheat bread like this.

I adapted the recipe I used the last time. It was, for my taste, somewhat to sweet and it lacked a real crust. And I decided to substitute the buttermilk by a yoghurt-water-blend, because that's what I always got on hand here. (Whereas plain buttermilk is often hard to get.) And I increased the hydration by a lot. And I used this time a preferment, with sourdough - In order to get a deeper, less sweet flavor.

A lot of changes, you see. I wasn't to worried that anything could go wrong, because I think the reason why this bread came out so light is, first of all, proper kneading, and secondly, some acidic dairy products.

Yoghurt-Whole-Wheat-Bread

Preferment:
20 g mature culture
175 ml water
250 g whole-wheat flour (I always use home-ground flour)

Final dough
580 g whole-wheat flour
25 g vital wheat gluten
17 g salt
1 teaspoon dry yeast
20 g honey
30 g butter
150 g yoghurt (I used 3% fat yoghurt)
320 + 100 ml water


  1. I mixed the ingredients of the preferment and kept it over night in a warm place (I put it into the microwave, with the door a little bit open - this way, the light stays on and I get a temperature of ~81° F)
  2. The next morning, I let the remaining flour autolyse for an hour. (I mixed the flour with the gluten first, then with all of the yoghurt and 320 ml water.)
  3. Then I mixed the preferment and the flour-water-dough with the remaining ingredients (not the last 100 ml water though) and I kneaded it by hand using the Bertinet method for 15 minutes. While kneading, I incorporated another 100 ml of water. The gluten was perfectly developed, even better than the last time.
  4. first fermentation: until doubled, it took me about two hours. Then I degassed the dough very well and shaped it into a boule again.
  5. second fermentation: until doubled, it took me about 1.5 hours.
  6. I divided the dough into two pieces, preshaped them and let them rest for a couple minutes. then shaped them into sandwich loaves, rolled them in rice flour (I use whatever I've got on hand . . . coarse wheat, bran, oats . . .) and put them into bread pans.
  7. final fermentation: until the loaves reached well over the edges of the pans, about one hour.
  8. I slashed the loaves and put them in the 220° C hot oven and steamed well. After 20 minutes of baking, I took them out of the pans and baked them until done on a baking sheet. (another 20 minutes.) I covered the loaves with aluminium foil for the last ten minutes.

I think the bread had about as much volume as the last time, I'm very pleased with that. It has quite a sour flavor. It's definitely a good flavor, but for my taste it's somewhat to sour for being a sandwich bread. I will change something about that. The bread did well with the higher heat and I think that I'll bake this kind of recipe in these settings in the future. It still didn't have a crunchy crust, but that's not what I'm looking for in a sandwich bread either. I will reduce the amount of water somewhat, because it simply was harder to shape with a hydration of 86 % and the result wasn't significantly better. Maybe something around 75-80% the next time? I'm happy with the reduction of sugar though!

I think, the next time I'll bake this bread with a yeast preferment and simply add a little of sourdough to the final dough. Or should I include some whole rye for a deeper flavour? I'd like to experiment with some further additions to the dough, like soaked wheat chops or some seeds (incorporated in the dough when the gluten is developed). I'll do some more experiments, I promise!

Salome

Fence's picture
Fence

Rye bread recipe needed

Every single time that I have been to Russia (which is quite a few times) I always went to the nearest supermarket as quickly as I could after my arrival in order to buy a loaf of rye bread. There are, just as in many parts of the world, various types of rye bread in Russia, but the one that I really crave is the black, extra-dark rye bread that I, basically put, grew up on. These pictures (http://russianreport.files.wordpress.com/2009/07/black-rye.jpg and http://commons.wikimedia.org/wiki/File:Bread_%28buhanka%29.jpg) are the closest examples of what I'm looking for that I could find on the net. Does anyone know a recipe which will give me similar results without having to use a starter? Thanks.

ClimbHi's picture
ClimbHi

One fire -- Many foods

One of the things I'm having fun with is learning how to use the oven to bake a variety of foods. With a WFO, this is not as easy as it may seem. There's no temperature knob on a WFO, so you can't just turn the heat up and down like in the typical kitchen range. Instead, you have to plan your baking to take advantage of the heat that you have available. This means getting the oven to a high temperature to start, and cook various things as appropriate as the temperature naturally falls.

One trick I've been working on is to cheat a bit and keep a small fire going even after the oven has reached it's baking temp. (Usually, you rake the fire and coals out of the oven once it's heated.) This does two things: It allows me to hold the temp a bit higher a bit longer, and it lets me add smoke to the mix. Here's last weekend's foray into the world of wood-fired cooking. It was hot, we had invited some neighbors over for dinner to celebrate his birthday, and thought we'd do the whole meal in the oven outside so we didn't heat up the kitchen with cooking.

First, there have been several questions about how much smoke a WFO produces. Unfortunately, I thought of this after my fire was already going pretty well, so I didn't get a shot of the smokey first 10 minutes, but here's a shot of the fire so you can see it's going hot & heavy, and a shot of the chimney top. Notice, no visible smoke.

DSCN2760 by you.

DSCN2759 by you.

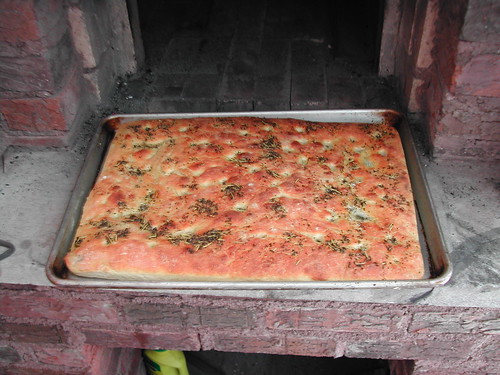
Once the oven is hot enough that the soot burns off the bricks, it's time for bread. This dinner party was kind of a last minute thing, and I didn't have time the night before for the typical sourdough preferment routine, so I elected to build some Pain à l'ancienne per PR's BBA. That only takes a few minutes to put together on day one, then it's directly into the fridge until the next day, when it only takes minimal work to complete. We decided to make it into a focaccia this time, with a topping of EVO, basil, rosemary, garlic salt. The bread went in with an oven wall temp of around 550° for about 20 minutes. Here's the finished product:

DSCN2763 by you.

Once the bread was out, the oven was still around 500° wall temps, so in went some fresh tomatoes and new red potatoes, cut up for later making into potato salad. I also tossed some oak chips/sticks onto the coals that I had kept in the oven to maks some smoke to flavor the veggies.

Wood-Roasted Potatoes:

DSCN2765 by you.

Wood-Roasted Plum Tomatoes:

DSCN2766 by you.

(These were added to some other veggies that we grilled later, but I didn't get pix of the final medly.)

Here's a shot of the WFO-roasted potato salad:

DSCN2769 by you.

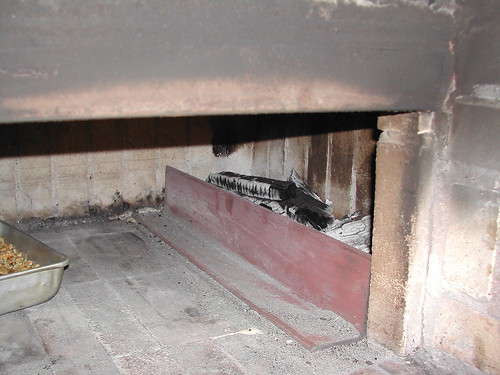
The oven wall temp had now fallen to about 450°, so in went the desert - another peach/blueberry cobbler. I didn't get pix of this one, but I posted pix of one last week. You can see the very edge of the pan in this photo. You can also see how I maintain the coals during this process. I have a steel angle that I slide into the oven to make a box to hold the coals. I add small pieces of wood on top of the hot coals to maintain them and to generate smoke when desired.

DSCN2767 by you.

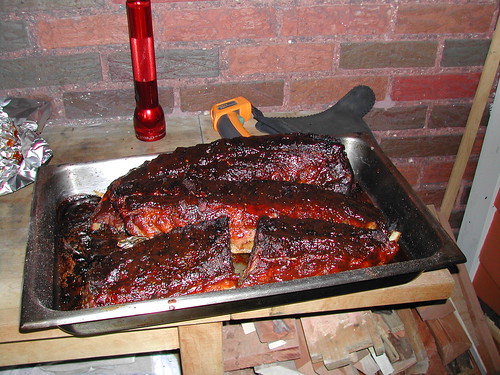
Once the cobbler was done, I left the door open for a bit until the oven wall temp fell to around 400°. Then I built the fire up just a bit and added a bit of additional wood, to get things really smoking. Then I loaded some dry-rubbed ribs, and sealed the door almost tight so the fire would continue to smoke without either heating the oven further or going completely out. Left them cook for about 4 hours in the falling oven. Fifteen minutes before dinner, I mopped them with some Jack Daniels BBQ sauce (I gotta learn how to make sauce that good!) and here's the final product -- fall off the bone, don't-care-how-messy-you-get-eatin'-'em good, ribs.

DSCN2768 by you.

Everything was very tasty, and we never went near the kitchen stove.

I'm gonna wind up fat as a house. ;-(

ClimbHi
Pittsburgh, PA

althetrainer's picture
althetrainer

Chunky garlic loaf

I returned from my 9-day vacation and couldn't wait to bake breads... what's wrong with me?  LOL  Anyway, nothing too exciting but I discovered chunky garlic bread and fell in love with in while I was away.  So I made one free form loaf and the sandwich loaf is onion sesame, both sourdough. 


Pages