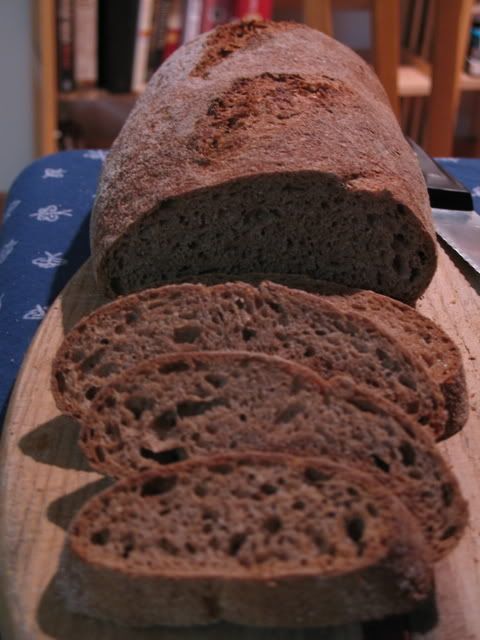
Pain de Campagne

Pain_de_CampagneBatard

Pain_de_CampagneGrigne

Pain_de_CampagneCrumb
The formula for this bâtard is derived from that for Anis Bouabsa's baguettes, as shared with TFL by Janedo. Jane prompted me to add some sourdough starter, and this resulted in a big improvement, to my taste. We had also discussed adding some rye flour to the dough. Jane said she and her family really liked the result. The addition of rye and sourdough makes this more like a pain de campagne, which is traditionally shaped as a boule or bâtard. The result of my mental meandering follows:
Formula
Active starter ........................100 gms
KAF French Style Flour.......450 gms
Guisto's Rye Flour..................50 gms
Water......................................370 gms
Instant yeast............................1/4 tsp
Salt............................................10 gms
Mixing
In a large bowl, mix the active starter with the water to dissolve it. Add the flours and stir to form a shaggy mass. Cover tightly and let rest (autolyse) for 20 minutes.
Sprinkle the yeast over the dough and mix with a plastic scraper. Then sprinkle the salt over the dough and mix.
Using the plastic scraper, stretch and fold the dough 20 times, rotating the bowl 1/5 turn between each stroke. Cover tightly. Repeat this stretch and fold procedure 20 minutes later and, again, after another 20 minutes.
Fermentation
After the third series of stretches and folds, scape the dough into a lightly oiled 2 quart/2 liter container and cover tightly. (I use a 2 quart glass measuring pitcher with a tightly fitting plastic lid manufactured by Anchor Glass.) Immediately place in the refrigerator and leave it there for 21 hours. (In this time, my dough doubles in volume and is full of bubbles. YMMV.)
Dividing and Shaping
(I chose to make one very large bâtard, but you could divide the dough into 2 or 3 pieces and make smaller bâtards, boules or baguettes. Or, you could just cut the dough and not shape it further to make pains rustiques.)
Take the dough out of the refrigerator and scrape it gently onto a lightly floured work surface. Gently pat it into a rectangle. To pre-shape for a bâtard, fold the near edge up just past the center of the dough and seal the edge by gently pressing the two layers together with the ulnar (little finger) edge of your hand or the heel of your hand, whichever works best for you. Then, bring the far edge of the dough gently just over the sealed edge and seal the new seam as described.
Cover the dough with plastic wrap and/or a kitchen towel and let it rest for 30-60 minutes, with the seams facing up. (The time will depend on ambient temperature and how active your starter is. The dough should have risen slightly, but not much.)
To shape a bâtard, fold the near edge of the dough and seal the edge, as before. Now, take the far edge of the dough and bring it towards you all the way to the work surface and seal the seam with the heel of your hand. Rotate the loaf gently toward you 1/4 turn so the last seam you formed is against the work surface and roll the loaf back and forth, with minimal downward pressure, to further seal the seam. Then, with the palms of both hands resting softly on the loaf, roll it back and forth to shape a bâtard. Start with both hands in the middle of the loaf and move them outward as you roll the loaf, slightly increasing the pressure as you move outward, so the bâtard ends up with the middle highest and the ends pointed .
Preheating the oven
Place a baking stone on the middle rack and both a cast iron skillet and a metal loaf pan (or equivalent receptacles of your choosing) on the bottom shelf. Heat the oven to 500F. (I like to pre-heat the baking stone for an hour. I think I get better oven spring. Since I expected a 30 minute rest after pre-shaping and a 45 minute proofing, I turned on the oven 15 minutes after I had pre-shaped the loaf.) I put a kettle of water to boil 10 minutes before baking.
Proofing
After shaping the loaf, transfer it to parchment paper liberally dusted with semolina. Cover the loaf with plastic wrap and/or a kitchen towel. Proof until the loaf has expanded to about 1-1/2 times it's original size. (This turned out to be 30 minutes for me.) Do not over-proof, if you want good oven-spring and bloom!
Baking
Put about a cup full of ice cubes in the loaf pan on the bottom shelf of the oven and close the door.
Slip a peel or cookie sheet under the parchment paper holding the loaf. Uncover the loaf. Score it. (The bâtard was scored with a serrated tomato knife. The knife was held with its blade at about a 30 degree angle to the surface of the loaf. One swift end-to-end cut was made, about 1/2 inch deep.)
Transfer the loaf and parchment paper to the baking stone, pour one cup of boiling water into the skillet, and close the oven door. Turn the oven down to 460F.
After 15 minutes, remove the loaf pan and the skillet from the oven. Rotate the loaf 180 degrees, if it is browning unevenly. Close the oven door.
Bake for another 15 minutes, then remove the loaf and place on a cooling rack. Check for doneness. (Nice crust color. Internal temperature of at least 205F. Hollow sound when you thump the bottom of the loaf.) If necessary, return to loaf to the oven to bake longer.
Cooling
Cool on a rack for two hours before slicing.
Comments
I got very good oven spring and bloom. This loaf has an ear by which you could carry it around. It sang to me while cooling. The crust is nice and crunchy. The crumb is well aerated and almost "fluffy" in texture, but with tender chewiness. The taste is just plain good. It is minimally sour. Based on my half-vast experience, I'd say it is fairly representative of a French Pain de Campagne, the major difference being that it is less dense than the ones I recall.
This is, for me, not merely a good "novelty" bread. It could join San Francisco Sourdough and Jewish Sour Rye as an "everyday" bread I would enjoy having all the time. The method is good for those of us who work outside the home. It can be mixed in the evening and baked in time for a late dinner the next night.
Enjoy!
David



 Beetle "Lace"
 Ready for the oven


