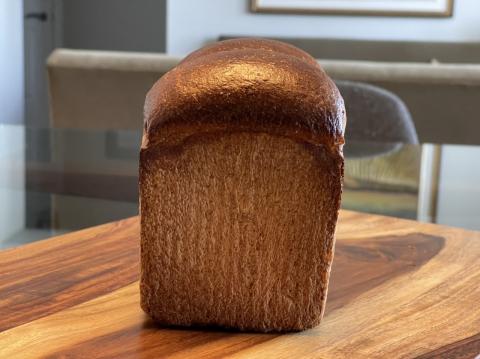
I’ve been baking a lot of milk breads for some time developing the formula to the point that I’m quite happy with it. So now I’d like to see what I can do with a vegan version of a sourdough milk bread. This is my first try at a vegan version of a 100% whole wheat milk bread. My favourite non dairy milk is soy milk and I prefer the Asian soy milk rather than the North American ones as they are slightly sweetened without any added flavours like vanilla so it was easy to decide to use this. I have a bottle of toasted walnut oil that I use when I make bread with walnuts in it to amp up the walnut flavour so I decided that I would replace the oil from the butter and the egg yolk with the equivalent amount of toasted walnut oil. Finally for the egg yolks I decided to use ground flax seeds with water. I initially planned to use aquafaba (chickpea water) however, I realized when my first test dough wasn’t rising that the can of chickpeas I used had a good amount of salt added that I hadn’t accounted for in the dough. The high salt appeared to inhibit the microbes and there was very little rise over quite a long time so that first dough was binned.
Based on the information I could find 1 egg about 11% fat and the egg white is about equal to 1 tbsp of flax seeds ground and mixed with 2-3 tbsp of water.
Butter in North America is about 80% fat.
Instructions
Levain
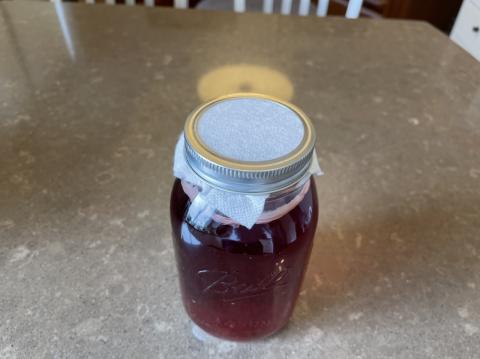
Mix the levain ingredients in a jar or pyrex container with space for at least 300% growth.
Press down with your knuckles or silicone spatula to create a uniform surface and to push out air.
At a temperature of 78ºF, it typically takes up to 10-12 hours for this sweet stiff levain to be at peak. For my starter I typically see 3-3.5 times increase in size at peak. The levain will smell sweet with only a mild tang.
Tangzhong
Put about 1” of water sauce pan set on medium high heat. In the bowl of the stand mixer stir the milk and flour until blended. Then place the bowl on the sauce pan to cook the tangzhong (Bain Marie) for several minutes until well thickened, stirring regularly with a spoon or heat-resistant spatula. Theoretically it should reach 65ºC (149ºF) but I don’t find I need to measure the temperature as the tangzhong gelatinizes at this temperature. Let cool in the bowl and then refrigerate until the next morning.
Flax seed gel
Grind 1 tbsp of flax seeds and combine with 2-3 tbsp of water and stir to form a thick gel.
Cornstarch glaze
Combine ¼ tsp of corn starch and ¼ cup of water in a measuring cup and stir to dissolve. Microwave for 20-40 seconds in pulses until the cornstarch glaze thickens.
Dough
Into the bowl of a stand mixer with the tangzhong, add the soy milk (consider holding back 10 g of soy milk and adding later if this is the first time you’re making this), ground flax seed gel, salt, diastatic malt (optional) and levain. Mix and then break up the levain into many smaller pieces. Next add the flour. I like to use my spatula to mix until there aren’t many dry areas. Allow the flour to hydrate (fermentolyse) for 20-30 minutes. Mix on low speed and then medium speed until moderate gluten development this may take 5-10 mins. You may want to scrape the sides of the bowl during the first 5 minutes of mixing. Next drizzle in the toasted walnut oil a little at a time. Slow the mixer down to avoid splashing the oil at you. The dough may come apart, be patient, continue to mix until it comes together before drizzling in more oil. Once all the oil has been added and incorporated increase the speed gradually to medium. Mix at medium speed until the gluten is well developed, approximately 10 mins. You will want to check gluten development by windowpane during this time and stop mixing when you get a good windowpane. You should be able to pull a good windowpane, not quite as good as a white flour because the bran will interrupt the windowpane somewhat.
On the counter, shape the dough into a tight ball, cover in the bowl and ferment for 4-4.5 hours at 82ºF. There should be some rise visible at this stage.
You can next place the dough into the fridge to chill the dough for about 1.5 hours, this makes rolling the dough easier to shape. Remember, if you do so the final proof will take longer. Alternatively, you can do a cold retard in the fridge overnight, however, you may find that this increases the tang in your bread.
Prepare your pans by greasing them or line with parchment paper. I used a muffin pan oiled with walnut oil.
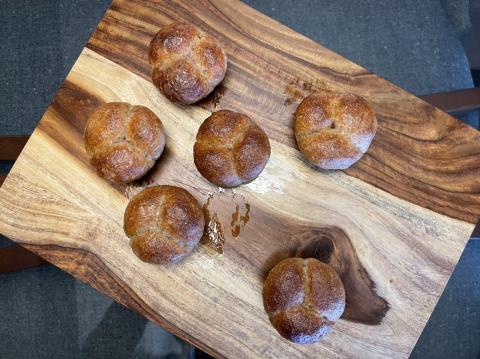
Lightly flour the top of the dough. Scrape the dough out onto a clean counter top and divide it into six. I like to weigh them to have equal sized bun. Shape each tightly into a boule, allow to rest 5 mins. Flatten each boule, divide it into three pieces shaping each into a small boule. Place each set of three small boules into the muffin tin to bake into a three lobed bun.
Cover and let proof for 3-5 hours at a warm temperature. I proof at 82°F. You will need longer than 3-5 hours if you chilled your dough for shaping. I proof until the top of the dough comes to within 1 cm of the top edge of the pan.
Preheat the oven to 350°F. Prepare your cornstarch glaze.
Bake 30-35 mins for rolls.
Apply cornstarch glaze when the bread is done, then place back in oven for just 1 minute.
One change I would make next time other than adjust the timing which wasn’t great (I shaped far too early because I had to get out of the house) is that I would slightly reduce the milk by 5% or so as the dough was difficult to shape due to stickiness. I wonder if the stickiness is in part from the flax seed gel used to replace the egg white. I’d be curious to try this again going with my initial plan for aquafaba, but using a no salt added can of chickpeas.
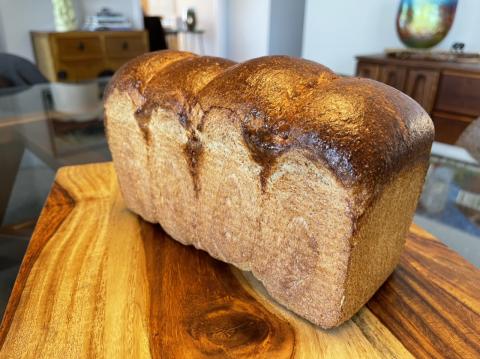
In the end, these were delicious and had a great amount of nutty flavour. It is impossible in my mind to replace the flavour from dairy fat, but these are delicious in their own way and much healthier using walnut oil, soy milk and flax seeds. Someone might ask why I didn’t use vegan butter, the ones I looked at often had unhealthy fats in them such as coconut oil so I figured if I was going to make a vegan version of a milk bread it should be healthier if I was going to skip the dairy.
My index of bakes