The Fresh Loaf

A Community of Amateur Bakers and Artisan Bread Enthusiasts.

Recent Blog Entries

tpassin's picture
tpassin

I used the same formula as for my 50-50 Emmer bread -

https://www.thefreshloaf.com/node/72946/50-emmer-sourdough

and made rolls instead of a loaf.  The process was the same.  I portioned the dough into 4-oz (114g) pieces.  This might be a little large for a roll, and I would probably go for either 3 or 3.5 oz next time (85 - 100 g).  The dough, though a bit sticky,  was easy to shape as long as I used a little flour on my hands and the bench.  The rolls overnighted in the refrigerator on a parchment-covered cutting board, covered with a sheet of plastic wrap. There was no sign of drying out or slumping.

To get the glaze, I mixed a little water with an egg yolk and brushed on a double layer after slashing.  I have found that using an egg yolk instead of a whole egg makes for a deeper glaze, sometimes even looking like it was lacquered.

These were baked with steam on a baking steel at 450° F for 15 minutes.

The crust is softish, which is good for a roll.  The crumb and flavor are just about the same as for the linked 50% emmer loaf. 

Benito's picture
Benito

I’ve been wanting to try baking this style of bread for some time, but just couldn’t get my nerve up to trying it.  Despite its name, it seems that it is really an Asian style of bread.  I’m guessing that the Danish part of it is that it is somewhat like a danish as in the pastry.  Also, this isn’t something I could try during the heat of the summer and this week we are finally having some normal autumn weather.

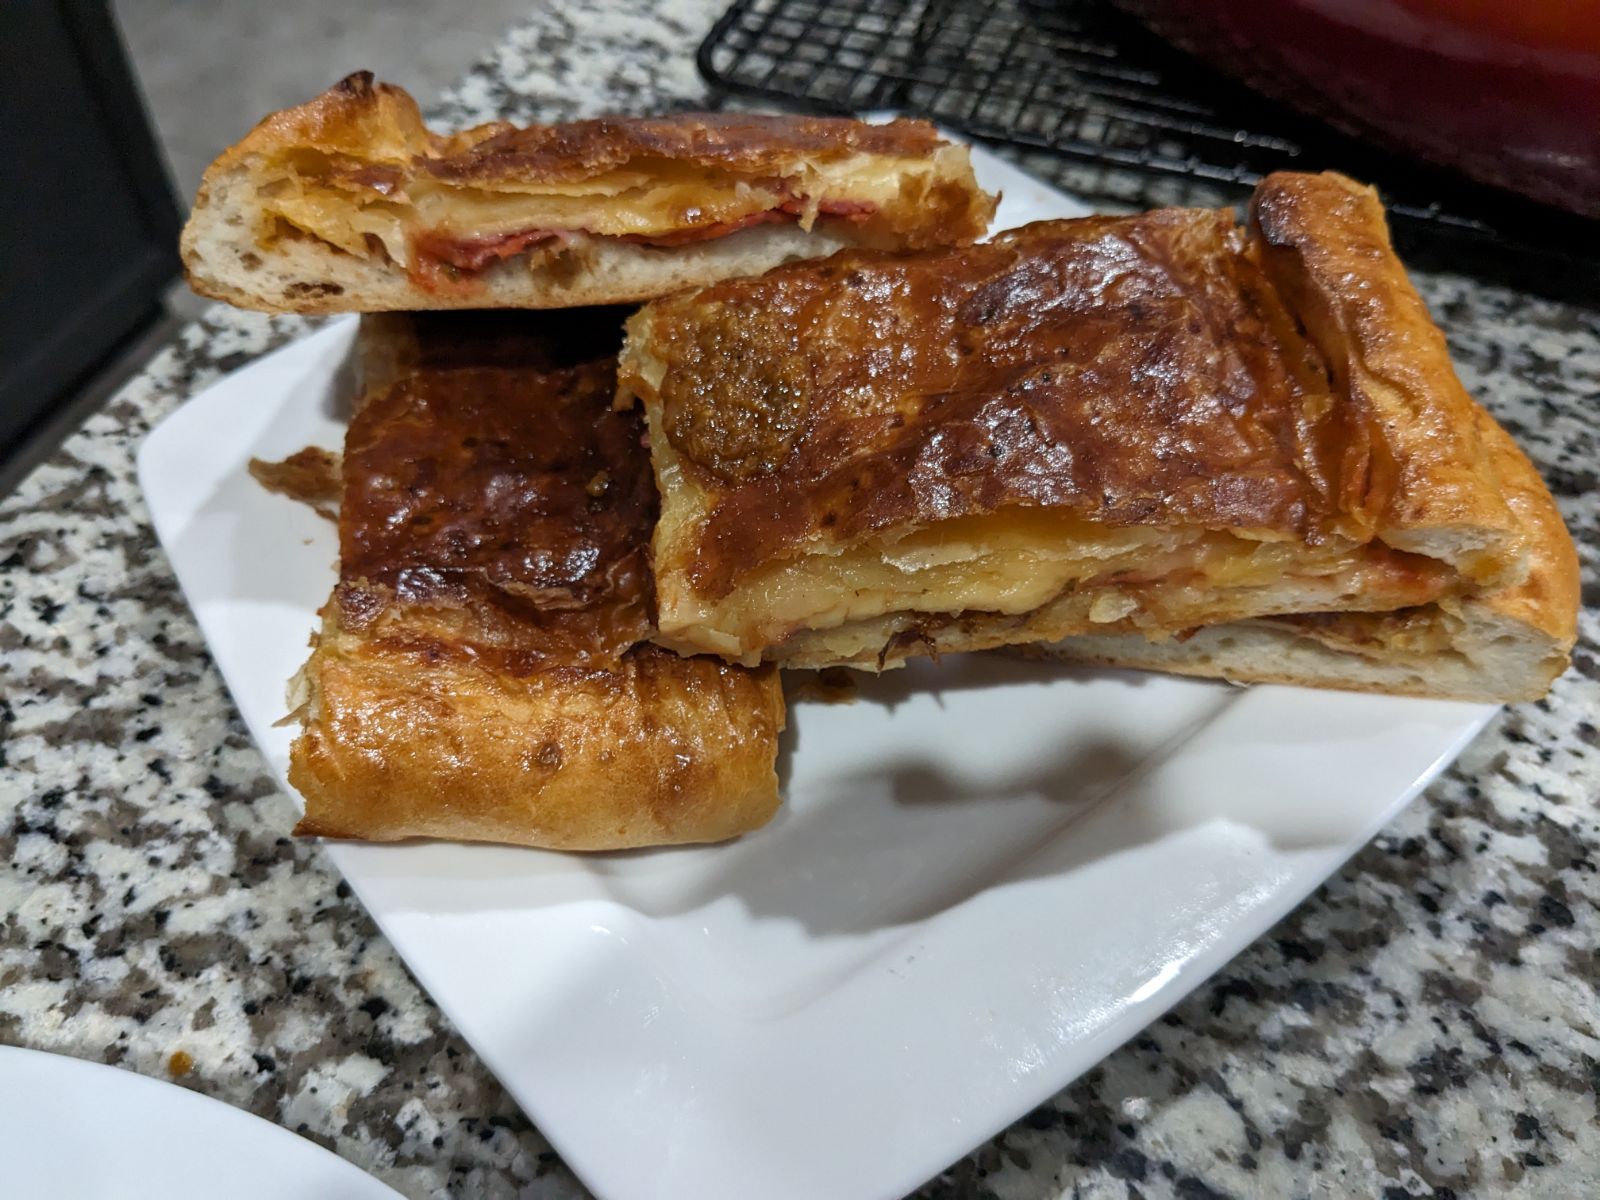
To make this bread one starts by making a somewhat stiff enriched dough.  Then you make a flat square of butter that then gets sandwiched inside the dough.  This gets a series of folds resulting in 12 layers.  One has to keep the butter cold enough so that it doesn’t melt into the dough, yet when rolling it out, warm enough to roll out.

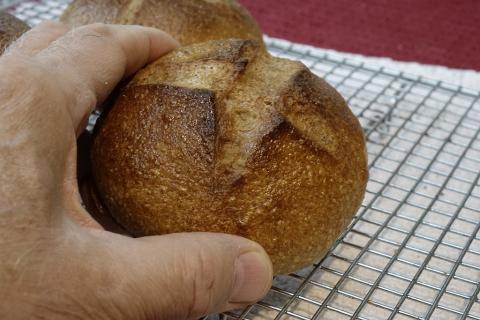
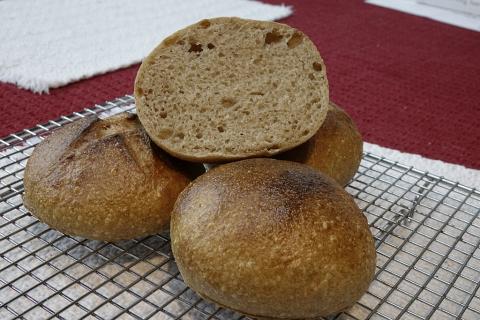
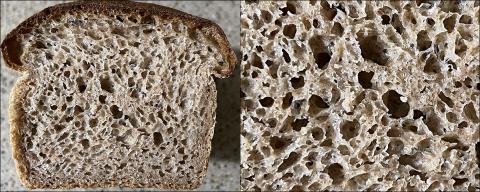
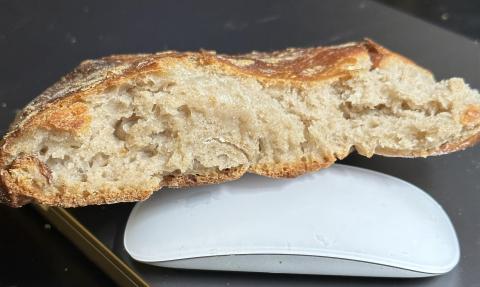
For my first attempt at this type of lamination, I’m quite pleased with the outcome.

I’ve altered the formula just a bit to fit my 4x4x9” Pullman pan from the original recipe by Chiew See of Autumn Kitchen on IG/Youtube.

To the bowl of a standmixer add milk, IDY, sugar and salt, mix to dissolve.  Add flour and mix until the dough starts to come together.  Add butter in pats until well incorporated.  Mix until moderate gluten development, it doesn’t need to reach good windowpane.  In fact, I found this dough too low hydration so added some extra milk and ended up fully hand kneading it.

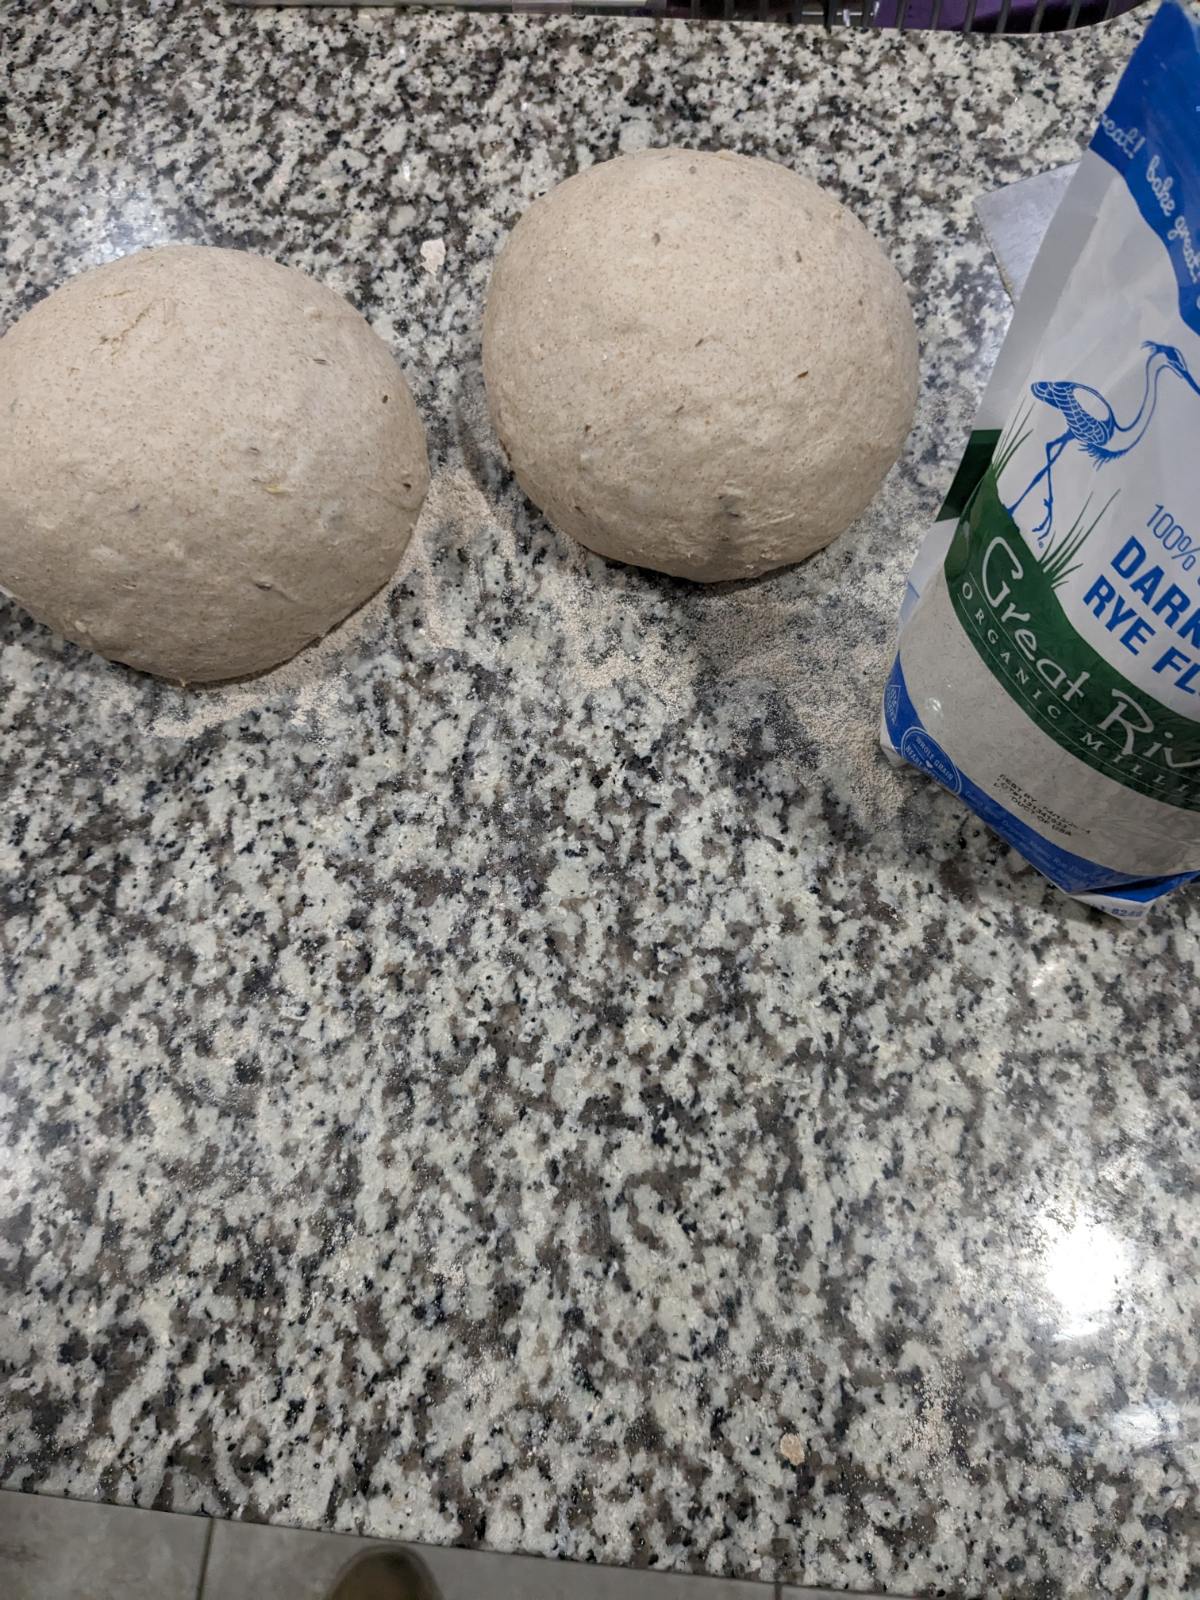
Flatten the dough with a rolling pin into a rectangular shape.  Wrap with clingfilm, leaving space for dough to expand.  Ferment at 28°C for 30 mins.  Freeze the dough for 1 hour then transfer to the fridge 3°C overnight.

Fold parchment paper into 18 x 18 cm square.  Weight out 154 g butter, place it on the parchment square, joining the pieces so that it starts to fill the square.  Fold the parchment to enclose the butter.  Use your rolling pin to strike or press the butter to soften it without warming it excessively.  Roll the butter out to fill the 18x18 square using the rolling pin ensuring that the butter is uniform thickness throughout and that the butter fills right to the corners.  Refrigerate the butter overnight.

In the morning remove both the butter and the dough from the fridge.  Both the butter and the dough needs to have the same firmness before laminating them together, if the butter is harder, let it soften first. You should be able to leave an indent in the butter if you press into it.  The butter should be pliable and be lightly bent without breaking, its temperature should be between 13-15°C.  

Roll the dough into an 18x36 cm rectangle, the dough should be twice the size of the butter.  Brush off excess flour.  Place butter in the center of the dough, fold the dough to enclose the butter pinching the dough where the ends meet to seal.  Turn the dough 90* so that the open end is towards you and the closed sides are perpendicular to you.  Gently press down on the dough with the rolling pin before rolling.  Lightly dust with flour, then roll from center to the ends with firm and even strokes.  Flip the dough and continue to roll to 21x53 cm.  Trim off the uneven ends.  Brush off excess flour.

Do a double or book fold, this brings the cut ends of the dough together folding one edge to two thirds of the length then fold the other end to meet.  Next fold the dough in half.  You now have four layers.  Wrap with clingfilm and refrigerate for 30 mins.

Remove dough from the fridge, give it a few minutes if it is too hard before rolling.  Gently press down with the rolling pin.  If there are any bubbles pop with a toothpick.  With either of the open ends towards you roll the dough to about 21x53cm.  Do a lenter fold (letterfold in thirds) giving you three layers for a total of 12.  Wrap in clingfilm and refrigerate for at least 1 hour.

Prepare your pan by greasing it with butter.

Remove the dough from the fridge allowing it to soften until it is soft enough to roll.  Again using the same methods roll the dough out to slightly larger than 30x21 cm.  Trim all four sides to achieve 30x21 cm, keep the scraps for final shaping.

We will require 9 strips that are 30 cm long so mark 2.33 cm intervals on the 21 cm sides of the dough.  Cut the dough into 9 strips 2.33x30 cm.  We will be braiding three sets of 3 strips, so starting with 3 strips, stack the ends together with the center strand at the bottom and press down so that end sticks.  Braid the 3 strands so that the cut sides of the strips face up if possible.  Pinch to seal the end.  Flip it over, place ⅓ of the trimmings you kept into this underside of the braid now facing up.  Fold the two ends together and then place this into the greased pan folded side down.  Repeat with the other two sets of three strands so that there are three sets of braided dough in the pan.  The sets are placed side by side in the pan.

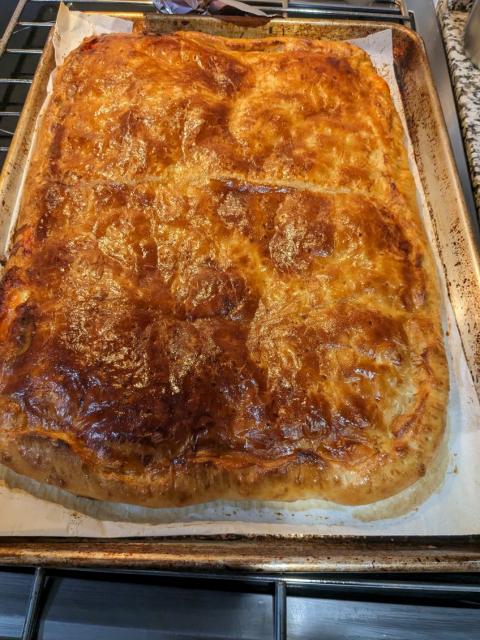
Ferment between 27-28°C 80-82°F until the pan is about 80% filled (3-4 hours).  30 mins prior to baking preheat the oven at 200°C or 390°F.   Egg wash the dough when preheating starts and then again immediately prior to baking.  Optional, after second egg wash sprinkle almond flakes on the top.  Place on a lined pan to bake as the dough will leak melted butter from the tin.

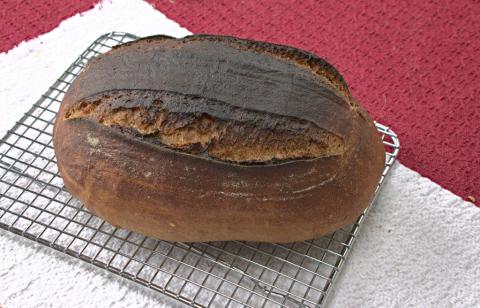
Bake at 200°C 390°F for 8 mins, then drop temperature to 170°C or 340°F and bake for another 25-30 mins or until golden brown.  Allow the loaf to cool prior to slicing.

After the first set of folds.

Plaiting completed and arranged in the Pullman Pan.

About 30 mins prior to baking just before the first egg/milk wash.

 My index of bakes.


The Roadside Pie King's picture
The Roadside Pi...


La Parigina. Neapolitan stuffed pizza.


What is special about Parmigina? Pizza dough on the bottom puff pastry on top. 

Everything is on point. I just need to fill the canolii. I even got the kitchen back in order. Thank the Lord, for dishwashers!

Another Girl's picture
Another Girl

I’ve been ordering berries from Barton Springs Mill for several years and have enjoyed every single product I’ve ordered from them. The flavor profiles they provide have been pretty accurate from my perspective, which is very helpful. Some nine or ten months ago, their Quanah wheat caught my eye. It is described as a hard red winter wheat and its flavor profile – buttery, creamy, malty – is right up my alley. A bag was duly ordered and, regrettably, it has been in storage ever since, waiting for me to bake my way through all the berries ahead of it in queue. Now that I've used it a few times, I thought I'd share my impressions. For reference, I followed the basic formula and process detailed in my Easy Peasy Pan Bread post, using a mix of 2/3 Quanah and 1/3 AP (KAF).

The spoiler is that we really, really like this wheat for sandwich breads. BSM reports the protein content for the berries at 11.5%, but the flour at 9.5%. Not sure why that is, maybe just a typo, but in my experience thus far, it makes a soft, slack dough hinting that 9.5% might be correct. After some time and a fold or two, it developed some extensibility, but elasticity required some more folds. It ended up being a nice dough. The first time I used this flour, the hydration was probably in the 90% range but that seemed to be too much so it was dialed back to 85% for the next bake. That worked fine. The rise is good, very acceptable. The bread is lighter in color than some other red wheats and the flavor is outstanding. It is mild tasting with no bitterness, but it is not bland by any stretch. To the contrary, it has a nice richness. I don’t think any sweeteners would be required with this flour, even at 100%. I baked it to about 205℉ and it keeps for about a week. I've ordered a few more bags because we like it so much.

I don’t usually leaven high percentage WW with sourdough because we don’t care for the flavor; however, I am curious how the mild flavor of Quanah will partner with my mild new(ish) low hydration white starter, so that bake will be next.

tpassin's picture
tpassin

Recently I've posted about bakes using 50% spelt and 50% einkorn:

https://www.thefreshloaf.com/node/72911/50-einkorn-take-2
https://www.thefreshloaf.com/node/72889/50-spelt

Today's loaf used the third "ancient" grain - emmer.  I've never used it before.

As for the other two flours, this emmer was stoneground by a local restored water mill (Locke's Mill in northwestern Virginia).  The bits of bran were much smaller than with the einkorn flour, and I had to use a finer sieve to remove them.  I ended up with about a 94% extraction, made a soaker with the bran, and added the soaker to the flour during mixing.

The formula was the same as I used for the einkorn loaf, except that I expected that the water might come out a little differently since einkorn is known for being slow to absorb water.

Formula
========
220g sifted emmer (Locke's mill)
all the soaker
200g KA bread flour
150g white sourdough starter, refreshed earlier in the day
285g water (includes water in soaker and water added during mixing)
10g salt

During mixing I added 15g more water than originally planned to hydrate some dry flour in the bottom of the mixing bowl.  This water was absorbed well and I did not feel a need to add any more later.  By contrast, the einkorn dough didn't want to absorb added water and I actually left some liquid water in the bowl to be worked in during later S&Fs.

Other than the water and improved handling, the process was the same as I had used for the einkorn loaf. The dough rested after mixing for 35 minutes, and had two more S&F sessions over the next 1 3/4 hours.  Bulk ferment lasted 6 hours.  Shaped the loaf with no perform - the dough had become very extensible so I stretched it very far in the first stages of shaping.

The shaped loaf proofed for 55 minutes in a proofing basked, and then was refrigerated overnight for 13 hours.  After it warmed up for 15 minutes the loaf was turned out onto a parchment-covered cutting board, slashed, and slid into the preheated oven onto a baking steel.  I generated steam by pouring water onto rocks in a cast iron pan in the bottom of the oven.

I baked the loaf at 400° F for 40 minutes.  The top had turned black, which was a surprise, and the internal temperature was 208° F. From the pictures below you can see that there was good expansion in the oven and the crumb came out nicely open for this kind of bread.  The flavor is outstanding, the best (to my taste) of the three kinds: spelt, einkorn, emmer.  I would say that this loaf has the ideal flavor I always look for an a whole-wheat type of loaf.

The dough was easy to handle and work with, now that I've gained experience with the spelt and einkorn variations.  I'd say the dough properties were between the spelt and einkorn loaves.  And now for the photos:

Isand66's picture
Isand66


  I made a new version of my pretzel rolls to bring to my Cousin’s for Rosh Hashanah dinner along with some of my standard ones.  Everyone seemed to really like the new ones so I guess I must have done something right :). 

This version had some fresh ground rye along with some dark cocoa powder along with the Guinness which really gave the final dough a nice malty flavor.  

I used pretzel salt, black sesame seeds and everything bagel topping for the toppings.  As usual these were made with a lye bath

Give these a try and I think you will be very satisfied.

If you haven’t tried pretzel rolls yet, give these a try.

One note, if you use pretzel salt like I do on a portion of the rolls, you cannot cover the rolls with anything or the humidity in the air will react with the salt and you will get mushy salted rolls.  It’s best to freeze any you don’t use right away.

Lye really does make a big difference.  I know a lot of people are afraid to use it, but honestly you are using such a small amount in the water bath that unless you pour it in your eyes, it will do very little to your hands, etc.  The lye really gives you the authentic pretzel flavor and look.


Caution:  When using the Lye make sure you wear gloves, long sleeves and protective eye gear. Also, never add Lye to hot water or it will bubble over and probably burn you.

Formula


For Lye Bath (3.5% Solution

2 Liters (1836 grams) of Cold water

70 grams Sodium Hydroxide Crystals

Make the Levain

Add your seed starter (20 grams) to the indicated amount of flour and water and mix until incorporated.  Cover and let sit out at room temperature of in your proofer until nice and bubbly around 6-10 hours depending on your temperature.  Use immediately or refrigerate for a few days until ready to mix the main dough.

Procedure

Add the diastatic malt powder to the Guinness and stir.  Add the flours in your mixing bowl and slowly add the Guinness mixture.  Mix for about 1 minute until combined.  Cut your starter in pieces and lay on top of the flour mixture and cover and let rest for 30 minutes to 1 hour so the flour can absorb the water.  Note: if you are using the Ankarsrum mixer like I do, you add the liquid first, add the starter to the liquids and then the flour.  I mix just until everything is combined, reserving some of the liquid for after the autolyze.

Next add the salt and butter (Softened) and mix for 6 minutes on low.    Place the dough in a slightly oiled bowl and do a couple of stretch and folds.  Cover the bowl and let it rest for 10-15 minutes.  Do another stretch and fold in the bowl and let it rest another 10-15 minutes.  Do another stretch and fold and let the dough sit out in the covered bowl for another 1.5 hours.  Place the dough in the refrigerator until ready to bake the next day.

When ready to bake take the dough out and leave it covered in your bowl for 1 hour at around 75-80 F.  Next divide the dough into pieces that are 110 grams each or 135 grams for larger rolls .  Shape as rolls and place on a baking sheet and cover with either a moist towel or plastic wrap sprayed with cooking spray.  Let it rest for around 60 minutes to about 1/2 proof.

While the rolls are proofing, fill a large stock pot with 2 liters of cold water.  Measure out the Lye and slowly add it to the cold water.  (DO NOT EVER ADD LYE TO HOT WATER).  Cover the pot and bring it to a rolling boil and then shut off the heat.

Pre-heat your oven to 450 degrees.  When the rolls are proofed sufficiently, prepare to dip them for about 15 seconds in the lye bath upside down.  Let them drain on a bakers rack over a cookie tray covered with a towel or parchment paper.  After draining for a minute you can transfer them to a cookie/baking sheet that has been sprayed with cooking spray.  You want to use a stainless steel cooking sheet as aluminum may react with the lye and peel.   I know this from experience and I had to cut off the bottoms of half the rolls I made.  I actually use my Silpat non-stick sheets which work like a charm.

When ready to bake, score each roll as desired and sprinkle with pretzel salt or topping of your choice.  

Bake for about 15-20 minutes until they are golden brown and register about 200 F in the middle.  Let them cool on a bakers rack until you can’t wait any longer!

Note: you cannot store these in a plastic bag or covered really otherwise the salt will react with the moisture in the air and you will end up with soggy tops.  I place them in a paper bag and leave it open so the air circulates.

Enjoy!

The Roadside Pie King's picture
The Roadside Pi...

Phase 1 - the bulk fermentation

Phase 2 - the pre-shape

Phase 3 - the final shaping


MPH23's picture
MPH23

This seems to a problem with almost every recipe that I try (see picture).


For these loaves I tried:

https://www.theperfectloaf.com/best-sourdough-recipe/

I followed precisely as written.


There was very little change to the dough appearance/behavior after an overnight cold ferment. It was pretty solid. When I went to move it from banneton to dutch oven I could feel it deflate more (not that there was a lot to begin with).


Flours:


Bob's Red Mill Whole Weat


Dove Farms strong white.


Advice?


Kjknits's picture
Kjknits

I was watching random suggested videos on YouTube recently, and Lisa from Farmhouse on Boone popped up making sourdough puff pastry (recipe here). I’ve never made true puff pastry, with the butter envelope and all of that, instead being quite satisfied with King Arthur’s fast and easy puff pastry (It’s made like a biscuit dough; the butter is cut into the dry ingredients, then you add sour cream as the “liquid” and perform a few sets of folds…I always do more than the one fold they call for in the recipe).

At any rate, I was intrigued with the sourdough aspect of Lisa’s puff pastry, so I had to try it. It came out amazing! The recipe yields 2.5 lbs of dough. The first day I made four apple turnovers with half a pound of the dough. They were kind of goofy looking, because I forgot how to shape them (it’s been a while), but absolutely delicious and so, so flaky. 

The next day I used one pound to make a lattice crust for my go-to chicken pot pie recipe. I baked the crust on the filling…next time I’ll bake it separately on a baking sheet for maximum rise and flakiness, because the bottom of the dough stayed gummy on the filling and there wasn’t as much puff. No pics of that; we gobbled it up for dinner before I had a chance to take any. 

One pound is in the freezer and will probably make either a breakfast puff pastry “pizza” (you roll the dough out and put some cooked bacon or sausage on it, then scrambled eggs, then grated cheese and bake, like this recipe), or maybe some ham and cheese pinwheels for a fun “fancy” dinner. 

tpassin's picture
tpassin

This loaf is a slightly changed version of the bread in my previous 50% einkorn post

https://www.thefreshloaf.com/node/72901/50-einkorn

Here's what I changed:

1. Used KA bread flour for all the white flour, as I had intended all along;
2. For the soaker, I used more water with the bran (about 30g) and heated the mixture to about 150° F;
3. During initial mixing I withheld about 50g of the planned water (see below);
4. The hydration ended slightly lower - about 20g of water less;
5. I proofed the loaf in a proofing basket;
6. I retarded the loaf in the refrigerator overnight.

Here's the formula from before:

Formula
========
220g sifted einkorn (Locke's mill)
all the soaker
200g KA bread flour
150g white sourdough starter
270g water (but see #3 below)
10g salt

For #3, after I mixed everything by hand and worked all the water in by repeatedly squeezing the dough, I thought the dough could handle more water.  I was mindful that in reading, it's always said that einkorn either can't absorb as much water or that it absorbs water slowly.  My plan was to get gluten development started and then work in more water.

This seemed to work - the dough was not sticky or hard to handle, so I added about 30g more.  It didn't absorb much, so I let the dough rest covered for half an hour with the unabsorbed water sitting in the bottom of the bowl.  Then I mixed by squeezing and kneading, and all that water got absorbed.  The dough felt good and easy to handle, so I didn't add any more water.  This means the total water was about 250g, not the 270g originally planned.  This makes the overall hydration including water and flour in the starter about 66%.

After this, I did a first S&F after 30 minutes - basically coil folds, though I took the dough out and stretched it in my hands for the last two turns.  A second S&F after a further 40 minutes, also between my hands.  The dough was getting extensible, but was willing to hold a shape, and was not sticky.  Altogether, the dough was much easier to handle compared with the previous einkorn loaf.

After a 5 hour bulk ferment, the dough had more than doubled and was growing rapidly.  I shaped it into a log without making a preform, and put it seam side up in the rattan proofing basket. Shaping was easier than the previous loaf because the dough was firmer and not sticky.  I covered it with a thin cotton hand towel.

After 45 minutes the loaf was rising well and possibly proofed well enough to bake, like the previous loaf after the same BF and proof times.  Instead, I put the loaf into the fridge.

The next morning I preheated the oven to 410° F for an hour. I took the loaf out of the fridge 10 minutes before bake time.  The top (while in the basket - i.e., the seam side) was pretty dry so I wiped it with water.  I inverted the loaf onto a parchment-covered cutting board, slashed it, and baked with initial steam for 37 minutes, to internal temperature 208° F.

The results were very pleasing.  The loaf was not overproofed during the overnight retardation, the crumb was a little more open than the previous loaf and was on the soft side (like the previous loaf).  The shape of the loaf was more pleasing because it had not had a chance to spread sideways much, and the overall volume was good.

Overall, I'm happy with this loaf, and the experience makes me more confident about raising the proportion of einkorn in the future.

In the pictures below, the slice may look smallish because it is the first slice off the end.


Pages

Subscribe to Recent Blog Entries