The Fresh Loaf

A Community of Amateur Bakers and Artisan Bread Enthusiasts.

Benito's blog

Benito's picture
Benito

I wanted to try this recipe again but with more of the porridge and cooked a bit longer. I increased the porridge to 15% and cooked it with half milk and water. However, in order to keep the porridge moist during cooking, an unspecified about of water was added. The porridge is kept at room temperature covered until the next day.


I built an overnight stiff levain which was kept at 76ºF which started at a pH of 5.26.
In the morning, I mixed salt, all the water and all the whole wheat and this was allowed to hydrate for 30 mins.
At the end of this short saltolyse the levain was at 3.5-4x rise and the pH was 4.12. It was added to the wet dough and broken up and hydrated. The bread flour was then added, the pH at this point was 5.26. After a 10 min rest slap and folds x 200 were done.
An additional 16 g of water was added via bassinage bringing the hydration not including the porridge to 80%. After a 5 mins rest the porridge was added through a series of stretch and folds. pH now was 5.36. After a 30 mins rest a bench letterfold was done. Then at 30 min intervals a series of coil folds were done until the dough appeared to have good structure in this case 4 were done.
The dough was then allowed to fermented at 80ºF until it showed a rise of 35% and a pH of 4.38 at which time shaping was done. The shaped dough in banneton was then allowed to start final warm proofing on the counter until the pH reached 4.1 and the rise was 50%. Cold retard was started 3ºF overnight for next morning baking.
Pre-heat oven with cast iron skillet in the oven and set up for open steam baking.
30 mins prior to baking, pour 1 L of boiling water into metal loaf pan with Sylvia towel and place on baking steel on the lowest rack of the oven.
Once oven reaches 500ºF turn dough out of banneton, brush excess rice flour off, score and then brush with water. Transfer to oven. Pour 250 mL of boiling water into the cast iron skillet on a high shelf, high enough that the dough have fully bloom. Drop temperature to 450ºF and bake with steam for 25 mins. Then vent oven and remove all steaming gear and drop temperature to 425ºF. Bake for another 25-30 mins rotating as needed.

Benito's picture
Benito

I’m a bit out of practice making pastry. I usually only bake a pie when we have friends over for dinner. So with the pandemic it has been a while since I made one. For this pie I decided to try Kate McDermott’s all butter pastry from her book Art of Pie.

Traditional Art of the Pie All-Butter Dough

An all-butter crust is not as flaky as a butter and leaf lard crust, but the flavor can’t be beat.

FOR ONE DOUBLE-CRUST PIE OR TWO SINGLE-CRUST PIES

INGREDIENTS

2½ cups (363 grams) all-purpose flour, unbleached

½ teaspoon (3 grams) salt

14 tablespoons (196 grams) salted or unsalted butter, cut into tablespoon-size pieces

½ cup (118 grams) ice water + 1–2 tablespoons (15–30 grams) more as needed

I added 20 g of sugar to this to help with browning.

As per usual with pastry, getting everything cold including your hands is essential to prevent the butter from melting into the dough rather than staying ins sheets between layers of the dough. It is hard to avoid kneading it as a bread baker but we must resist the temptation to knead.

I sprinkle the water on about 1 tbsp at a time and then toss the flour/butter with a fork. After I added about 120 g of water, I pick up a handful of the dough and squeeze and once the dough barely holds together then the dough is hydrated enough. There may still be a few dry areas, I don’t worry about those as the 1 hour rest to allow the dough to hydration. I bring it all together I compress and then fold the dough several times in the bowl, then divide into two and then wrap in plastic and rest in the fridge before rolling the dough out.

I still have rhubarb that my close friends gave me from their garden, it was frozen away. So I decided I’d try a different combination of fruit to go with the rhubarb.
Sweet raspberries pair well with tart rhubarb, and the two combine into a beautiful ruby-red filling. Vanilla bean scrapings add a creamy smoothness to the mix.

MAKES 1 (9-inch / 23-cm) PIE

1 recipe for double pie crust

1½ pounds / 680 g rhubarb, trimmed and coarsely chopped

8 ounces frozen raspberries

2 teaspoons freshly squeezed lemon juice

1 teaspoon vanilla extract

1 cup / 192 g granulated sugar

⅓ cup + 1 tbsp cornstarch

⅛ teaspoon fine salt

I cooked this until it just started to thicken and then cooled overnight.

In the morning assemble the pie, filling the base with the raspberry rhubarb filling which has nicely thickened in the fridge. Do your lattice top crust and then fold and crimp the edges as you prefer. Place the pie in the freezer while the oven heats to 400ºF.

Once the oven has reached temperature, apply an egg milk wash to the lattice and then apply sugar. Place the pie on a lined cookie sheet and then place onto your baking steel on the lowest rack. I find you can get a nice dry browned bottom crust by baking low and on a preheated baking steel.

Bake for 30 mins at 400ºF then lower the oven temperature to 350ºF. Rotate during the final half of the baking and keep an eye on the top crust. I usually shield the crimped crust with a pie shield and seldom need to do any other shielding.

Benito's picture
Benito

Back from two weeks off without any baking. My starter was refreshed two weeks ago at 50% hydration, given 1 hour at room temperature then refrigerated. The pH had only dropped to 4.4 or so when I returned so there was plenty of food left. I discarded some, then brought the hydration up to 100% and did a small feed. He tripled in 3 hours but had not yet peaked, so I discarded and fed him again. 5 hours later he had peaked at 3.5-4x with the dome just starting to flatten. He was ready to build a levain for this bake.

You may have noticed my gradually increasing the whole wheat in my Hokkaido sourdough milk breads lately. I finally decided it was time to do 100% whole wheat and this didn’t disappoint.

For a 9” x 4” x 4” pullman pan

Sweet Stiff Starter
• 53g stoneground unsifted organic whole wheat flour
• 24g water
• 18g light brown sugar
• 18g sourdough starter ~100% hydration
1:1.33:2.9:1 starter:water:flour:sugar

Tangzhong classic 1:5 ratio
• 89g milk (adjusted down to 1:5 ratio from original)
• 18g stoneground unsifted organic whole wheat flour

Dough Dry Ingredients
• 9 g vital wheat gluten
· 424 g stoneground unsifted organic whole wheat flour
• 54g sugar 12.5%
• 7g salt 1.6%

Dough Wet Ingredients
• 180g milk (consider adding more milk 5 g next time, dough was stiff)
• 50g egg beaten (about 1 lg egg)
• 60g butter 13.9% softened but do not melt, unless you are mixing with the mixer then melt. Combine with 30 g of flour to make easier to add to dough if hand mixing.

Total flour = 513 g

Total weight 1004 g

Pre-bake Wash
• 1 egg beaten
• 1 Tbsp milk

Post-bake Wash
• 1 Tbsp butter

Instructions
Starter
Mix the starter ingredients in a jar or pyrex container with space for at least 50% growth.  In fact I usually get 2.5-3.5x growth.
Press down with your knuckles to create a uniform surface and to push out air.
At room temperature, it typically takes up to 10 hours for this sweet stiff levain to be at peak.
Tangzhong
In a sauce pan set on med-low heat, whisk the milk and flour until blended. Then cook for several minutes until thickened, stirring regularly with a spoon or heat-resistant spatula. Let cool in the pan or, for faster results, in a new bowl.

Dough
In the bowl of a stand mixer, briefly whisk the dry dough ingredients, and then add the sweet stiff starter, separating it into 5-6 portions as you add it to the bowl.
Now pour/scrape in all the wet ingredients (including the tangzhong), with the melted butter last. With the dough hook attachment, mix on low speed for a minute, scrape down the sides, and then mix on medium speed for 15-20 minutes. The dough will seem very soft, but as you approach the 15-20 minute mark, it should not stick to your hands and should pass the windowpane test.
Transfer the dough to a lightly oiled bowl, form it into a ball, flip it smooth side up, cover and let rise for 6-12 hours depending on room temperature. You can place the dough into the fridge to chill the dough for about 1.5 hours, this makes rolling the dough easier.
Prepare your pans by greasing them or line with parchment paper.
Scrape the dough out onto a clean counter top. Lightly flour the bench. Press the dough into a rectangle and divide it into four. Shape each tightly into a boule, allow to rest 5 mins. Using a rolling pin roll each ball out and then letterfold. Turn 90* and using a rolling pin roll each out to at least 8”. Roll each into a tight roll with some tension. Arrange the rolls of dough inside your lined pan alternating the direction of the swirls. This should allow a greater rise during proof and in the oven.
Cover and let proof for 2-4 hours (more if you put the dough in the refrigerator). I proof until the top of the dough comes to within 1 cm of the top edge of the pan.
Preheat the oven to 350F and brush the dough with the egg-milk wash. Just prior to baking brush with the egg-milk wash again.

Bake the loaves for 50 minutes or until the internal temperature is at least 190F. Shield your loaf if it gets brown early in the baking process. After 50 mins remove the bread from the pan and bake a further 10 mins by placing the loaf directly in the oven on the rack with the oven turned down to 325ºF. You can brush the top of the loaf with butter if you wish at this point while the bread is still hot.

Wonderful flavour, there isn’t any real sour tang and certainly no bitterness that I had always thought was characteristic of 100% whole wheat breads like this that I ate as a child. I’m not sure that the Vital Wheat Gluten was necessary, but I wanted to ensure that I was able to get the shreddable crumb that this type of bread should have.

Benny


Benito's picture
Benito


I baked this loaf as a present to thank neighbors of ours who will be taking care of our plants while we are away on our first vacation of almost two years.  It was a last minute decision to make a country sourdough and there was a weird issue with the aliquot jar measuring rise.  I have rarely had this happen but the aliquot jar never rose past 15% increase in volume.  It is really odd that this should happen, the dough for the aliquot jar was removed from the main dough after a very thorough mixing.  In fact, for the first time I used my stand mixer to knead this dough so you’d think that the levain would have been well incorporated in the dough.  Anyhow, since I’ve been following pH I used that along with the expansion of the main dough to decide when to call bulk quits.  The pH of the white flour levain at time of addition was 3.87.  At the end of mixing in the stand mixer the pH of the dough was 5.45.  End of bulk was pH 4.45 when the dough was shaped.  End of warm proof was pH 4.02.  Cold retard at 3ºC overnight and at the time of baking the next day the pH was 3.9.  

This dough is 80% hydration, 15% stoneground whole wheat, 5% whole rye, 50% bread flour and 30% all purpose flour.

Not a bad bake, but it certainly had a bit more spread than I would have liked, I suspect that the hydration may have been a bit too high for these flours. 

Benito's picture
Benito

Slowly working my way up in the percent whole wheat in my Hokkaido sourdough milk breads.  75% is the highest so far and I think it was quite successful.  I’m not sure how much higher I can go and still get the result that I’d like.  I did change things this time to add an autolyse because a majority of the flour is stoneground whole wheat.

For one loaf 9x4x4” Pullman pan


Ingredients


Sweet Stiff Starter 

• 53g bread flour 

• 24g water 

• 18g light brown sugar 

• 18g sourdough starter ~100% hydration 

1:1.33:2.9:1  starter:water:flour:sugar

@ 76ºF 10 hour not at peak


Tangzhong classic 1:5 ratio

• 89g milk (adjusted down to 1:5 ratio from original)

• 18g Whole Wheat flour   


Dough Dry Ingredients 

• 55 bread flour 

      · 305 g whole wheat        

• 54g sugar 12.5%

• 7g salt  1.6%


Dough Wet Ingredients 

• 169g milk 36.8%

• 50g egg beaten (about 1 lg egg)

• 60g butter 13.9% softened but do not melt, unless you are mixing with the mixer then melt.  Combine with 30 g of flour to make easier to add to dough if hand mixing.


Pre-bake Wash 

• 1 egg beaten


• 1 Tbsp milk

Instructions

Starter 

Mix the starter ingredients in a jar or pyrex container with space for at least 50% growth. (See gallery where 150ml grows to approximately 225ml.)

Press down with your knuckles to create a uniform surface and to push out air.

At room temperature, it typically takes 7-9 hours for this sweet stiff levain to be at peak.

Tangzhong 


In a sauce pan set on med-low heat, whisk the milk and flour until blended. Then cook for several minutes until thickened, stirring regularly with a spoon or heat-resistant spatula. Let cool in the pan or, for faster results, in a new bowl.


For my first bake, in the morning mixed the wet ingredients including the tangzhong with all the whole wheat flour to allow the bran to hydrate for 1.5 hours.  Added levain next and mixed to incorporate.


Next added sugar, salt and bread flour and mixed to incorporate, rest 10 mins.  Mixed until very good gluten development and windowpane.  

Transfer the dough to a lightly oiled bowl, form it into a ball, flip it smooth side up, cover and let rise for 6-12 hours depending on room temperature. Bulk lasted 5 hours at 82ºF.  You can place the dough into the fridge to chill the dough for about 1.5 hours, this makes rolling the dough easier.  I didn’t do that this time.

Prepare your pans by greasing them or line with parchment paper.

Scrape the dough out onto a clean counter top. Lightly flour the bench. Press the dough into a rectangle and divide it into four. Shape each tightly into a boule, allow to rest 5 mins. Using a rolling pin roll each ball out and then letterfold. Turn 90* and using a rolling pin roll each out to at least 8”. Roll each into a tight roll with some tension. Arrange the rolls of dough inside your lined pan alternating the direction of the swirls. This should allow a greater rise during proof and in the oven.

Cover and let proof for 4-6 hours (more if you put the dough in the refrigerator). I proof until the top of the dough comes to within 1 cm of the top edge of the pan.

Preheat the oven to 350F and brush the dough with the egg-milk wash.


Bake the loaves for 50 minutes or until the internal temperature is at least 190F. Shield your loaf if it gets brown early in the baking process. After 50 mins remove the bread from the pan and bake a further 10 mins by placing the loaf directly in the oven on the rack with the oven turned down to 325ºF. You can brush the top of the loaf with butter if you wish at this point while the bread is still hot.


I’m quite pleased with the oven spring this dough was able to achieve with this much whole wheat.  I think going higher than 75% I’ll probably need to add some vital wheat gluten in order to attain a shreddable crumb which is a characteristic of this style of bread.


 Alternate the direction of the swirls for better rise.

Benito's picture
Benito


Whenever I prepare pizza dough I make enough for two days of dinners for the two of us.  Since I ran out of the pesto, I decided to try a Capricciosa pizza.  This is a pizza with red sauce, artichokes, mushrooms, olives, ham (I used prosciutto) and mozarella.  I also added some Grana Padano.  For the red sauce, I opened a can of San Mariano tomatoes and removed three or four tomatoes and placed them into a bowl.  Using my hands I squeezed the tomatoes at first discarding the tomato water.  After the tomato water was squeezed from each tomato, I used my hands to process the tomatoes into a rough sauce.  I added about 1.5 tsp of EVOO, a small pinch of salt (don’t forget as the pizza bakes the sauce will concentrate so don’t over salt), 1 tsp of dried basil, 1 tsp of red wine vinegar and pepper to taste.  I don’t blend or process the sauce as it can make the sauce a bit bitter from breaking down the tomato seeds.

If you’re interested in the process and recipe for the dough, look at my previous post with all those details.

In retrospect, I think in the future I would at least partly bake the mushrooms and dry the artichokes before using them.  The toppings were, after baking, quite wet and although most of the crust stayed crisp, the very center of each pizza was wet.


Benito's picture
Benito

Does one need a pizza oven to make pizza at home?  I don’t think so although I’d love to have one 😉  I’ve been trying to fine tune my processes for making the dough and finally baking the pizza.  I’m still using the recipe from the TFL community bake but I’ll post it below for those interested along with my small alterations.

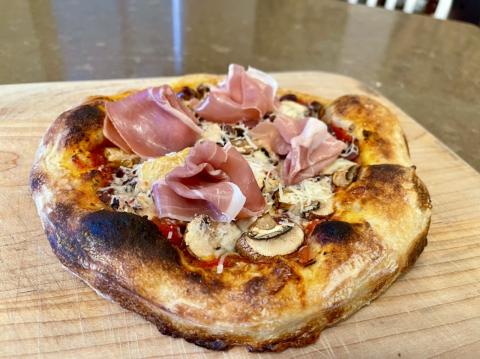
One thing about baking in my oven with a cast iron is that I now bake on the roasting setting which activates the upper elements of the oven.  I’ve also gradually moved my baking steel upwards in the oven so that the actual cast iron skillet is on the equivalent of the second highest rack.  This has the effect of baking really hot and fast.  My first pizza I didn’t check for doneness and it went just a bit too far after 6 minutes at 550ºF.  The second pizza I checked and gave it an extra 30 secs after I turned it in the oven after 3 minutes of baking, so it had a total of only 3.5 minutes and yet was totally baked, again maybe just a bit too long.  Anyhow, I’m pretty happy with my pizzas but I’m always fine tuning things to see if I can bake them better.  I now also brush water on the cornicione immediately before the pizza goes into the oven, this has really helped with getting “leopard spots” on the cornicione so that’s one tip I can share.

For these two individual pizzas I made a home made pesto with basil, walnuts, Grana Padano and a combination of EVOO and toasted walnut oil.  The other toppings were a simple combination of roasted red peppers, sliced kalamata olives and sun dried tomatoes.  After the pizza comes out of the oven, extra pesto and Grana Padano was added.  Delicious.  If you haven’t made your own sourdough pizza dough yet you really need to give it a go.

 For 4 9” pizzas NY style thin crust 200 g each

Levain Build 100% hydration 35 g needed 


433 g bread flour

43 g Whole grain flour (50:50 whole spelt:whole wheat) (consider using whole Kamut instead of whole wheat)

4.76 g Diastatic malt 1%

252 g water and

41 g water hold out

8.43 g salt 1.71%

2.5 g sugar 0.5%

4.8 g olive oil 1.0%


Total flour 493.5

Total water 310.5 

63% hydration water only

64% including olive oil


Sourdough version you may have to adjust the amount of levain. At 3.5% PreFerment Flour (PFF) 2-4 day retard should work.


(1) In your mixer bowl(or by hand) dissolve the Starter or yeast in all of the Final Dough Water except the HOLD OUT Water.  (Add diastatic malt too)

(2) Mix in the flours until well hydrated 

(3) Allow to fermentolyse for 1hr 

(4) Mix in the remaining HOLD OUT Water, salt, and sugar mix until well-incorporated. 

(5) Slowly drizzle in the oil until well combined. 

(6) Beat or knead by hand until dough is moderately developed. The dough will be sticky and elastic. If kneading by hand, use slightly wet hands and avoid adding more flour. 

(7) Oil your hands and a suitable container. 

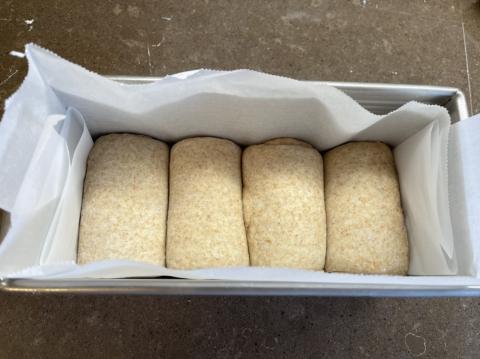
(8) Shape into a tight ball.  I divide the ball into four smaller ones each for one 9” pizza at this point.  Each goes into a small oiled bowl and allowed to proof for 1 hour before starting cold fermentation.

(9) Cold ferment in the refrigerator for 48-96hrs. 

(10) Remove to warm up to room temp for at 3-6hr or so before use, or you can ferment at room temp. for 6hrs.   2-3 hours seem ideal 80ºF 

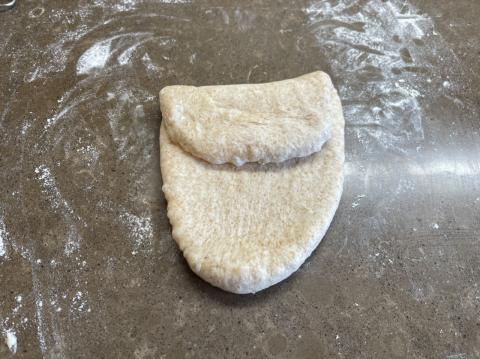
(11) Stretch the balls into your desired size skins (see video below), top and bake at 550F (as high as your oven will go) Until the crust is browned and the cheese has melted. Spin the pie at least once to avoid burning due to oven hot spots. I have included a link to a skin stretching tutorial. Watch this video, more than a few times then go through the motions in your head. If you can see it in your mind's eye, you too can be a home oven pizzaiolo! 


Heat oven to 550ºF roasting setting, with skillet in oven on baking steel on the second highest rack about 1 hour.  My set up with the baking steel on the roasting rack that set up is on the third highest rack because of the added height from the roasting rack so it essentially makes the skillet on the second highest rack.

Place stretched dough into skillet and top with sauce and toppings.


Brushing water on the cornicione prior to baking in oven, gives better oven spring and leopard spots to the cornicione. 


Make sure the non oily side of the dough is down in the skillet to avoid a burnt bottom. 


Bake for 3 minutes at 550ºF then rotate and bake for another 3 minutes.  As mentioned earlier, watch the crust as I have found the second pizza often bakes faster than the first.

Benito's picture
Benito

This was a partially successful experiment using pandan extract and coconut milk.  The final bake leaves something to be desired, but my first attempt was a major fermentation fail.  In the first attempt, I failed to account for the reduction in hydration caused by replacing all the skim milk with full fat coconut milk.  The increased enrichment and decreased hydration caused fermentation and rise of the dough to go extremely slowly.  At first I thought that something must have gone wrong with my levain but in the end I don’t think that was the primary problem.  That dough in total was baked after 36 hours of rise a combination of warm and cool temperatures.  In the end the dough rose only a bit in the oven and had an excessively sour flavour.

So thinking about trying this again, I decided to increase the hydration by increasing the pandan extract in the dough.  The problem of course was that the dough ended up being a greater weight than I usually use and as a result had way too much of a mushroom top to it.  Also despite a longer bake the sides couldn’t hold the weight of the top of the bread and started to collapse in on itself.  Not a stellar result.  Hopefully this bread will taste alright.  I’ve never tasted pandan, just hearing about it from some Asian bakers so I wanted to try it out.  If we actually like this flavor, I’ll try again and also reduce the dough weight by maybe 100 g  to reduce the crazy mushroom top and subsequent collapsing sides.  Oh I also used the 0.5 tsp of IDY because I wanted this to be ready today.

For Pullman 9x4x4” pan


Sweet Stiff Starter - overnight cool room temperature

• 53g bread flour 

• 24g pandan extract    

• 18g sugar 

• 18g sourdough starter ~100% hydration 


Tangzhong classic 1:5 ratio

• 52g coconut milk + 37 g pandan

• 18g bread flour   


Dough Dry Ingredients 

• 360g bread flour 

• 50g sugar (reduced from 59g)

• 7g salt 

(Optional IDY 0.5 tsp)


Dough Wet Ingredients 

• 77g coconut milk 

      • 62 g pandan extract + 53 g (to compensate for the low water in coconut milk)

• 59g egg beaten (about 1 ⅕ of a large egg)

• 67g melted butter 


Total flour = 431 g


The tangzhong, levain and all the wet ingredients were mixed then added the dry ingredients mixing on low until no dry flour.  Rested for 10-15 mins, then mixed on high until good gluten development.


After 2-2.5 hour of bulk I placed it in the fridge for 1 hour.  after this divided, shaped into boules and then into swirled rolls.  Placed into pullman pan alternating the swirls.


Baked 350ºF for 50 mins then taken out of pan and placed back in over for another 10 - 15 mins bake.  Watch the top crust as it may get too dark too quickly so may need to be shielded.


Benito's picture
Benito

This is the same recipe as the recently posted 50% whole wheat Hokkaido sourdough milk bread except that the total dough weight was reduced to make 8 buns in a 9” cake pan. These are going to my sister’s house for our Canadian Thanksgiving dinner tonight, the first time having a family dinner since the pandemic started.

 8 rolls in a 9” round pan or

9 rolls in a 8” square pan

Ingredients

Sweet Stiff Starter 


Tangzhong 

  • 85g milk 
  • 15g whole wheat (stoneground not sprouted)


Final Dough 

  • 141g bread flour
  • 164g whole wheat flour (same as above)
  • 50g sugar (used 40 g)
  • 6g salt 
  • 124g milk 
  • 1 eggs
  • 57g unsalted butter 


Pre-bake Wash 

  • 1 egg beaten
  • 1 Tbsp milk


Post-bake Wash 

  • 1/2 Tbsp butter
  • Fleur de sel 

Instructions

Starter 

Mix the starter ingredients in a jar or pyrex container with space for at least 50% growth.

Press down with your knuckles to create a uniform surface and to push out air.

At room temperature, it typically takes 7-9 hours for this sweet stiff levain to be at peak.

Tangzhong 

In a sauce pan set on med-low heat, whisk the milk and flour until blended. Then cook for several minutes until thickened, stirring regularly with a spoon or heat-resistant spatula. Let cool in the pan or, for faster results, in a new bowl.


Dough

In the bowl of a stand mixer, briefly whisk the dry dough ingredients, and then add the sweet stiff starter, separating it into 5-6 portions as you add it to the bowl.

Now pour/scrape in all the wet ingredients (including the tangzhong), with the melted butter last. With the dough hook attachment, mix on low speed for a minute, scrape down the sides, and then mix on medium speed for 15-20 minutes. The dough will seem very soft, but as you approach the 15-20 minute mark, it should not stick to your hands and should pass the windowpane test.

Transfer the dough to a lightly oiled bowl, form it into a ball, flip it smooth side up, cover and let rise for 6-12 hours depending on room temperature. You can place the dough into the fridge to chill the dough for about 1.5 hours or retard overnight, this makes rolling the dough easier.

Prepare your pan by greasing them or line with parchment paper.

Scrape the dough out onto a clean counter top. Lightly flour the bench. Press the dough into a rectangle and divide it into 8 or 9 portions. Shape each tightly into a boule, place into a greased or parchment lined pan.

Cover and let proof for 2-4 hours (more if you put the dough in the refrigerator).  Mine took 5 hours to complete final proof at 82ºF.

Preheat the oven to 350F and brush the dough with the egg-milk wash.


Bake the rolls for 30-35 minutes or until the internal temperature is at least 190F. Shield your loaf if it gets brown early in the baking process. You can brush the top of the loaf with butter if you wish at this point while the bread is still hot and sprinkle with flaked salt.  I didn’t have fleur de sel so sprinkled a bit of pink salt on after brushing with butter.


Benito's picture
Benito

Working with a new whole wheat flour now, this is a local organic stone ground flour that I’m hoping will taste great. I’m also hoping that the thinner crust I achieved recently by not baking in my dutch oven wasn’t a fluke so I’m baking open in my oven with steam using the Sylvia towel and a cast iron skillet again.  

I’m also experimenting again with a very wet autolyse of just the whole wheat and using a stiff levain.  The idea I have in my mind is that if the whole grain component of the flour is autolysed with all the water, except the hold back water, the bran can hydrate more quickly.

The levain is prepared the night before and fermented at a cool room temperature.  Not surprisingly, this lower hydration levain ferments more slowly than a 100% hydration levain and also holds its peak longer.

In the morning the whole wheat flour is mixed with the water and allowed to hydrate for 1 hour.  After 1 hour, the levain and salt and added.  Once the levain is well combined the bread flour is added and mixed until there is no dry flour.  Rest for 10-15 mins.  Reassess the dough and decide if it requires more water, at this point I added the hold back water and allowed the dough to fully absorb that water using Rubaud kneading.  After 15-20 mins of rest 400 slap and folds were done to achieve moderate gluten development.

Proofing box set to 82ºF.  Rest 15 mins and a bench letterfold was completed.  Aliquot jars were prepared, one for rise and one for pH.  The pH at this stage was 5.39.

A series of coil folds were then done the first 3 at 20 mins intervals as the dough relaxed by 20 mins and then the following one and a half coil folds at 30 mins intervals.  The the time of the final half coil fold the dough showed a 10-15% rise and had a pH of 4.99.

The dough was allowed to complete bulk fermentation at 82ºF.  Bulk ended when the dough reached a rise of 40% with a pH of 4.52.  It was shaped, no pre-shaping was done since the final coil fold acted as the pre-shape, and placed in a banneton.  It was allowed to proof at room temperature until it had a rise of 70% and a pH of 4.16.  Cold retard was then started at 3ºC.

Although I know other bakers who will target a pH of 3.9 for all doughs as the start of cold retard, it doesn’t completely make sense to me.  Doughs with more whole grain will buffer the acid produced more than dough with less whole grain.  Dough with more whole grains also tend to have less gluten.  If one were to target lower pH regardless of the type of flours used in the dough one would run the risk of over fermentation and more gluten degradation.  I believe that doughs with really strong gluten can tolerate a lower pH than ones with weaker gluten.  However, I’ll need to do much more baking to prove this to myself.

The next morning the oven is pre-heated to 500ºF with the cast iron skillet on a rack well above the baking steel.  After 30 mins of pre-heating, the pan with the Sylvia towel is filled with boiling water and placed on the baking steel next to where the bread will bake.  When the oven is ready, another cup of water is boiled, the dough is flipped out of the banneton, excess rice flour is brushed off, the dough is scored and water is brushed onto the dough.  The dough is transferred on the baking steel and finally 250 mL of boiling water is poured into the cast iron skillet.  After a minute or two, the oven temperature is dropped to 450ºF.  20 minutes into the bake the oven is vented by removing both the pan and the skillet.  The bread continues to bake at 450ºF for ten minutes.  The bread is then removed so that a rack can be placed one position over the baking steel and the bread is then placed on this rack.  The temperature is then dropped to 420ºF and the bread is then baked for another 10 minutes rotating half way through.

Another benefit that I see at the end of the bake is that the bottom crust isn’t nearly as darkly baked as it would be when baked in a dutch oven.  I won’t know about the crust thinness until the dough is sliced, but so far the advantages of baking without the dutch oven seem to be worth the extra effort of baking using my open steaming method.

Pages

Subscribe to RSS - Benito's blog