The Fresh Loaf

A Community of Amateur Bakers and Artisan Bread Enthusiasts.

ehanner's blog

ehanner's picture
ehanner

My 23 year old son is home from his job as a cruise ship musician. He plays saxophone on a huge ship traveling all over the world. When he returns for a little time off, I try to treat him to his favorite foods and breads. Today being St Patrick's Day in the US, I'm certain he is singing Irish tunes at one of Milwaukee's many Irish Pubs. I thought some of you might appreciate the humor in the picture he just sent me. Apparently some one gave him a slice of home made beer bread so he asked for the recipe. Here it is written out on a piece of paper and photographed with his cell camera, directly into the heart of dear ole dad's kitchen. What better use for technology!

It looks like a quick bread. Maybe I'll use a bottle of dark beer and swap a cup of WW to give it some tooth. He'll need that tomorrow, no doubt.

Eric

ehanner's picture
ehanner

A couple weeks back, Shiao-Ping picked up a new book and did a nice review on it here. I was intrigued by what I saw and ordered a copy from Amazon which arrived early this morning.

I will not go into great detail about the book except to say that I am a visual person. I appreciate seeing what the finished product looks like in vivid color. The BSB is stunning in this regard. Every bread and pastry is artfully photographed in a way that make me want to try every one of these recipes. The method for each is carefully worded to be clear.

One interesting aspect is that they have several base recipes that are then modified or added to to create something different. For example the Mr. Potato Bread (page 92) calls for 830g of sourdough (pages 50-51) . "Once you have a basic white sourdough, millers sourdough (multi grain), or spelt sourdough you can create  other variations from it." These are called Derivative Breads.

This is how I have organized my thoughts about the breads I bake but I didn't really have a good grip on the variety I could create with the base recipes. This book is loaded with unusual breads you have never heard of or tasted unless you happen to live down the road from this bakery or perhaps in Oz where some of these couplings might be common. Fig and Barberry loaf, Spiced Fruit sourdough, Mr Potato Bread and on and on. Each one looks better than the last.

This is a great book and is proclaimed to be "The ultimate Baking Companion" on the cover. From what I can see I wouldn't dispute that statement at all. I'll be selecting some of the more unusual breads to highlight here as I suspect will Shiao-Ping in the future. One can not help but compare this book to Suas's Advanced Bread and Pastry. The last 200 plus pages are dedicated to pastry and deserts, starting with laminated doughs.This a serious book for any serious home baker or want to be pro baker.

Eric

ehanner's picture
ehanner

Last week nicodvb posted his most recent trial of 100% Rye flour bread. He declared it as good so I thought I would try it out and see if I could follow his steps.

I did stray off the green line just a wee bit when I used boiling coffee to scald the rye the night before. I also added some rye meal and some boiled rye berries that had been rinsed and strained after a 30 minute softening on the stove. And I just couldn't help myself from adding 2 T of German bread spice. So my version is a little darker than nico's due to the coffee.

There was so much going around the house today that I missed the step where he covers the dough for the first 20 minutes. I gave it an extra steam injection to help move the bar in the right direction. It smelled wonderful during baking. Rye has a deep full healthy smelling aroma when baking. I checked the internal temp once at 45 minutes and found 160F so I gave it an additional 15 minutes at 350F.

My loaf doesn't look as pretty as nicodvb's but let me tell you, it is tasty. A very sweet and full flavor. I think once the moisture settles down it will be perfect but slightly dense. Thanks nico for posting your results.

Eric

Proofed and ready to bake.

Just out of the oven. It isn't as dark on the top as this.

The crumb is a little dense, but delicious never the less.

ehanner's picture
ehanner

Last week, I posted about my Horst Bandel bread from Hamelman's Bread. At first glance the crumb images looked good and the flavor was very good. However after some reflection on the bread and the process I decided my initial declaration of victory may have been over stated. While my first attempt was acceptable for a first try, I suspect I have much to learn about this style of bread.

I have been having conversations with Mini and Andy (ananda) about the process and specifically the temperature profile to arrive at a well baked loaf. Along the way I have been talking with qahtan about puddings of various types. There was a most interesting thread on puddings which made me wonder if Pumpernickel isn't really just another steamed pudding without the fruits. After all you cook it in a closed pan at low extended heat and after wards stabilize the moisture by wrapping in towels. The word Pudding has me first thinking about chocolate or lime and a box of Jello but apparently the British and many other Europeans refer to steamed bread by the same term.

I looked at some videos on how to make a proper Christmas Pudding. The example was shown placing a quantity of wet looking dough in a glass pan, covering it with parchment and foil, then tying a string around the foil cover. The whole thing gets placed in a hot oven and slowly cooked in a lowering oven to arrive at a well caramelized crumb, deep in color and full of flavor with a soft crust. That's exactly what I want for my Pumpernickel.

So, to sum up. I discovered that the bottom of my crust from my first try was quite a bit drier and harder than the sides. I decided to place the pan on a wire roasting rack instead of directly on the hot stone. Thinking is that I'll get a less direct and harsh heat. I took my best guess on how much dough to load in the pan and let it proof. When it was again within 1/4 inch of the top, I removed some of the dough from the top as you can see in the photo. That shot is taken after proof and after I removed an additional amount. Next I placed a piece of parchment over the bread and slid the cover on. It was then weighted down with a cast iron griddle to be sure it didn't pop off again and also to be sure it was sealed.

I made additional dough so I would have enough to try a glass pan at the same time. My thinking was that the thicker walls of the glass pan would temper the direct heat and not dry out the bottom crust. Also I had the chance to try out the paper/foil cover tied on with a string.

The breads were loaded into a preheated 350F oven and baked as above for 30 minutes. At this time the heat was lowered to 250F for 2 hours. The final reduction was to 220F for another 6 hours approximately. At this time (6AM) I turned the oven off and let the heat coast down for the next 4 hours. The internal temp was 204F when I checked after the 6 hours at 220F. Both loaves popped out of the pan easily and were well shaped. They are now wrapped in a towel awaiting the Pumpernickel Fairy to tap me on the head and say they are ready to eat. I will post the crumb images when available. Some of these are a little out of order, sorry but they should make sense. I thought anyone who might be thinking of making this bread might like to see the steps I used to get this far.

Eric

Added the Crumb Image by edit:

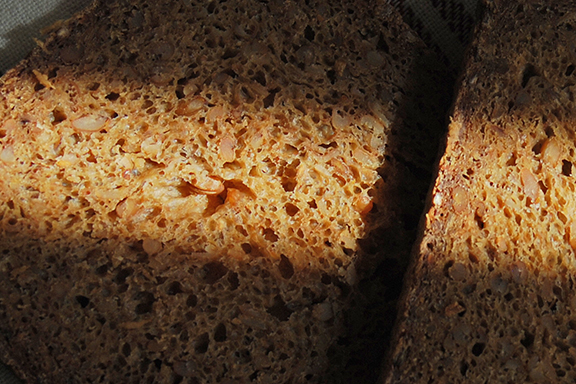
The Pumpernickel Fairy made a low pass on the flight deck this morning and gave me a frown. It has been 24 hours since I wrapped the bread in a towel and placed it on the wire rack (thanks Mini). I unwrapped it and sliced off a few slices to see the results. First, I will now confess I made a mistake with the mix, which was in following the directions as written. On page 223 Item 4.) Mixing, Hamelman says "Add all the ingredients to the bowl, including the sour-dough and both of the soakers, but do not add any of the final dough water reserved from squeezing the liquid from the old bread soaker". I take that to mean that I should add the amount of water in the final dough segment of ingredients (page 222 bottom). The water amount is 12.8 Oz (1-5/8 cups). The first time I made this I with held that water and found I didn't need it. This time I needed an additional 16+ Oz of bread flour to get to a reasonable dough. The amount must be a misprint as I can not see where the differences in rye flours would make that much of a difference. JH goes on to say "It is entirely possible that no additional dough water will be required".

So, bottom line is that this batch has way more white flour in it than was called for, percentage wise. It isn't nearly as flavorful as the last batch. The edges are hard now but they will soften up some after it has sat a day or so in a plastic bag. It has a nice flavor and my wife and are enjoying some with cream cheese. Turn the page and start over she said (Pumpernickel Fairy)

Pleated paper over glass pan

Proofed, removed some dough, ready to cover
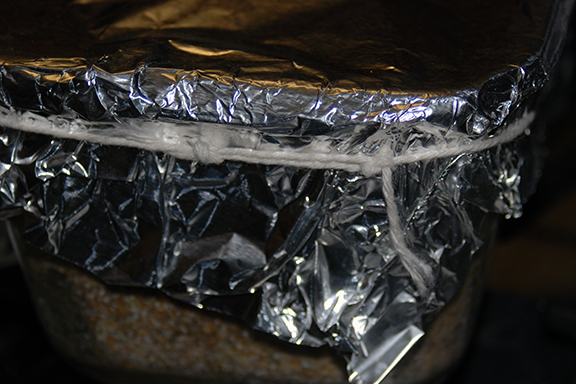
Wrapped and tied.

In oven covered and weighted down
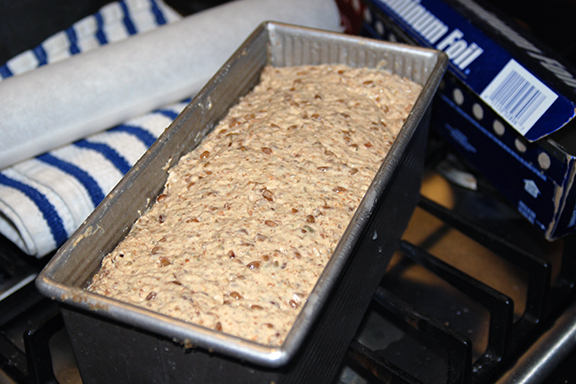
Pullman ready to cover
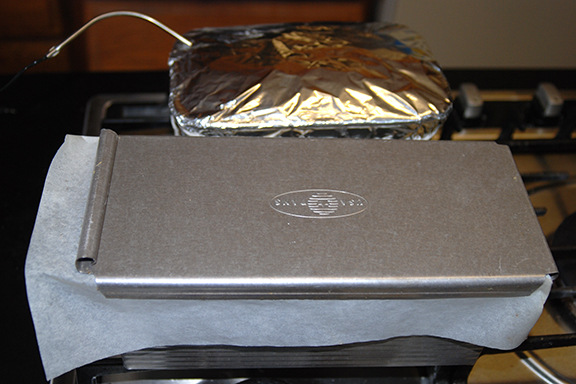
Covered with paper ready to bake

After bake, paper is wet from steaming.

Perfectly formed top.
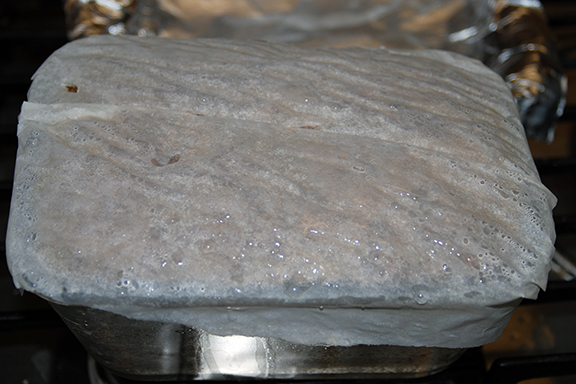
After bake, foil removed, wet paper.

Clean slightly domed top.
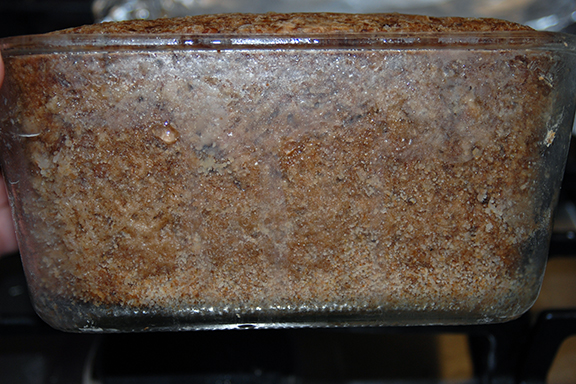
Side view of glass pan shows solid loaf.

Turned over on board. Well shaped loaves
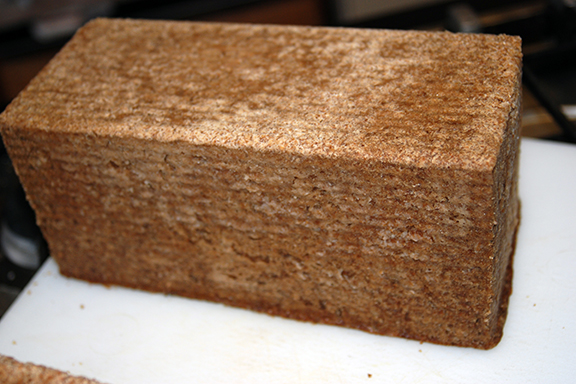
I think this is the way they should look?

Waiting for the Pumpernickel Fairy!
ehanner's picture
ehanner

Yesterday I made 2 loaves of my favorite rye with caraway seeds and bread spices. I decided to skip the sugar and swap with Black Strap Molasses. It was delicious as usual and the party I brought it to devoured most until the puppy got his way when no one was watching. I'll take that as a complement I guess.

After staying up last night watching the late coverage of the Olympics (3:30) ugh, the last thing I did before closing my eyes was assemble the rye sour for the next day. Today I re-hydrated some dry onions in hot water and using the water from that process, mixed a batch of Onion Rye. The crust appears dark, partially because I baked it a little hard to crisp the crust and partially due to the dark sesame and poppy seeds. I use my everything seed mix usually reserved for bagels. There are garlic chips, salt white and black sesame and poppy seeds. All held in place with an egg wash.

This makes a great sandwich if it lasts that long. I gave the second loaf to a helpful neighbor for dinner.

ehanner's picture
ehanner

This is a bread that I have been wanting to try for some time. Jeff Hamelman did a great job of presenting it in his book, "Bread" and the story that goes with how he learned about it is heart felt. This style of bread is a long way from just about everything you might be familiar with. It isn't airy and light. It doesn't have a beautiful crust in the traditional way we usually think of a nice golden color, expanding at a well placed slash. What it is, is a compact, almost waxy mass of slowly baked rye and wheat dough in a high hydration formula. It is baked in a covered Pullman Pan with straight sides for 12 hours at slowly reducing temperatures.

Before I attempted this bread, I looked at txfarmers thread from last year where she posted about her attempt and learned a lot about the process. If you are interested in baking this, I suggest reading this thread first.

I had the opposite results as far as rising during baking as txfarmer. I apparently had to much dough in the pan and although it had risen to within 1/2 inch of the lid during proof, I checked after 1 hour of baking to find the lid had been blown off the pan. Hmmm. I got my trusty serrated bread knife and sawed the dough level with the pan top, replaced the lid and pretended like that was part of the plan.

To back up a little, Hamelman says the bake time should be around 12 hours but that includes some time in the oven after it is turned off. I didn't get a good feel for how much time at what temperature so I improvised a little.  I preheated my fire brick in a pan I use for steam, the stone I sometimes use and a 1/2 box of unglazed tiles in a 350F oven. I figured the additional thermal mass would give me a slowly cooling environment similar to a WFO or a big commercial oven like Jeff has to play with.

There are a lot of variables on the path to a great Horst Bandel. It took me a while to get the required rye components together and the Pullman Pan on the same day. I used freshly ground whole rye, rye meal and rye chops from flourgirl51 and her wonderful Organic grain/flour mill. Surprisingly the various forms of rye are hard to come by here in the upper Midwest of the US. When I discovered I could get everything from one known source, I got myself into gear and started the ball rolling to learn this bread.

Here are a few images I took as an after thought after the bake. I'm very happy with the results of my first attempt but there is room for improvement. This isn't rocket science but, it is chemistry. I went pretty much by the book and got a good result. I plan on adjusting the volume of dough, baking temp profile and cooking of the whole berries on the next attempt.

If you try this bread, you must be prepared for a flavor experience that is so full I would call it "adult". If you appreciate fine smoked meats and fish, capers or black caviar on cream cheese or dry butter, then this is for you. It is that good.

Thank you Jeffrey. And thank you Mini and txfarmer for your assistance.

Eric


ehanner's picture
ehanner

Shiao-Ping's excellent post on Mr. Nippon's Baguette formula and the images of her crumb and those in the book inspired me. From what I can tell, the 12 hour cool autolyse as a significant effect on the dough. The dough is sticky as Shiao-Ping cautioned and acted differently from any other 75% hydration dough I have worked with. It was trying to wind it's way up the shaft of the dough hook on my DLX mixer for one thing. It was window paining BEFORE kneading. After an initial mixing with the hook, I let it set for 15 minutes to allow the salt time to melt and the pinch of IDY time to incorporate before kneading for 1 minute on first speed and only 2 minutes on speed 2. The dough was smooth and silky from the first seconds of kneading. Quite beautiful really, if you know what I mean. I had pulled a small amount of dough after the initial 15 minute pause since it looked so smooth and was surprised to see how transparent the film was. After 2 minutes on speed level 2, I stopped and placed the dough in a lightly oiled plastic container and proceeded with the stretch and fold procedure that SP laid out. The total bulk ferment time was 3 hours with 5 S&F's.

One issue I had was that the 12 hour autolyse is supposed to be done at 60F. I looked around the kitchen for a drafty garage door that would serve as a place to maintain the cool temperature I had established with cool water. It worked out perfectly. The outside temp was a balmy 5F this morning and my bowl of autolyse flour and water measured at 61F. However, after adding the starter, salt and IDY together the DDT is 22C or about 72F. The friction factor isn't any where near that spread so I floated the dough bowl in warm water during the first 20 minutes in preparation for the first S& F. It worked out fine but it's a little clumsy having to make that adjustment. I wanted to follow the protocol as closely as I could and being wildly off the DDT would be a big error.

Shaping and proofing was as normal. I wanted to try the scoring pattern of SP's second set of images where the chef is trying to suggest wind in his slashing pattern. To me it looks like a series of slashes that wrap the long loaf with one following the last and the gaps bridged by another set of cuts. I won't pretend to suggest that it turned out anywhere near the chefs pattern. It took me a few years to be just moderately proficient at the traditional pattern. This is way harder but I will continue to practice. I think the effect of so many cuts will be to allow the crumb to expand more giving room for that airy open crumb structure. We will see. As I write this, I have just removed the three baguettes from the oven. I spritzed 2 of the loaves and left one with the surface flour on it. I can see I should of cut deeper already.

I will cut one open and we shall see if we are going out for dinner or not.

Eric

ehanner's picture
ehanner

The other day, as I was in the process of purchasing a book on Amazon when I noticed the "Other people also bought this" feature that was pointing out a book I have wanted to look at for a long time. Brother Juniper's Bread Book by Peter Reinhart is a classic and I think his first published book.

Paging through it today, I am taken by the variety of good looking bread recipes. There isn't a single photo in the book so when I say good looking I mean the recipes look interesting.Reinhart's writing style is clear and easy to follow as is the case in all of his later works.

The currently available version has been revised in some interesting ways. In the section on Sweet French Breads, Peter says he changed the formula slightly, now calling for bread flour and less yeast and salt. This allows for a slower rise and better flavor. I'm glad to see that he re-visited the basic concept of how to produce good bread. We have all learned that the path to full flavored bread winds down a path of slow fermentation. All of the recipes reflect this emphasis on time.

Finally, there are some great muffin recipes and a chapter on The World's Greatest Brownies. How could you not like that?

This would be a good starter book for a person who is baking impaired like I was. All of Peter's later books have a considerable amount of space dedicated to natural yeast or Sour Dough. In this book he is focused on getting great flavor with dry yeast products. This is a well written classic that has been updated and has many wonderful breads and other baked goods. I'm looking forward to trying some of the recipes.

Eric

ehanner's picture
ehanner

In another thread a few days ago, Andy (ananda) was discussing what a true artisan bread looked like and clipped a photo of this white bread in with a beautiful crumb structure. I asked him if he would share the details, which he was kind enough to oblige me.

The more proper name for this would be a Pain au Levain with mixed formula starters. It is made entirely with bread flour in my case and is truly a wonderful bread, even though I had a little trouble at the end. Here is the post with the formula I used.

This mix makes 3760+ grams of dough which I divided equally into 4-940g loaves. You could make half the batch easily enough but I needed some bread for friends I hadn't gifted in a while so I made the 8 Lbs.

The first build of a starter is done using a 100% feeding which gets it going on a fast pace. The second elaboration is done at 50% with the over all hydration thus far at 60%. The final dough mix is a 65% hydration mix so it is much easier to handle than the 80% Rubaud dough I have been playing with recently.

Another interesting aspect of this formula is that it calls for an overnight retarding of the starter after the second build. This is unusual for me as a step in the process but the flavor development is certainly noticeable.

I had a little trouble getting the levain incorporated evenly and eventually ended up using my DLX with the hook installed to mix the dis-similar masses. I also mis read the proofing and after 45 minutes baked the first pair of loaves while the remaining pair waited in the cool garage.

As you see, I proofed the first two using a couche and the second pair were proofed in a plastic banetton. And one of the loaves in a banetton was sprayed with water to see if I could encourage cracks. It's hard to see in these images but the crumb is translucent and very nice mouth feel.

I highly recommend that you try this bread. The flavor is outstanding, nutty, great after taste. My neighbor just called to tell me it was their favorite so far and they get a loaf of many many different breads.

Thank you Andy, this is truly a Wonderful White bread. Next time I'll let it proof longer, and there will be a next time.

Eric

Is that a Fish?

ehanner's picture
ehanner

There has been much discussion lately about the rather remarkable Gerard Rubaud as written by MC. Everyone seems to like the flavor of the multi grain levain and dough mix but the method is a trial for home bakers due to the tiny amounts involved in the starter.

To make a long story short, I decided to make one loaf which means the first stage of the levain could be mixed in a large thimble with a tooth pick. Since all of the starter feeds and the dough use the same mix of flours, I added it all up and mixed it all together in one batch as dsnyder suggested in his second try at this. It makes the process far less cumbersome since you only have to measure once all the small amounts.

I also weighed out the salt and divided it into 1/4's and added a little from 1 pile spread out in all 3 levains. I hope that is clear. In practice I just sprinkled a pinch in each build to slow it down a bit as per the author.

I also broke from my usual method of adding the water (for the dough) to the levain and creating a slurry. Rubaud says use the water in an autolyse and THEN add the levain and salt. All small things but in the end I think it makes a difference.

All of us that are baking this bread are after the BEST bread we can make and attention to the smallest detail may make a difference.

I will not duplicate Davids most excellent recipe table it can be found here. Also Shiao-Ping's wonderful front page post is here. And MC's Interview which started this off is here.

I'm quite happy with this second attempt at this bread. It did smell wonderful in the house tonight and I can only imagine how it must be to be in a room of 50 or so right out of the oven. Many breads taste good but in my experience not all of them smell great after baking. The bread is just slightly warm to the touch and there is no sour tang. Just a full flavored translucent and creamy crumb and a thin crispy crust. Very nice.

Eric

Pages

Subscribe to RSS - ehanner's blog