The Fresh Loaf

A Community of Amateur Bakers and Artisan Bread Enthusiasts.

Most bookmarked

venkitac's picture
venkitac

Effects of choosing when to stretch-and-fold?

I've been going thru a lot of bread books comparing the techniques presented by the authors in the last week or so. Most every book advocates Stretch&Fold, of course. But there seem to be a couple of differences in approach:

(a) Some books say consistenty for most recipes "S&F N times (depending on recipe, N is 1,2,3,4) at 20 mins intervals from the beginning, then let the dough double in bulk". This means that the dough is undisturbed for anywhere from 2-4 hours towards the end after the inital N S&Fs, when it doubles.

(b) I've read in atleast a couple of other books (Hamelman, Beranbaum) that it's a bad idea for bread with commercial yeast to ferment for more that 75 mins without receiving some form of handling to redistribute nutrients. In particular, if you look in Hamelman's books, all his recipes advocate S&F throughout the bulk fermentation at even intervals. But the dough still needs to double at the end too. This likely means that the fermentation time to double the dough is longer, because even if we're super gentle, we'll certainly lose some gas in each S&F and thus the end-to-end doubling time must be longer.

So with method (a), the time to double must be shorter than method (b). Since fermentation time is critical in the whole equation, but so is nutrient consumption by yeast, which way is "better" or "correct"?

The other issue here with method (b) above is that if I do S&F throughout (evenly distributed), sometimes dough doesnt' double because from the last S&F to end of bulk fermentation is only about 1 hour. For example, one of the recipes called for a 3 hour bulk, and folding at hour 1 and hour 2. At the end of 3 hours, I had dough that was barely 1.5 times in size. I'm guessing that is because I handled the dough too rough at hour 2 and let too much gas escape - does that sound right?

P.S. In addition to the above, *many many* recipes call for an overnight retardation in the fridge, particularly in Peter Reinhart's books. This clearly means no one is S&Fing it at 2AM:) Which is contrary to (b) above, but then again, the fermentation is much much slower. So I guess the nutrient redistribution doesn't need to happen because of the slower fermentation? Must be.

P.P.S I have been reading and thinking too much about bread. I woke up at 2AM today and went thru the whole analysis Debra and Dan did for my messed up sourdough (too much acid) in my head. Now I know I have a serious obsession, I should probably take a couple of days off from baking:)


Salome's picture
Salome

Hamelman's 5-grain levain in Couronne shape

I could withstand the Leader's "Alpine Baguettes" and decided to give Hamelman's "5-grain levain" a try. I thought that there can't be anything wrong with a bread that Hamelman himself describes as "one of the most delectable breads".

It's made of whole-wheat flour, bread and high gluten flour, and it includes a soaker (sunflower seeds, flaxseeds, chopped rye and oats.) In my case it includes as well some sesame seeds as I was running low on sunflower seeds and had to substitute some of them trough sesame. The fermentation process is speeded up by a little addition of yeast. I can't get high-gluten flour here in Switzerland, therefore I added 12 grams of Vital Wheat Gluten to the flour.

While I was letting the dough ferment for the first time, I was thinking about how I should shape this batch of bread. I felt a little bit bored by my "standard shape", the round loaf baked in the iron pot. I remembered the special Couronne shaping that I discovered a long time ago on wildyeastblog.com and that I had on my to-do-list for a long time. So I gave it a try. Thank you Susan, You're a great inspiration to me and your directions are clear and easy to follow, thanks for that!

Well, my Couronne doesn't exactly look as perfect as Susan's. It's a little bit out of shape because my "proofing banneton" was probably a little to big, so the balls didn't form a tight unit and moved around when I slided them into the oven.

That's the way I constructed my "banneton", inspired by Susan's description. I used the lid of my scouting cooking pot and a newspaper-ball. (I'm sorry for the bad image quality, all the good cameras are out today and I had to use my old camera, bought in 2002.) I covered this "banneton" with a well floured towel to prevent dough from sticking.

I had about 1.1 kg of dough alltogether, so I used 750 grams as recommended for the Couronne and made a small boule out of the rest.

To shape a couronne like the one above, divide the 750 grams of dough into six pieces of 100 and one piece of 150 grams. Shape the pieces into balls and let them rest for about 10 minutes. Roll the 150 gram - ball into a flat disk, about 15 cm wide. Place it over the newspaper ball, then arrange the other six balls seamside up around it. Then you have to cut a "star" into the flat doughpiece in the mittle with a sharp knife (look below or read Susan's instructions) and fold the "star-edges" over the balls.

Then let it proof as usual (cover it with a towel while proofing) and bake as you'd bake your recipe normally, maybe slightly shorter, because this shape is not as compact as a normal boule or batard.

I just tried two slices of the small boule - I planned on giving the couronne away, but now the person who was supposed to receive it isn't at home, therefore I put it into the freeze and I'll have it another time when more people are around. Right now, I'm not able to eat 750 grams of bread on my ownin a reasonable time. (as I said, everybody's gone, like the cameras . . .) I'm better off with 300 grams . . .

The flavor of the 5-grain levain is very good, as far as I can say right now. The bread is still somewhat warm. Nearly every bread tastes great while it's still warm. But I'm optimistic that the bread will taste great tomorrow for breakfast, as well.

I'm planning on baking this one again. Not only because it seems to be a tasty bread, but because I've got the feeling that I could simply do better. It was a hot day today, so the fermenting and proofing was difficult to get right, especially because the dough turned out to warm as well.

I'm sure that I'll shape Couronnes again. But then I'll probably scale the "banneton" a little bit down. The newspaperball more like 9 and the "pot lid" around 23 cm in diameter.

Shiao-Ping's picture
Shiao-Ping

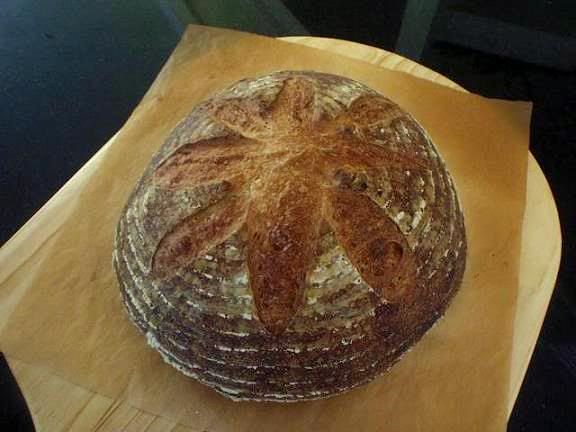
100% Whole-Wheat Miche de Campagne - James J. MacGuire's Pain de Tradition formula

As I had such a lovely result from my last Pain de Tradition using white flour, I thought I'd give it a try with whole-wheat flour.   James said to make a miche de campagne, substitute 15% whole-wheat or up to 10% medium rye for part of the white flour, so my 100% whole-wheat version isn't conventional. 


   100% Whole-Wheat Miche de Campagne - James MacGuire's Pain de Tradition formula


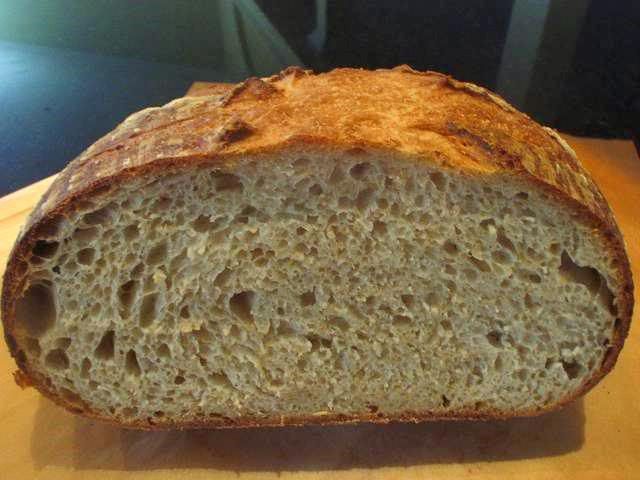
                  The crumb


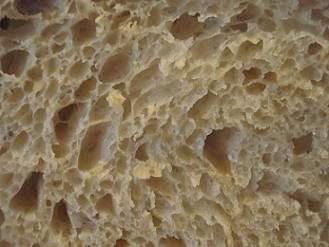
                                                                                     close-up

There is one major difference in the procedure from my previous one.  I retarded the shaped dough overnight, for 8 hours, and then let it come back to room temperature for an hour and a half before it's loaded to oven to bake.  The whole process seems to be long but is not at all cumbersome for a housewife - there are always a million things to be done in the kitchen and around the house any way.

The result is very pleasing for me.  I think the high hydration dough loves to sing, I could hear it crackling even 5 meters away.  It has a very strong nutty and wheaty aroma.  The crust is very crispy and the crumb is lovely.   So often wholemeal bread is dense and heavy, but this high hydration pain de tradition formula makes this 100% wholemeal bread light and delightful to have.  I will have no trouble at all getting my son to have a piece of this.  Done!

Shiao-Ping    

caviar's picture
caviar

mixer speeds DLX

Does anyone know what kind of mixer The DLX is i.e. Spiral ; planetary; Oblique or stand . I've assumed it is a stand mixer ( you know what they say about assuming)Also I would like to know what speed range is represented by the lines on the speed indicator.

Does anyone know this info or where to get it? I have not been able to find it so far.

Herb

Pablo's picture
Pablo

Hamelman's 40% Rye - without commercial yeast

Hamelman's 40% Caraway Rye without commercial yeast:

I haven't cut into this yet, but I'm so pleased!  I modified the recipe and only used the rye levain.  It looks great.  This bodes well for paying attention to fermentation temperatures.

I cut the recipe down to make a single loaf:

Rye Sourdough:
dissolve together
8.5g ripe starter
150g water
mix in
181g Giusto's whole dark rye flour
It makes a putty-like starter.  Let ferment 17 hours at 70F.  I floated the container in the bathroom basin with 70F water.

Next day:
Dissolve rye starter in 151g 105F water
Mix together:
265g 12% protein bread flour
7g Giusto's Vital Wheat Gluten (to approximate 14% protein flour)
8.5g salt
8.5g caraway seeds
Combine dry and wet and knead vigourously for 10 minutes.  Dough was initially sticky but soon came together and was easy to knead without any flour on the counter.
Ferment at room temp 90 minutes with two stretch and folds
Life intervened with a Dr. apt., so dough to 'fridge for 2 1/2 hours.  Upon return dough is domed but not doubled
Ferment an additional hour at room temp, altogether doubled from the beginning now
Lightly degas and form into a batard.  Proof on parchment at room temp for 2 hours
Sprinkle with caraway seeds, mist, and slash
Bake 460 with steam 15 minutes, peek in the oven and jump up and down, bake an additional 20 minutes without steam

I'll post a crumb shot once I've cut into it.

:-Paul

Paddyscake's picture
Paddyscake

David's Pain de Campagne...kinda


I've carefully avoided the high hydration slack doughs, fearing terrible results like baguettes that look like they were run over and batard-like blobs of baked dough. Little did I know that David's Pain De Campagne would start me on the road to this challenge. It's always good to have someone give me a little push..I'm the scaredy cat, but once I get going, have a good time. You know, like a roller coaster!

I was a little concerned when I saw my fermented dough hadn't doubled in the 21 hours. David's was bubbly and had doubled. Mine looked pretty much the same as when it went in the fridge. I knew my starter was well fed and happy, so what had I done wrong? I had recently made a similar recipe where the fermented dough rose well in a brotform, but when turned out, flattened. The oven spring though, was remarkable. What have I got to lose..so I kept going.

The dough was shaped and then pretty much flattened while proofing. David describes the shaping as lifting and folding the edge closest to you up over the center. Well, it was more like trying to coax/roll the dough up and over, there was no lifting! On final shaping you are supposed to roll the log like loaf to taper the ends. That wasn't happening, I just ended up with a very long flat baguette-like shape. OK, I'll deal with it.

Bake time came and I tried my hand at baguette slashing, which would have been OK if I had started out a little more to the left. I made 2 slashes and ran out of room for the 3rd. Oh, well..My next problem was the loaf was longer than my stone. All right, I'll put it diagonally on the stone. Easier said than done. I had a good 4 inches hanging off the front of the stone..YIKES.. I quickly grabbed a cookie sheet and slide it underneath the parchment paper and coaxed it back farther on the stone. Phew.

The first 15 minutes crawled by and finally I got to open the oven door..ALL RIGHT!! good oven spring. The loaf turned out OK, believe it or not. Still waiting for the taste test.

Now my new goal in breads..to be able to reproduce those beauties that David always turns out.

Thanks David, for sharing your techniques and recipes.

I'll keep truckin'

Betty

allysnina's picture
allysnina

'00' flour

I am using this type of flour for the first time for pizza, has anyone ever used this grade of flour and if so is there a difference vs. bread flour?

althetrainer's picture
althetrainer

Yipee, I have a question for ya

My husband and son love the water roux white sandwich toast that I make for them from time to time.  I notice the crust tends to brown very quickly, in less than 10 minutes.  I try to avoid opening the oven door in the first 10 minutes so to reduce chances of shrinking or collapsing. 

We came home from a trip today and we had no bread at home so instead of making my regular sourdough I decided to make the water roux bread.  I waited for 12 minute before putting the tin foil over the loaf but once again the crust was already too brown!  I will try to remember using a lower rack for baking next time. 

Do you know if the bread browns so quickly is a result of higher sugar contents, or the water roux starter?  Do you have the same experience?  I am just curious.

thebreadfairy's picture
thebreadfairy

Review: Cadco Countertop Convection Oven - XAF-113

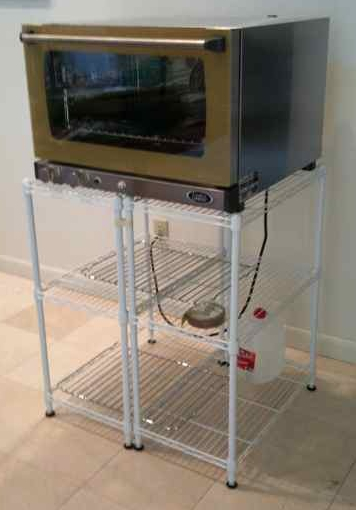
I just purchased a new Cadco convection oven and to say I am thrilled would be an understatement. After using a 20-year old Whirlpool oven with a Hearthkit Oven insert while I learned to bake bread during the past six months, and producing very satisfactory results, I have found this new oven to be big step up in ease of use and evenness of baking. Since there are virtually no reviews of this oven on the web, I wanted to share my experiences with this group that has provided me with so much useful information.
DETAILS: After having semi-lusted for this oven since seeing it in operation a few months ago, I used the occasion of a malfunction of my regular oven to to treat myself to the Cadco even though I had never used a convection oven before. The model I chose, the XAF-113 is the largest countertop convection oven they make that can operate on 120 volt current, so no special electrical hookup is needed. It is an approximately 24" stainless steel cube with a huge glass front window and door which provides a clear bright view of everything going on in the oven. No more peering through a small, darkened window or cracking open the door to see how the bread is doing. It has a capacity of 3 half-sized (16 x 12 inch) sheet pans.
This unit also has a very simple manual as opposed to digital control panel. (Digital, programmable panels are available on more expensive models). There are basically only two control knobs, time and temperature. Temperature range is 175°-500° F. Just recently, Cadco introduced  a manual "steam" button on this model and my unit is equipped with it. It is not a true steam injector but seems to work well anyway. What it is is a built-in small electric pump which draws water thru an inlet hose which has its outside end inserted in a water container. This water is then sprayed on the ventilator fan and heating element and dispersed throughout the baking compartment. Although I could see some water droplets being scattered around the inside, no drops appeared to mark the bread crust, and my final crusts seemed to be as good as I was getting using hot water thrown on lava rocks in a skillet. And, this is so much easier. The skin on my hands and arms has already started celebrating the end of daily steam burns.
I have also equipped my oven with a 1/4" metal plate that Cadco sells as an accessory to use instead of a baking stone. They claim that this heats up much more quickly than a stone yet retains heat as well as a stone. After baking two loaves I am inclined to agree with them. The metal plate has protrusions coming from the bottom surface which seem to markedly increase the exposed surface area and allow it recover quickly.


EXPERIENCE: I have only used it to bake two loaves so far since I just installed it yesterday. What I immediately noticed was that the oven heats up much quicker than my conventional oven and stone. Normally, it takes my oven 1 hour plus to reach 500°. With the Cadco, it took about 25 minutes!
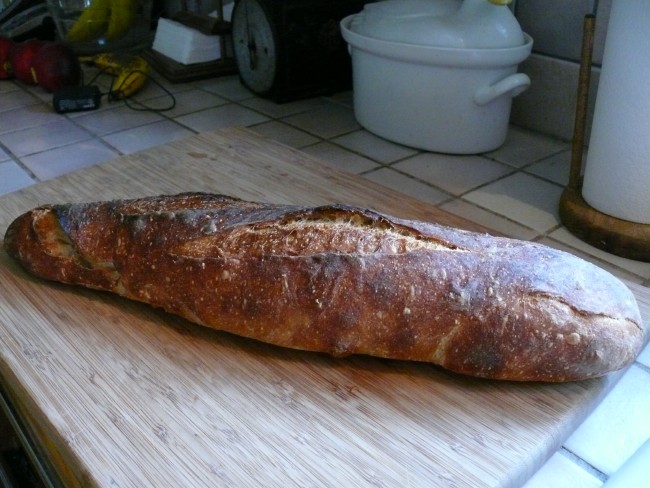
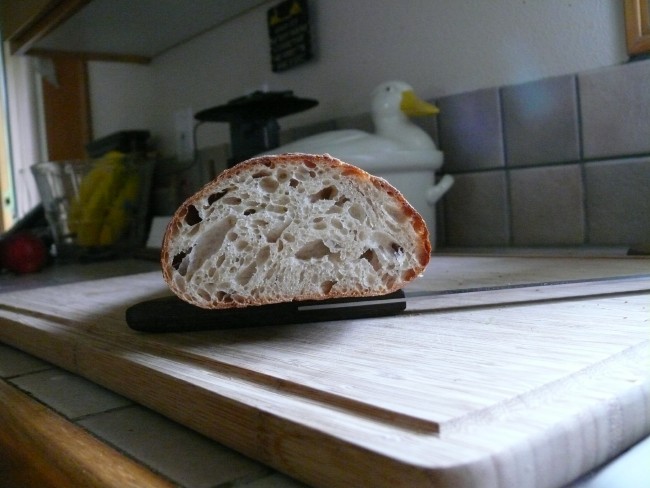
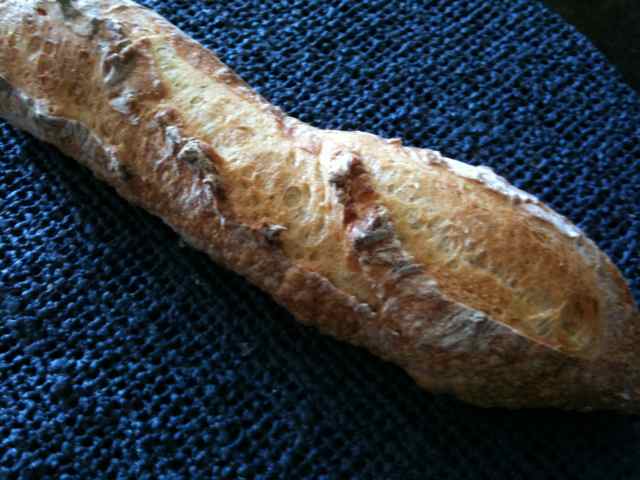
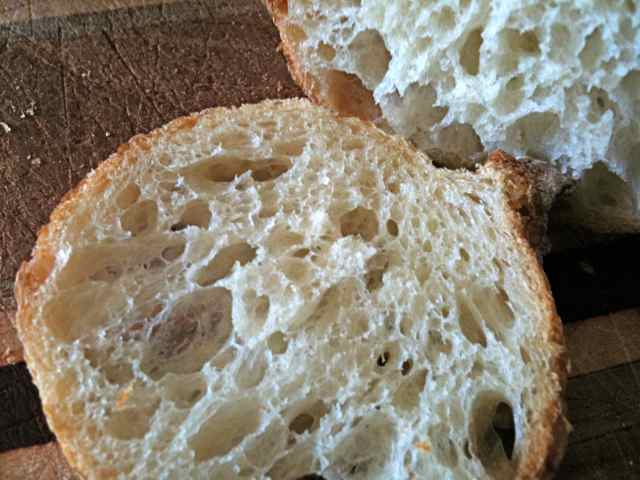
The first loaf I baked was variation of Eric Kayser's Baguette Monge. I have been playing around with this formula a lot recently trying to work out a successful cold retardation process. I have baked probably 20 loaves recently so I am well aware of the whole gamut of final loaf possibilities. I was extremely pleased when the oven turned out the best loaf of this bread that I have so far been able to bake. I adapted the baking temps by reducing the pre-heat temp from 500° to 450°. Normally, the temp on loading is set to 425° and I reduced it to 400°. Usual baking time has been 25 minutes and with the Cadco I used 20 minutes. What I got was great oven rise and grigne, lovely browning and the most open and moist crumb of any loaf so far. In addition, the overall browning of the loaf appeared to be quite uniform. Although I did rotate the loaves out of habit, I never saw any unevenness in the browning of the crust and rotating is probably not necessary. Here are some photos:


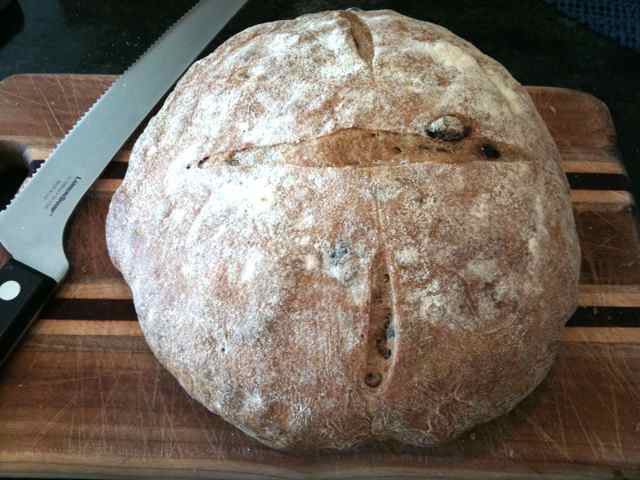
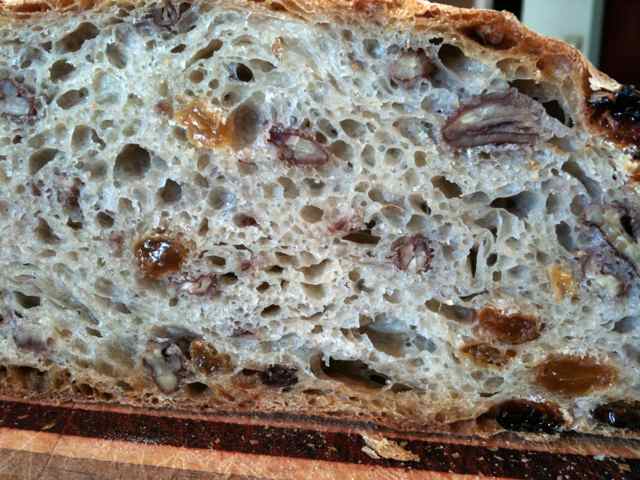
The second loaf was Hamelman's Golden Raisin and Walnut bread. I had never made this before and figured this would be a good test of whether just following simple guidelines for conversion to convection would be sufficient to produce a good loaf. Well, I was more than satisfied with the loaf. It had a wonderful crispy, chewy crust and a beautiful, semi-open and very moist crumb. I had no problems with over-browning of the crust with just reducing baking temps by 25-30 degrees. Here's some more photos:


In trying to be "fair and balanced", these are some of the negatives:

-Pretty noisy although I have gotten used to it. -No audible signal when oven has reached operating temperature -Not supposed to be built-in. Need 4-5" clearance on all sides. -Manual cleaning, not self-cleaning.
SUMMARY: In sum, I am extremely happy with this product. Although my experience with the oven is brief, it appears to be an extremely valuable tool for baking hearth-type breads. And the fact that this may provide a satisfactory solution to the ever-present "steaming" problem is a real plus for me.
As far as price goes, the unit lists for $1850 but I have seen it on the web for $1200-$1300 dollars. If you order one, make sure that it has the new manual "Humidity" button. Both the old and new units have the same model number so that alone is not enough to know what unit you are buying.
I hope that this will help those members who have been leery of convection ovens, just as I was, to consider it as a possibility. I have never used another convection oven, so this review is not meant to say that the Cadco is better than any other brand. I just know that it works, works well, and appears to be very solidly built. YMMV.
Jessica

photojess's picture
photojess

will you help me with some bakers math please?

I don't know why this is giving me so much trouble....I finally understand converting to 67% hydration.....but if I want to convert my 100% white bf starter to 63% hydration, I don't seem to be able to figure out how much flour to add.

I need 71 gms of whole wheat starter, but the book says I can use white, but it should be fairly stiff at about 63%. 

ex:  if I were using 100gms of starter, it's 50 gms each of flour and water.  (at 63%, that would be 63 gms of flour and 37 gms of water)  Please help from there.....my mind is confusing itself.  Esp if I only need 71 or 75gms to make it easier.

*****Do I use 37 gms of my 100% starter (because that is equal to the water) and add 27 gms of flour to it to equal the 63?  Then how do I maintain it? 

Pages