The Fresh Loaf

A Community of Amateur Bakers and Artisan Bread Enthusiasts.

Most bookmarked

bassopotamus's picture
bassopotamus

Hobart vs Electrolux vs Bosch

My wife and I are going to take the plunge and try selling bread this summer at the farmer's market. Right now, we have a kitchenaid pro 600, which just isn't going to cut it. I'm thinking probably 50-75 lbs of dough a week, mostly done in a day. From what I have seen, the DLX is the home product most likely to be up to the task. However, for about the same price, it appears you can get a used Hobart 5qt, or maybe an 8. Any reccomendations here? The DLX can probably do a bigger batch at a time, it sounds like, but I'm not sure if it is up to running like 6-8 batches in a row without a break.


thanks

justin

marieJ's picture
marieJ

Sourdough Pizza...a tried and true recipe..?

G'day!  I'm currently searching for a sourdough pizza base recipe.  I'd love to hear from those who have a tried and true recipe. I was just going to try one of my white sourdoughs and make a few adjustments. I'm also a newbie to the art and would love to hear of fellow afficionado's experiences.

Cheers! Marie.

Yippee's picture
Yippee

Hello from Yippee

Hello, dear fellow Fresh Loafers:

I'm a rookie baker who recently joined this community.  As I've gained more confidence in the bread making process during the last two months through experimenting with Asian style sandwich breads, I feel that I'm ready to step up to take on the challenge of artisan bread baking.  I look forward to learning from every experienced baker here and finding another place I can call home outside of my kitchen. Please visit my blog to see my report cards. 

Yippee

DrPr's picture
DrPr

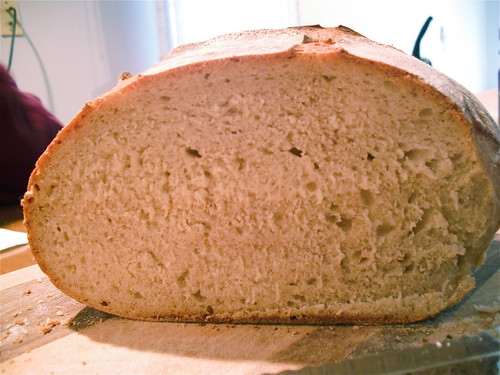
How can I achieve a less dense crumb?

I made a rustic white bread using Nancy Silverton's recipe from her Breads from La Brea Bakery book. This is my first time baking in cold weather and I'm thinking low fermenation temperatures might be the problem, since I've used this formula before with no problems.  I know my starter is healthy and performing well, so I am confident we can remove that from the equation. Here is what happened:

When it was time for the fermentation, the house was between 60F & 65F, and after two hours I could see no change in the dough. I then placed it in a room with a heater that raised the temperature to between 70 and 75.  After a total fermentation period of four hours the dough seemed to have spread out (the container was a bit wider than the dough) but not to have risen much, if at all. When I pressed on it it seemed rather firm, and my finger left an impression that lingered.  I didn't let it ferment further for fear of ruining the dough. I'm now wondering if I should have let it ferment longer.

I then shaped it and let it proof for about an hour as recommended but again, the rise I was supposed to expect was not discernable. Again I dared not let it sit out longer for fear of overproofing.  Should I have let it proof for a longer period at this point?

So next it went into the refrigerator overnight. Today I let it sit out for four hours in the warmed room as Silverton instructs, but the boule did not double in size as she describes (it barely rose at all) and when I pressed on it, the dough did not spring back as she says it should.  

Dreading the outcome, I baked per her instructions.  The result was a nice color and startling oven spring given the size of the dough (I hadn't expected anything at all!) but the crumb was stili denser than I was hoping for. My room mates praised the flavor and density so it wasn't a complete waste of flour, but I am wondering what I can do to make the dough less dense next time. By the way, I made a sourdough batard with this starter a few days earlier and it was also more dense than I prefer.  I would appreciate any suggestions/advice you may have.    Thanks!! Photos of the boule and the crumb are below.


Mini Oven's picture
Mini Oven

Cooked Kamut berries, now what?

Ongoing Kamut experiment... a short one.

Monday Morning:

I have 600g Kamut berries.  Dirctions say how to cook, 2 cups water for 1 cup berries washed in sieve.  I decided to use the rice cooker for my good 4 cups of grain.  By washing, it was clear that the grain was better washed in a large bowl and water poured off the top to remove parts of hulls and dust.  The berries are large enough to drain in a colander.   I then let the rice cooker do the work with 1 tsp of salt.  All the water was absorbed and the grain took on a caramel color with a nutty fragrance. 

Now what?  I was hoping to put this grain into a rye bread but I had to eat some first.  Very chewy.  Very chewy indeed!  Now I'm not so sure I want it whole in my bread.  I was eating chili for lunch so I combined some cooked grain into it.  Uh, ok, not the best idea, but I did get a glimpse of the texture with other food.  The tough chewy berries stood out.  "Roughage" kept going through my head.  I guess the blender is the next step, make the grains smaller.  Will I come out with a pudding like substance?   I have to think about this....  any ideas?  (Meanwhile, starter is being refreshed.)  I need some coffee.


Debra Wink's picture
Debra Wink

Hamelman's French Bread

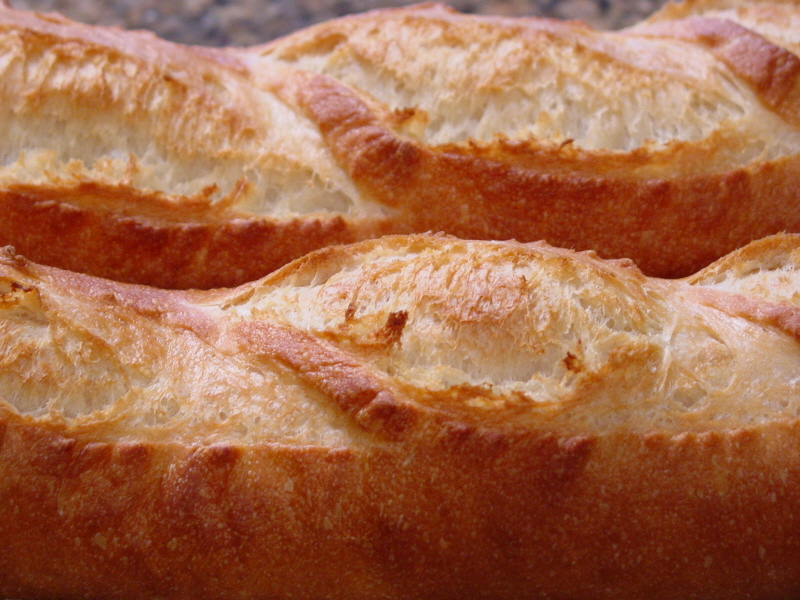
We were planning to cook dinner out on the grill this evening, but it was wet and dreary here today, so we changed plans and pulled some French onion soup out of the freezer instead. I opened Hamelman's book this morning to make the Baguettes with Poolish, only to be reminded that the poolish needs overnight fermentation, so I switched gears and mixed the straight French Bread dough instead. The loaves turned out feather-light and much tastier than anything I could have bought at the store. Given enough time, I would have chosen a bread with a pre-ferment, but under the circumstances these fit the bill perfectly. Since the formula is easy to access in Bread, a Baker's Book of Techniques and Recipes (page 233), I'll give my favorite recipe for French Onion Soup instead. This freezes very well. Enjoy!

Famous Barr's French Onion Soup

3 pounds onions (5-pound bag, peeled)
4 ounces butter
1 1/2 teaspoons freshly ground black pepper
2 tablespoons paprika
1 bay leaf
3/4 cup all-purpose flour
3 quarts beef bouillon
1 cup dry white wine (optional)

Slice onions thinly. Melt butter in large soup pot, and saute onions slowly for 1 1/2 hours. Add all the dry ingredients, and saute over low heat 10 minutes more. Add the bouillon and wine, and simmer for 2 hours. Adjust color to a rich brown, if desired, with caramel coloring or Kitchen Bouquet. Season with salt to taste. Refrigerate overnight.

To serve: Heat soup. Fill fireproof casserole or individual fireproof bowls. Top with French bread and swiss cheese. Place under broiler until browned.


baltochef's picture
baltochef

40 Hour Apple-Strawberry Jam

This past Friday I purchased a 4 lb. bag of Granny Smith apples with the intentions of eating some plain, and incorporating some into my fruit smoothies..Well, I had too much other fruit on hand, and the apples sat until this morning untouched..As they were starting to show soft spots where they had ben bruised during picking and transportation, I decided to use the entire 4 lbs. in a batch of 20 Hour Apples..

http://www.thefreshloaf.com/node/11218/20hour-apples-are-absolutely-fantastic

Being in somewhat of a hurry, I decided to incorporate some of the suggested short cuts that were mentioned by various posters in the above thread that I started back on March 21st..One poster mentioned using a slow cooker (crock pot), and other posters mentioned that Chef Herme's methodology for the ultra thin slicing and layering seemed to be unnecessary, as well as too fussy..

After peeling, coring (was not very meticulous about getting all of the core), and quartering the apples I was left with 2 lb. 4 oz. of yield..I elected to slice each quarter lengthwise into three to four 1/4" thick slices..I had juiced up all of the citrus fruits that I had on hand Friday night so I elected to spice things up a little with additional spices other than cinnamon..

20 Hour Apples--Redux

4 lb. Granny Smith apples--peeled, cored, quartered, sliced lengthwise into 1/4" slices

1lb. 8 oz. whole strawberries, stems pinched off as closely as possible (frozen for smoothies)

8 oz. organic granulated cane juice

1 1/4 teaspoons ground cinnamon

1/2 teaspoon ground cardamom

1/4 teaspoon ground cloves

1/8 teaspoon ground cayenne pepper

1 whole vanilla bean, split lengthwise in half, scraped out, mixed into the sugar

Instead of using a baking dish wrapped in plastic wrap weighted with a pan on top of the plastic wrap, I elected to use a Farberware Millenium hard anodized alluminum 4 quart stock pot to cook the apples in..First, I placed the scraped out sections of the vanilla bean in the bottom of the pot..Then, I layered the apple slices so as to cover as completely as possible the bottom surface of the pot..Then, I sprinkled a generous amount of the sugar-cinnamon-cardamom-cloves-cayenne pepper-vanilla bean mixture onto the apples..I repeated the apples and sugar mixture two more times..These three layers used up about 50% of the sliced apples, and the stock pot was not quite 1/2 full..Then, I remembered that I had approximately 1.5 pounds of whole strawberries in the freezer to use in smoothies..I pinch off the stems as close to the strawberry as possible when prepping them for freezing (the tiny amount of stem left on the strawberry disappears in the smoothie)..For some reason I wanted the pot to be as full as possible before I started baking the apples..Accordingly, I used the entire 1.5 pounds of frozen whole berries to create a layer of strawberries on top of the first half of the apples..I sprinkled the berries with the sugar mixture, and finished layering the remaining apples in three additional layers..The one cup (8 oz.)  of sugar was the perfect amount for the 6 layers of apples, and the single layer of berries..None left over..

The pot, with its relatively tight fitting lid, went into the 175F oven at 12 noon..My intentions are to let the apples and strawberries cook until 6 AM Monday morning..What I am shooting for is an apple-strawberry jam with the apples being cooked completely down..I will post back to let everyone know how this experiment turns out..

Bruce


SulaBlue's picture
SulaBlue

Voortman's Windmill Cookies?

Anyone have a recipe for something close to what these taste like, with that same crisp texture? I'm thinking THESE might be close, but the ingredients list for Voortman's Windmills don't mention almond.

http://savory-cooking.blogspot.com/2007/12/netherlands.html

Not sure what I'd use for a mold - I've found some, but they're $30 and seems to me you have to do 1 cookie at a time? I'm not quite -that- patient!

blackbird's picture
blackbird

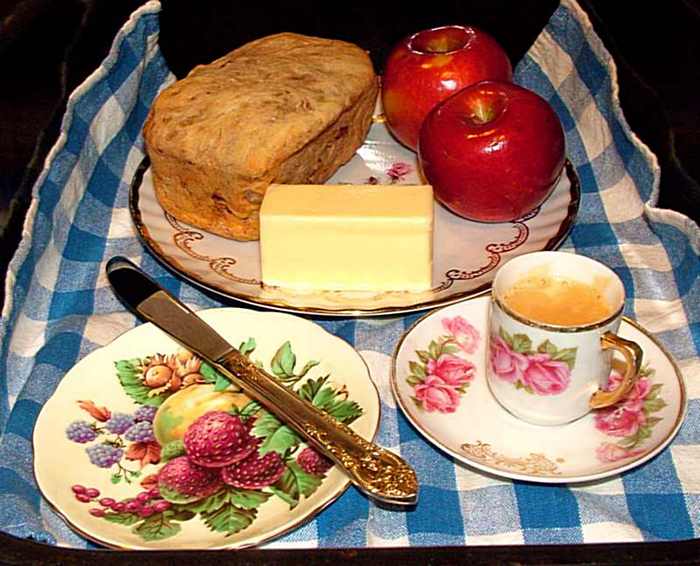
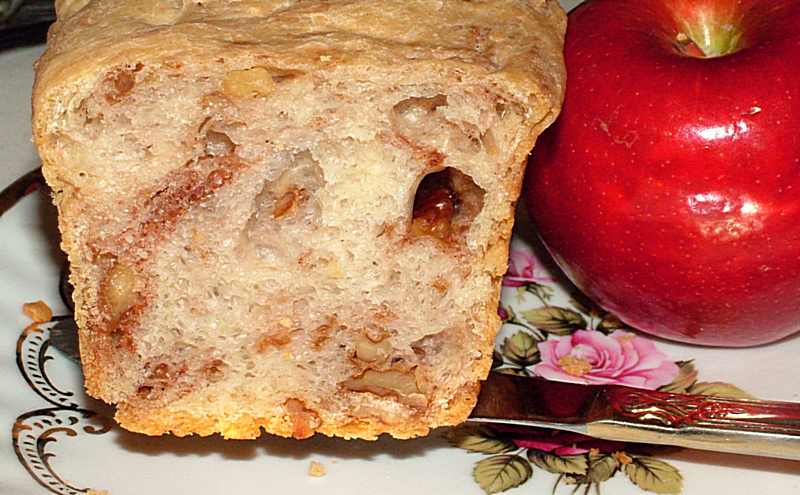
Walnut cinnamon lemon mini loaf

An old favorite for over 30 years, walnut cinnamon lemon bread is simple, crunchy and chewy.  The basic recipe is flexible rather than perfectionist.  I used frozen orange juice, thawed and room tmperature, back in those days. 

3 cups AP flour

instant yeast perhaps a big pinch

pinch of salt

1 maybe 2 ounces oil

8-9 ounces water

cinnamon as you like, I like it so I may use more than you

walnut pieces as you like, say 3/4 cup

lemon by lemon extract or lemon juice and or zest to your taste ----or you can use orange instead

No sugar or sweetening needed.

Mix all well, you can do some kneading at this mixing time.  I knead in the bowl with my mixing plastic spoon giving 5 minutes or so between a few spoon kneading efforts.

Let rise to double or so, then divide to fit pans, up to three mini pans, kneading is minimal or not at all.   The dough will be a bit wet and clay-like.  I use wet hands to handle it.   Or one big bread loaf pan. 

 Let rise, then into preheated oven at 425F, no steam, cover with alum foil loosely, decrease heat after 20 min to 375F, remove foil.  Baking time depends on your oven and how many times you open the oven.  Say 30 minutes total.  Let cool, or eat warm if it suits you.  Previously I wrote 45 minutes but my mind was thinking of a big bread pan loaf which requires a bit more time.  It is good to check on it so it does not get too dry. 

The simple recipe can be changed by adding eggs when mixing the dough for example. 

I tried a mold but got plenty of spring so it leans.


Djehuty's picture
Djehuty

Best work surface?

What makes the best surface for working with dough?  I'm currently using a silicone non-stick mat, and while it worked fairly well for denser dough, it's miserable for wet doughs.  I've seen quite a few bakers using wood surfaces, but I've also seen many using granite.  I have a butcherblock-style block of wood that I could clean up and use.  Would that be the best option, or should I look around for a granite slab?


Pages