The Fresh Loaf

A Community of Amateur Bakers and Artisan Bread Enthusiasts.

Most bookmarked

bobku's picture
bobku

Freezing Bagel dough

Does anyone know if I can freeze Bagel dough that is shaped and ready to go into boiling water. Can i just thaw them out then boil or do they need to rise again. Can this be done at all without greatly affecting the taste. I want to end up with frozen bagels that I can just thaw boil and bake

sharonk's picture
sharonk

Gluten Free Brown Rice Starter Success


Why Boosted Brown Rice Starter?


When I first had to give up gluten I had successfully been making seven-day sourdough rye bread (unfortunately full of gluten) using 100% dark rye flour. This goopy no-knead bread had an easy starter routine: once a day for seven days. The starter bubbled quickly and was quite beautiful to watch grow. I thought I could transfer my rye bread sourdough baking knowledge to gluten free baking but after many failures (that ended up in the compost pile) I realized I had to experiment. A plain brown rice flour and water starter took almost 6 days to start showing signs of activity and often by that time it was molding. The heaviness of the rice flour causes the starter solids to sink leaving the liquid on top. It seems hard for the bacteria to make their way through the heavy solids. I consulted with a knowledgeable gluten free sourdough baker who suggested I feed the starter every 8 hours and use a fermented drink called "Water Kefir" right in the starter on the first day.  Water Kefir is a culture that is used to make a dairy free drink much like lemon soda. I purchased my grains and made the water kefir using water, sugar, raisins and lemon. It fermented in less than 48 hours and I put a few tablespoons of it into brown rice flour and water. I built the starter gradually feeding it every 8 hours until I had the amount I needed. I was happy to see activity beginning shortly after 48 hours. Each subsequent feeding created increasing activity with large and small bubbles and hissing sounds when I stirred it down. This very live starter easily leavened the bread recipe without the use of eggs, commercial yeast, baking soda, or baking powder which was of prime importance to me being allergic to eggs and sensitive to the other ingredients.


 I call this starter "Boosted Brown Rice Starter" because I have boosted its activity with Water Kefir.  I find I can get a dependable starter every time when I use water kefir as a booster.


Here are very succinct directions for making Water Kefir:

Nearly fill a wide mouth quart jar with water.

Add 2 tablespoons sugar, stirring to dissolve, 20 raisins and a slice of lemon or lime.

Add the contents of your bottle of water kefir grains into the quart jar.

Cover with a paper towel or cloth and secure with a rubber band. 

When raisins float to the top, scoop them and the lemon slice out and discard.

Ferment the water kefir for 6 more hours on the counter with the paper towel.

Then store in fridge and use as needed.

When you have used the liquid down to about an inch in the jar start a new batch in a new jar and pour the water kefir grains plus the liquid their in right into the new jar, cover and ferment.


Water Kefir is a good tonic that strengthens the digestive system. Drink in small amounts before meals.

2 tablespoons is enough for bread starter. Water kefir gets fizzy with time and reminds me of super healthy 7-Up! It's a good tonic being full of probiotics and enzymes.


Water Kefir grains are available at Cultures for Health.


Good Luck,

Sharon

http://glutenfreesourdough.com


LindyD's picture
LindyD

To toast or not to toast? That is the question.

I plan to start Hamelman’s five grain sourdough rye tonight, now that my KAF order arrived and I have high gluten flour.

While the recipe doesn’t call for it, have any of you who have  baked this bread toasted the sunflower seeds before making the soaker?  

Any reason not to?

RFMonaco's picture
RFMonaco

Whole grain breads

Some really great looking and tempting bread shown here:

http://www.farine-mc.com/

sallam's picture
sallam

my no knead super quick loaf experiment

Greetings

I'm relatively new in baking. But doing things the fast and easy way always fascinates me. So I decided to try something new to me.

I've made 3 loaves of bread, using 1kg AP white flour, 2 cups wheat bran, and 1kg water (is that 100% hydration? or do I take the bran into account?).

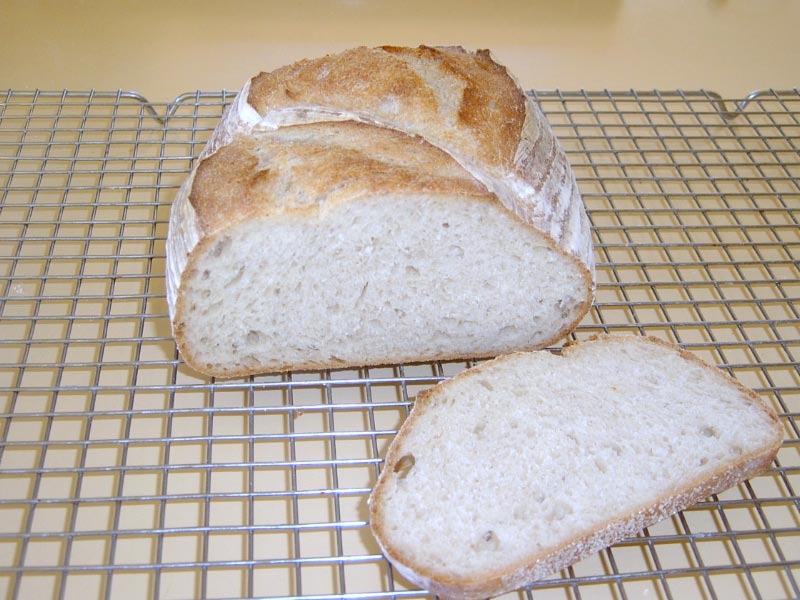
I thought I try a super quick no knead method, and see how that turns to. I let it rise only once, 4 teaspoons took it 40min. to double in volume. I then poured the sticky dough into 3 loaf tins (oiled and dusted with wheat bran), covered the tins all over with foil, then put them in oven for 1h at 425f (no pre-heating). No second rise, no keading and no resting. The result was a nice bread, open crumb, soft and tender all around. I used to do second and third rises, before and after shaping, plus resting periods. But, trying this super lazy method, I think I found no difference in taste and feel, if not better, due to the softening effect of steam captured by the foil, plus the high hydration ratio which gave open crumbs. The use of foil under and at top of the tins seemed to have spared me the harsh rims that my kids hate and always dispose of, and gave us the soft and tender texture that we were hoping for. My kids loved it so much, they like to eat it with a molass and tahini dip. My wife also liked it, but hinted that its a little bit moist. Do you think I should increase the baking time an extra 10min or so? or should I bake in higher temp.? I would love to hear your comments and advices.. which I learn from a lot.

Recipe:

1kg AP white flour
2cups wheat bran
4T sugar
4t instant dry yeast
3t salt

mix all the dry ingredients, then add:
1kg semi hot water

mix well, then cover in a warm spot (2min preheated oven) for 40min, or until double in size. spoon the dough into 3 loaf tins, coated with a few oil and dusted all over with wheat bran. Cover tins all over with foil, and bake in oven for 1h at 425f. No pre-heating.

dmsnyder's picture
dmsnyder

Hamelman's Sourdough Seed Bread

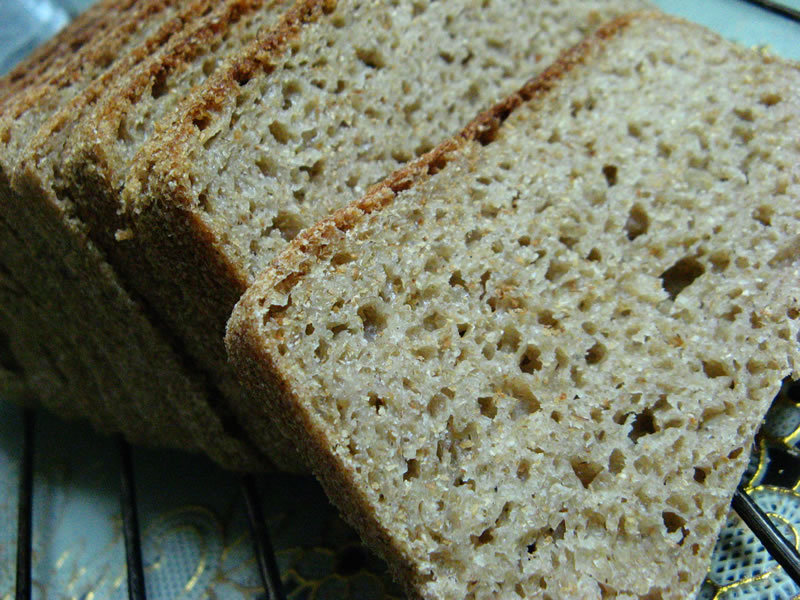
Hamelman's Sourdough Seed Bread is basically a pain au levain made with rye and bread flour to which is added toasted sesame and sunflower seeds and a soaker of flax seeds. It has a crunchy, rather thick crust and a pretty dense crumb. Its flavor is delicious - mildly sour, even when cold retarded overnight, with well-balanced overtones from the seeds. Its flavor is not as complex as Hamelman's Five-Grain Levain, which is simply amazing, but it is a wonderful bread.

This bread has enough substance and flavor to be eaten plain. It would be wonderful with a flavorful soup or stew or with cheese or a salad. And it makes delicious toast.

It's another bread, like Tom Cat's Semolina Filone, that I like a lot but have not baked for quite a while, having been otherwise occupied by a baking agenda with way too many breads.

I baked these boules on a stone, pre-heated to 500F. A cast iron skillet with lava rocks was used for steaming. The oven was turned down to 460F after loading the loaves, and I baked them for 40 minutes.

Sourdough Seed Bread

Sourdough Seed Bread crumb

David

gavinc's picture
gavinc

Getting sourdough consistent resutls

I now get week by week repeated success with Hamelman's Vermont Sourdough which is our regular bread I bake each weekend.  My take-home message to all sourdough newbies is to persist and pay attention to detail.  It's tempting to skip and make do with estimates and a "she'll be right" attitude, but if I want consisency week after week with sourdough, I have to do all the below:

  • Always have a fully active starter to build a fully active levain.
  • Use baker's percentage and scale all ingredients-
  • Take the time to measure the temperatures of the room, flour and levain and work out the desired water temperature so you can achieve a final dough temperature after mixing of 24 to 25C. (Believe me this doesn't take long and is not difficult).
  • Fold during bulk fermentation. (I do two at 50 minute intervals and shape after a further 50 minutes).
  • Final ferment for 2 hours; (or retard in the fridge until the next day works great for additional flavour, but not essential).
  • Bake in a hot oven 235C for 40 to 45 minutes (I find lower temperatures will not get the oven spring).  Use steam.

This never misses.

cheers,

Gavin.

dmsnyder's picture
dmsnyder

Tom Cat's Semolina Filone from Glezer's "Artisan Breads"

My favorite Semolina Bread.

The formula and procedures I used are here: Tom Cat's Semolina Filone (from Glezer's Artisan Breads)

David

Nica Linda's picture
Nica Linda

Baking bread in the Tropics?

Hello Bakers,

Over the past year I have discovered that I love to bake bread, and not just because I have been baking out of necessity (sadly, good bread is hard to find where I live). Without the convenience of internet right in my kitchen, my single resource has been the "Fannie Farmer Cook Book" published in 1970 that a friend gave me. But as of a month ago, we finally have dial-up speed internet out here in the campo. One of my first searches lead me to The Fresh Loaf!

After reading through so many highly-knowledgeable posts, my list of questions is as long as my arm. But in general, I would greatly appreciate any tips on baking in this tropical climate and unique recipes that might be ideal for the limited amount of flours and grains available to me...Bollo Fino white flour, mid-grade wheat flour, corn meal, Oat bran, Oatmeal and a variety of add-ins (local cheese, nuts, fruits, veggies). My baking tools are very basic and my oven is propane rather than electric.

My desire is to get a few good recipes down so I can make bread regularly for friends and neighbors. I also know of several local women in the area who might enjoy learning about different breads they can bake in their adobe brick ovens.

Thanks Fresh Loaf community!

Linda

Shiao-Ping's picture
Shiao-Ping

my first sourdough bread


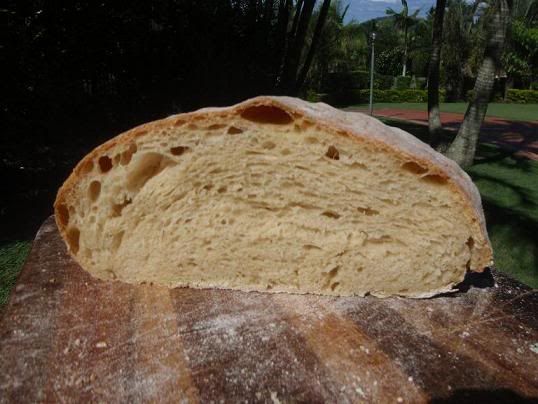
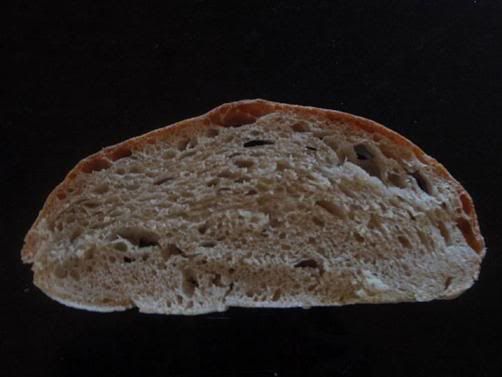
my first sourdough bread using 5 days old starter raised in sunny Queensland, Australia


I am new to sourdough berad.  A big thank-you to Susan of wild yeast.  I followed her Overnight Ciabatta recipe loosely.  But as someone said, "it isn't the recipe that will make or break...so much as the technique used in dealing with the ingredients," it really isn't easy for a beginner especially when the ingredients are so simple - flour, water and a few microorganisms in the air.  As you can see from the top picture, the bottom of my bread is dense.  I was quite scared when I was folding the dough and as a result I probably didn't do as good a job in that.  Another reason for the dense bottom crumb could be that it didn't proof completely before it went into the bake.   It is very hard for a beginner to judge - the recipe might say, "proof one hour", how about my room temp, how well did the dough ferment before that... all of these play a mystical part in the final product unbeknown to the beginner.

And, thank-you, too, to cleancarpetman.  I read his "Freedom!!" before I finally decided I should put all the books and reseach aside and just do it.  One day I will get the ryhthm of the process. 

The flavour of the bread was beautiful though - mildly sour, soft, and full of life.  It has the complexity in flavour that factory white bread cannot dream of.  Both of my son and daughter loved it.  How do a 14 year-old and a 16 year-old know these things. 

Shiao-Ping

Pages