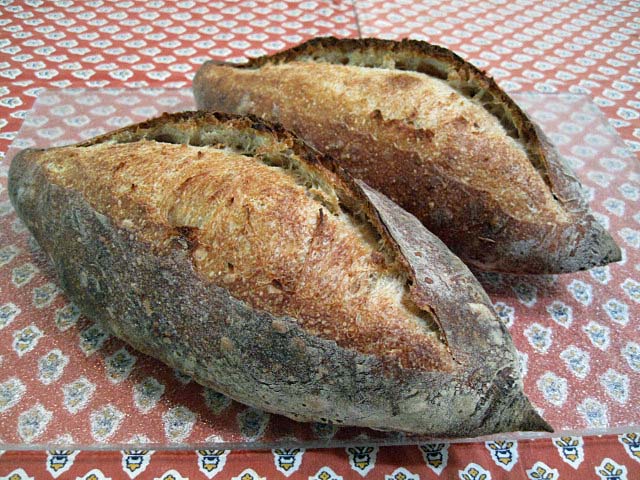
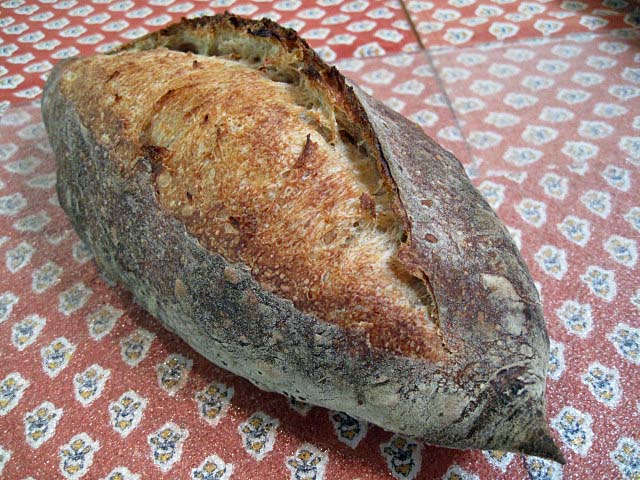
While I enjoy a variety of breads, the San Joaquin Sourdough remains my “go to” bread. It's easy to fit into a busy schedule. It uses few ingredients. It always tastes delicious. It's wonderful freshly baked but also makes great toast, French toast, garlic bread and croutons for salads or onion soup. It is almost as good after being frozen as fresh. What's not to like?

I first developed this formula about 3 years ago. Since then, I've tweaked the formula and methods in many ways. I know many TFL members have made this bread and enjoyed it. So, I thought an update on my current recipe might be of interest.
To summarize the changes I've made in the past 6 months:
I substituted 25 g of whole wheat flour for an equal amount of the rye flour in the original formula. The difference in flavor is subtle, but I like it better.
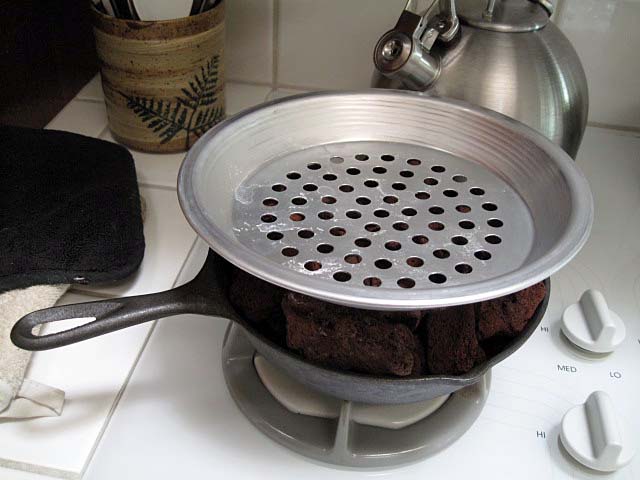
I adopted the oven steaming method for home ovens we were taught in the SFBI Artisan I and II workshops.

SFBI Steaming method
I switched from using a parchment paper couche to a baker's linen couche. (Highly recommended! Here is my source for linen: San Francisco Baking Institute)
Most recently, after trying several different methods, I've settled on the method of pre-shaping and shaping bâtards taught in the King Arthur Flour instructional video. (See: Hamelman technique videos The relevant instructions are in the fourth video, starting at about 7:00 minutes.) The SJSD dough is very extensible. This method forms a tighter loaf which is shorter and thicker than that produced with the method I had been using.
Ingredients | |
Active starter (100% hydration) | 150 g |
All Purpose flour (11.7% protein) | 450 g |
BRM Dark Rye flour | 25 g |
Whole Wheat flour | 25 g |
Water | 360 g |
Sea Salt | 10 g |
Procedures
Mixing
In a large bowl, mix the active starter with the water to dissolve it. Add the flours and stir to form a shaggy mass. Cover tightly and let rest (autolyse) for 20-60 minutes.
Sprinkle the salt over the dough. Using a plastic scraper or silicon spatula, stretch and fold the dough 30 times, rotating the bowl 1/5 turn between each stroke. Cover tightly. Repeat this stretch and fold procedure 3 times more at 30 minute intervals.
Fermentation
After the last series of stretches and folds, scape the dough into a lightly oiled 2 quart/2 liter container and cover tightly. (I use a 2 quart glass measuring pitcher with a tightly fitting plastic lid manufactured by Anchor Glass.) Ferment at room temperature for 90 minutes with a stretch and fold after 45 and 90 minutes, then return the dough to the container and place it in the refrigerator and leave it there for 21 hours.
Dividing and Shaping
Take the dough out of the refrigerator and scrape it gently onto a lightly floured work surface. Gently pat it into a rectangle. Divide the dough into two equal pieces.
To pre-shape for a bâtard, I now form a ball rather than a log. Place each piece of dough smooth side down. Pat into a rough circle, degassing the dough gently in the process. Bring the far edge to the middle and seal the seam. Then go around the dough, bringing about 1/5 of the dough to the middle and sealing it. Repeat until you have brought the entire circumference of the piece to the middle. Turn the piece over, and shape as a boule. Turn each ball seam side up onto a lightly floured part of your board.
Cover the dough with plastic wrap and/or a kitchen towel and let it rest for about 60 minutes. (The time will depend on ambient temperature and how active your starter is. The dough should have risen slightly, but not much.)
To shape a bâtard, I now favor the method portrayed in the King Arthur Flour instructional video. I encourage you to watch the video, but here is a verbal description of the method:
For each piece of dough, place it in front of you on an un-floured board.
Hold down the near side and stretch the far side of the piece into a rough rectangle about 8 inches front to back.
Now, fold the far end two thirds of the way to the near end and seal the seam with the heel of your hand.
Take each of the far corners of the piece and fold them to the middle of the near side of your first fold. Seal the seams.
Now, the far end of the dough piece should be roughly triangular with the apex pointing away from you. Grasp the apex of the triangle and bring it all the way to the near edge of the dough piece. Seal the resulting seam along the entire width of the loaf.
Turn the loaf seam side up and pinch the seam closed, if there are any gaps.
Turn the loaf seam side down. Then, with the palms of both hands resting softly on the loaf, roll it back and forth to shape a bâtard. Start with both hands in the middle of the loaf and move them outward as you roll the loaf, slightly increasing the pressure as you move outward, so the bâtard ends up with the middle highest and the ends pointed .
Preheating the oven
One hour before baking, place a baking stone on the middle rack and put your steaming apparatus of choice in place. (I currently use a 7 inch cast iron skillet filled with lava rocks.) Heat the oven to 500F.
Proofing
After shaping the loaves, transfer them to a linen couche, seam side up. Cover the loaves with a fold of the linen. Proof until the loaves have expanded to about 1-1/2 times their original size. (30-45 minutes) Test readiness for baking using “the poke test.” Do not over-proof, if you want good oven-spring and bloom!
Baking
Pre-steam the oven, if desired.
Transfer the loaves to a peel. (Remember you proofed them seam side up. If using a transfer peel, turn the loaves over on the couch before rolling them onto the transfer peel. That way, the loaves will be seam side down on the peel.) Score the loaves. (For a bâtard, hold the blade at about a 30 degree angle to the surface of the loaf. Make one swift end-to-end cut, about 1/2 inch deep.)
Transfer the loaves to the baking stone. Steam the oven. (I place a perforated pie tin with about 12 ice cubes in it on top of the pre-heated lava rocks.) Turn the oven down to 460F.
After 12-15 minutes, remove your steaming apparatus from the oven. Rotate the loaf 180 degrees, if it is browning unevenly. Close the oven door. (If you have a convection oven, switch to convection bake, and turn the temperature down to 435ºF.)
Bake for another 12-15 minutes, then remove the loaf and place on a cooling rack. Check for doneness. (Nice crust color. Internal temperature of at least 205F. Hollow sound when you thump the bottom of the loaf.) If necessary, return to loaf to the oven to bake longer.
When the loaves are done, turn off the oven but leave the loaves on the baking stone with the oven door ajar for another 7 minutes to dry the crust.
Cooling
Cool on a rack for two hours before slicing.


Enjoy!
David
Submitted to YeastSpotting